
roleId
As with all other fields listed in this table, roleId is required.
Valid roleId values include:
- 1 (Admin)
- 2 (Privileged)
- 3 (Editor)
- 4 (Participant)
- 5 (Social)
Note: If the Custom Role feature is enabled for your instance, you can also enter a user's custom Role ID.
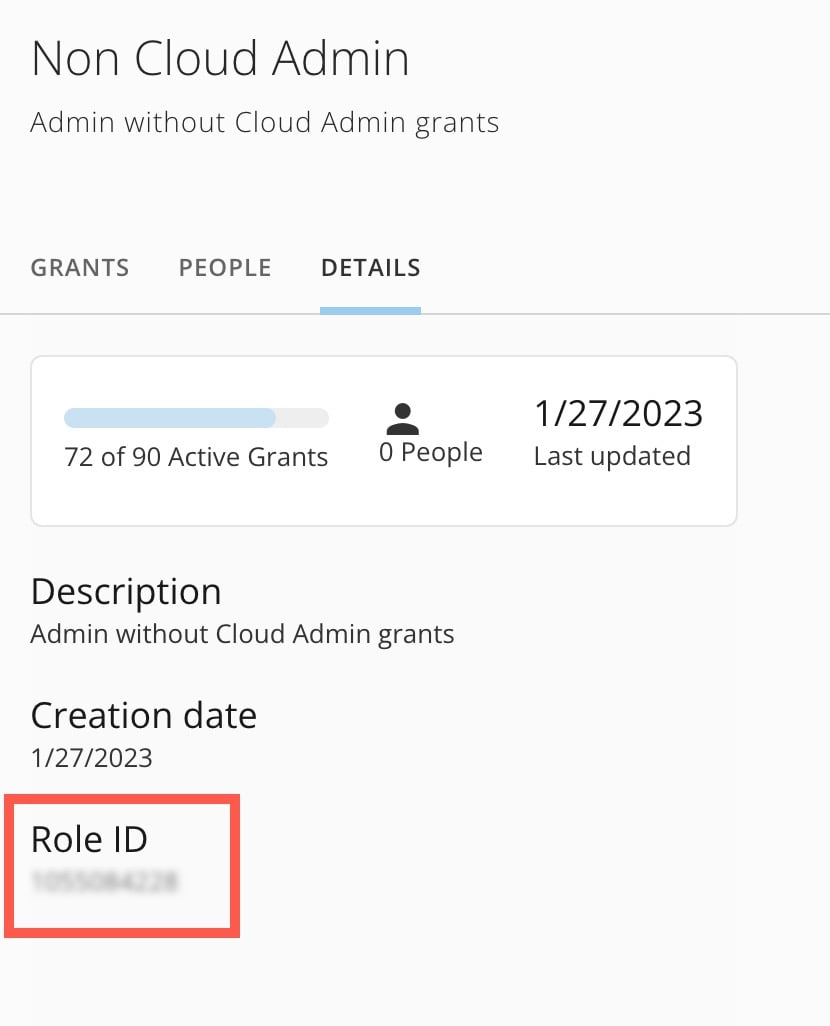
Find the Role ID by going to Admin > Governance > Roles . Select the role from the list and go to the Details tab. Locate the Role ID.
Utah
Example: America/Denver
See this Wikipedia article for a list of the tz database time zones
Valid locale values include:
de-DE, de-AT, de-CH, en-AU, en-CA, en-150, en-HK, en-IE, en-IL, en-MO, en-NZ, en-SG, en-GB, en-US, en-001, es-ES, es-US, es-419, es-MX, fr-BE, fr-CA, fr-FR, fr-CH, nl-BE, nl-NL, pt-BR, pt-PT, ja-JP, zh-CN, zh-Hans-HK, zh-Hans-MO, zh-Hans-SG
UT000034065
 * When the toggle is Disabled, the job must always be executed manually.
* When the toggle is Active, the job executes every six hours and every time the configuration DataSet is updated.
Follow these steps to run a job manually:
1. [Access](#access_user_management)
User Management.
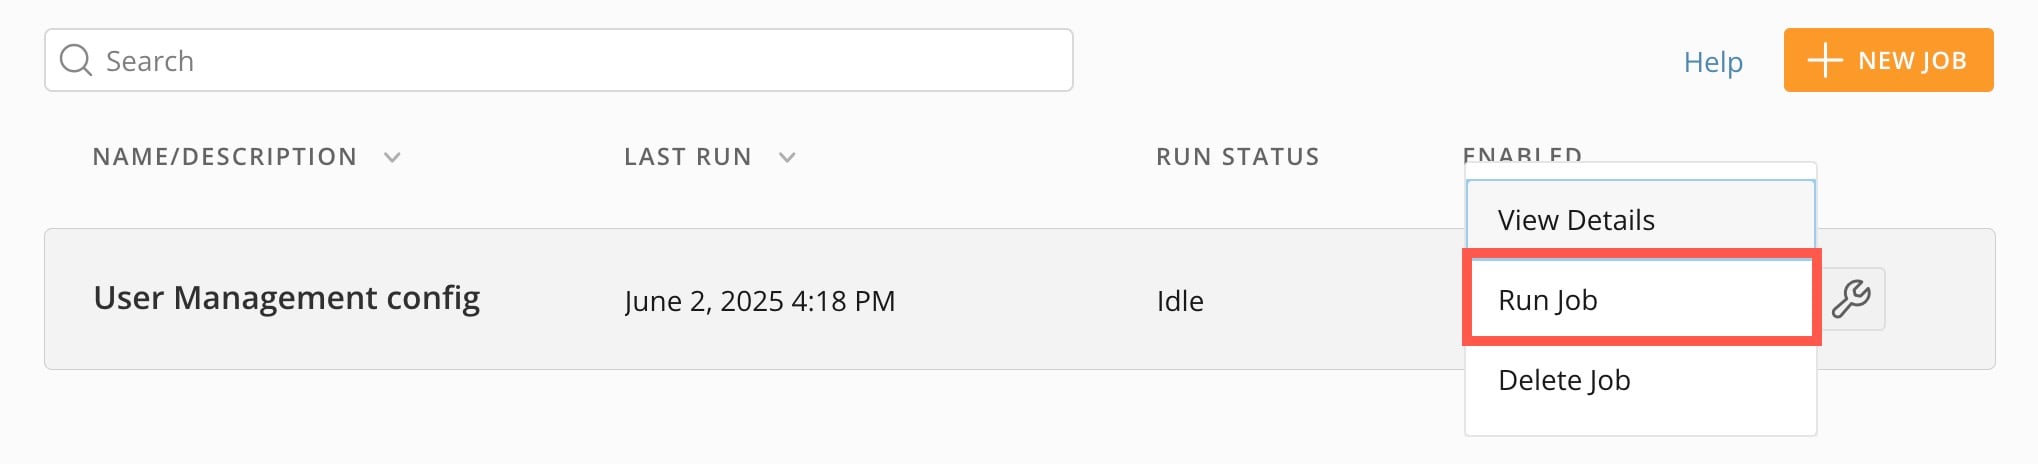
2. Hover over the job you want to run and select
**Options** > **Run Job**.
* When the toggle is Disabled, the job must always be executed manually.
* When the toggle is Active, the job executes every six hours and every time the configuration DataSet is updated.
Follow these steps to run a job manually:
1. [Access](#access_user_management)
User Management.
2. Hover over the job you want to run and select
**Options** > **Run Job**.
 ### Manage Attributes With the Configuration DataSet
You can use the User Management [configuration DataSet](#configuration_dataset) to help create and manage system and custom attributes in your instance in bulk.
### Manage Attributes With the Configuration DataSet
You can use the User Management [configuration DataSet](#configuration_dataset) to help create and manage system and custom attributes in your instance in bulk.
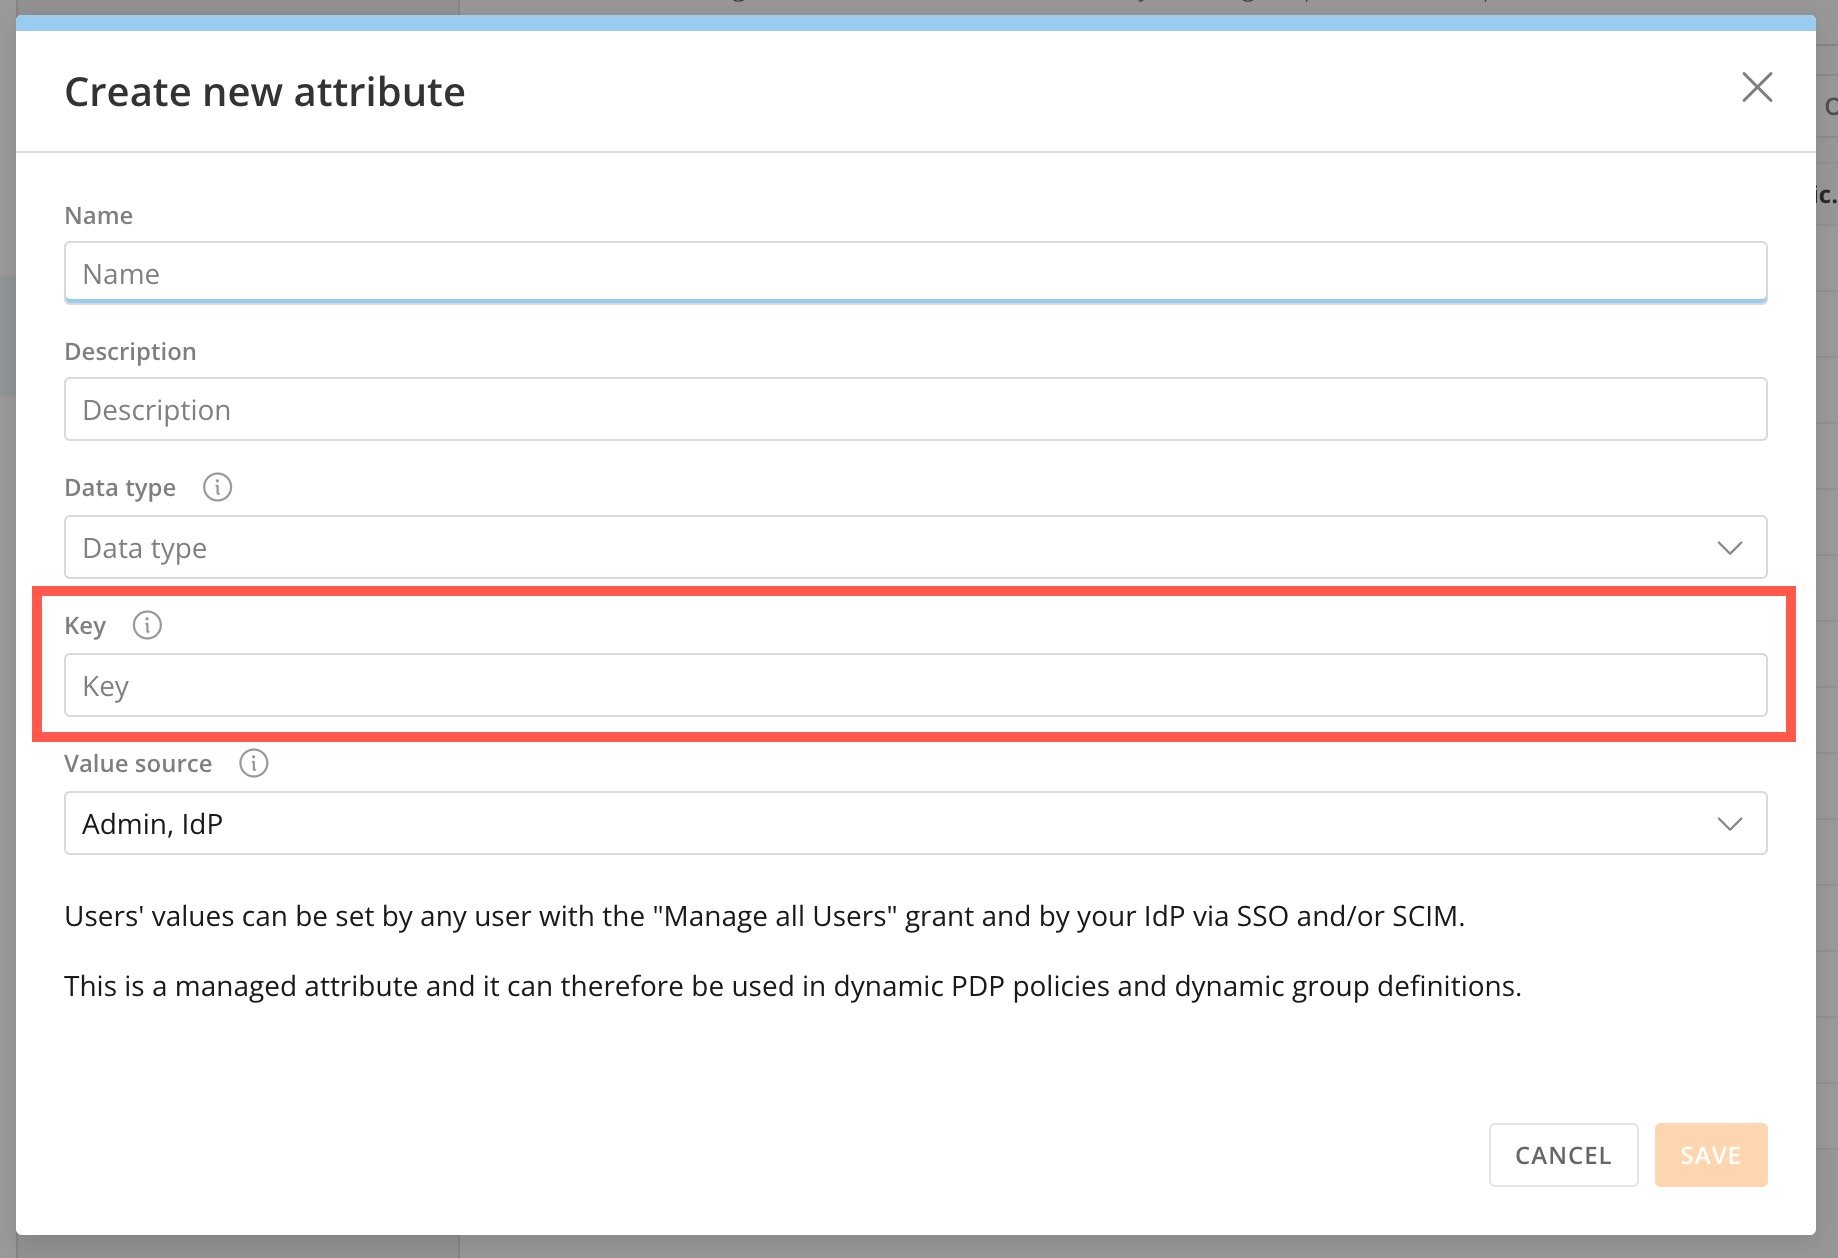 When you use User Management to create or update custom attributes, you must include the matching Key for each attribute in the configuration DataSet.
How does this work? Follow the steps below.
1. Add a \<
*custom attribute* > column for each custom attribute to the configuration DataSet, where the column name is the custom attribute's Key.
For example, to add the Team ID attribute where the Key is `teamId`, add a new column to the configuration DataSet called `teamId`.
When you use User Management to create or update custom attributes, you must include the matching Key for each attribute in the configuration DataSet.
How does this work? Follow the steps below.
1. Add a \<
*custom attribute* > column for each custom attribute to the configuration DataSet, where the column name is the custom attribute's Key.
For example, to add the Team ID attribute where the Key is `teamId`, add a new column to the configuration DataSet called `teamId`.
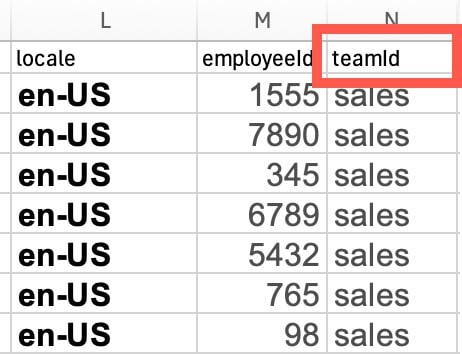 2. Fill in the column with the values for each individual. The data type of the attribute value must match the data type of the column. For example, if the attribute expects a number, but the configuration DataSet includes letters, the User Management job will not run successfully.
For example, the data type is string and the value for each individual is `sales`.
2. Fill in the column with the values for each individual. The data type of the attribute value must match the data type of the column. For example, if the attribute expects a number, but the configuration DataSet includes letters, the User Management job will not run successfully.
For example, the data type is string and the value for each individual is `sales`.
 7. Submit your changes and run the job.
# View Custom Attributes
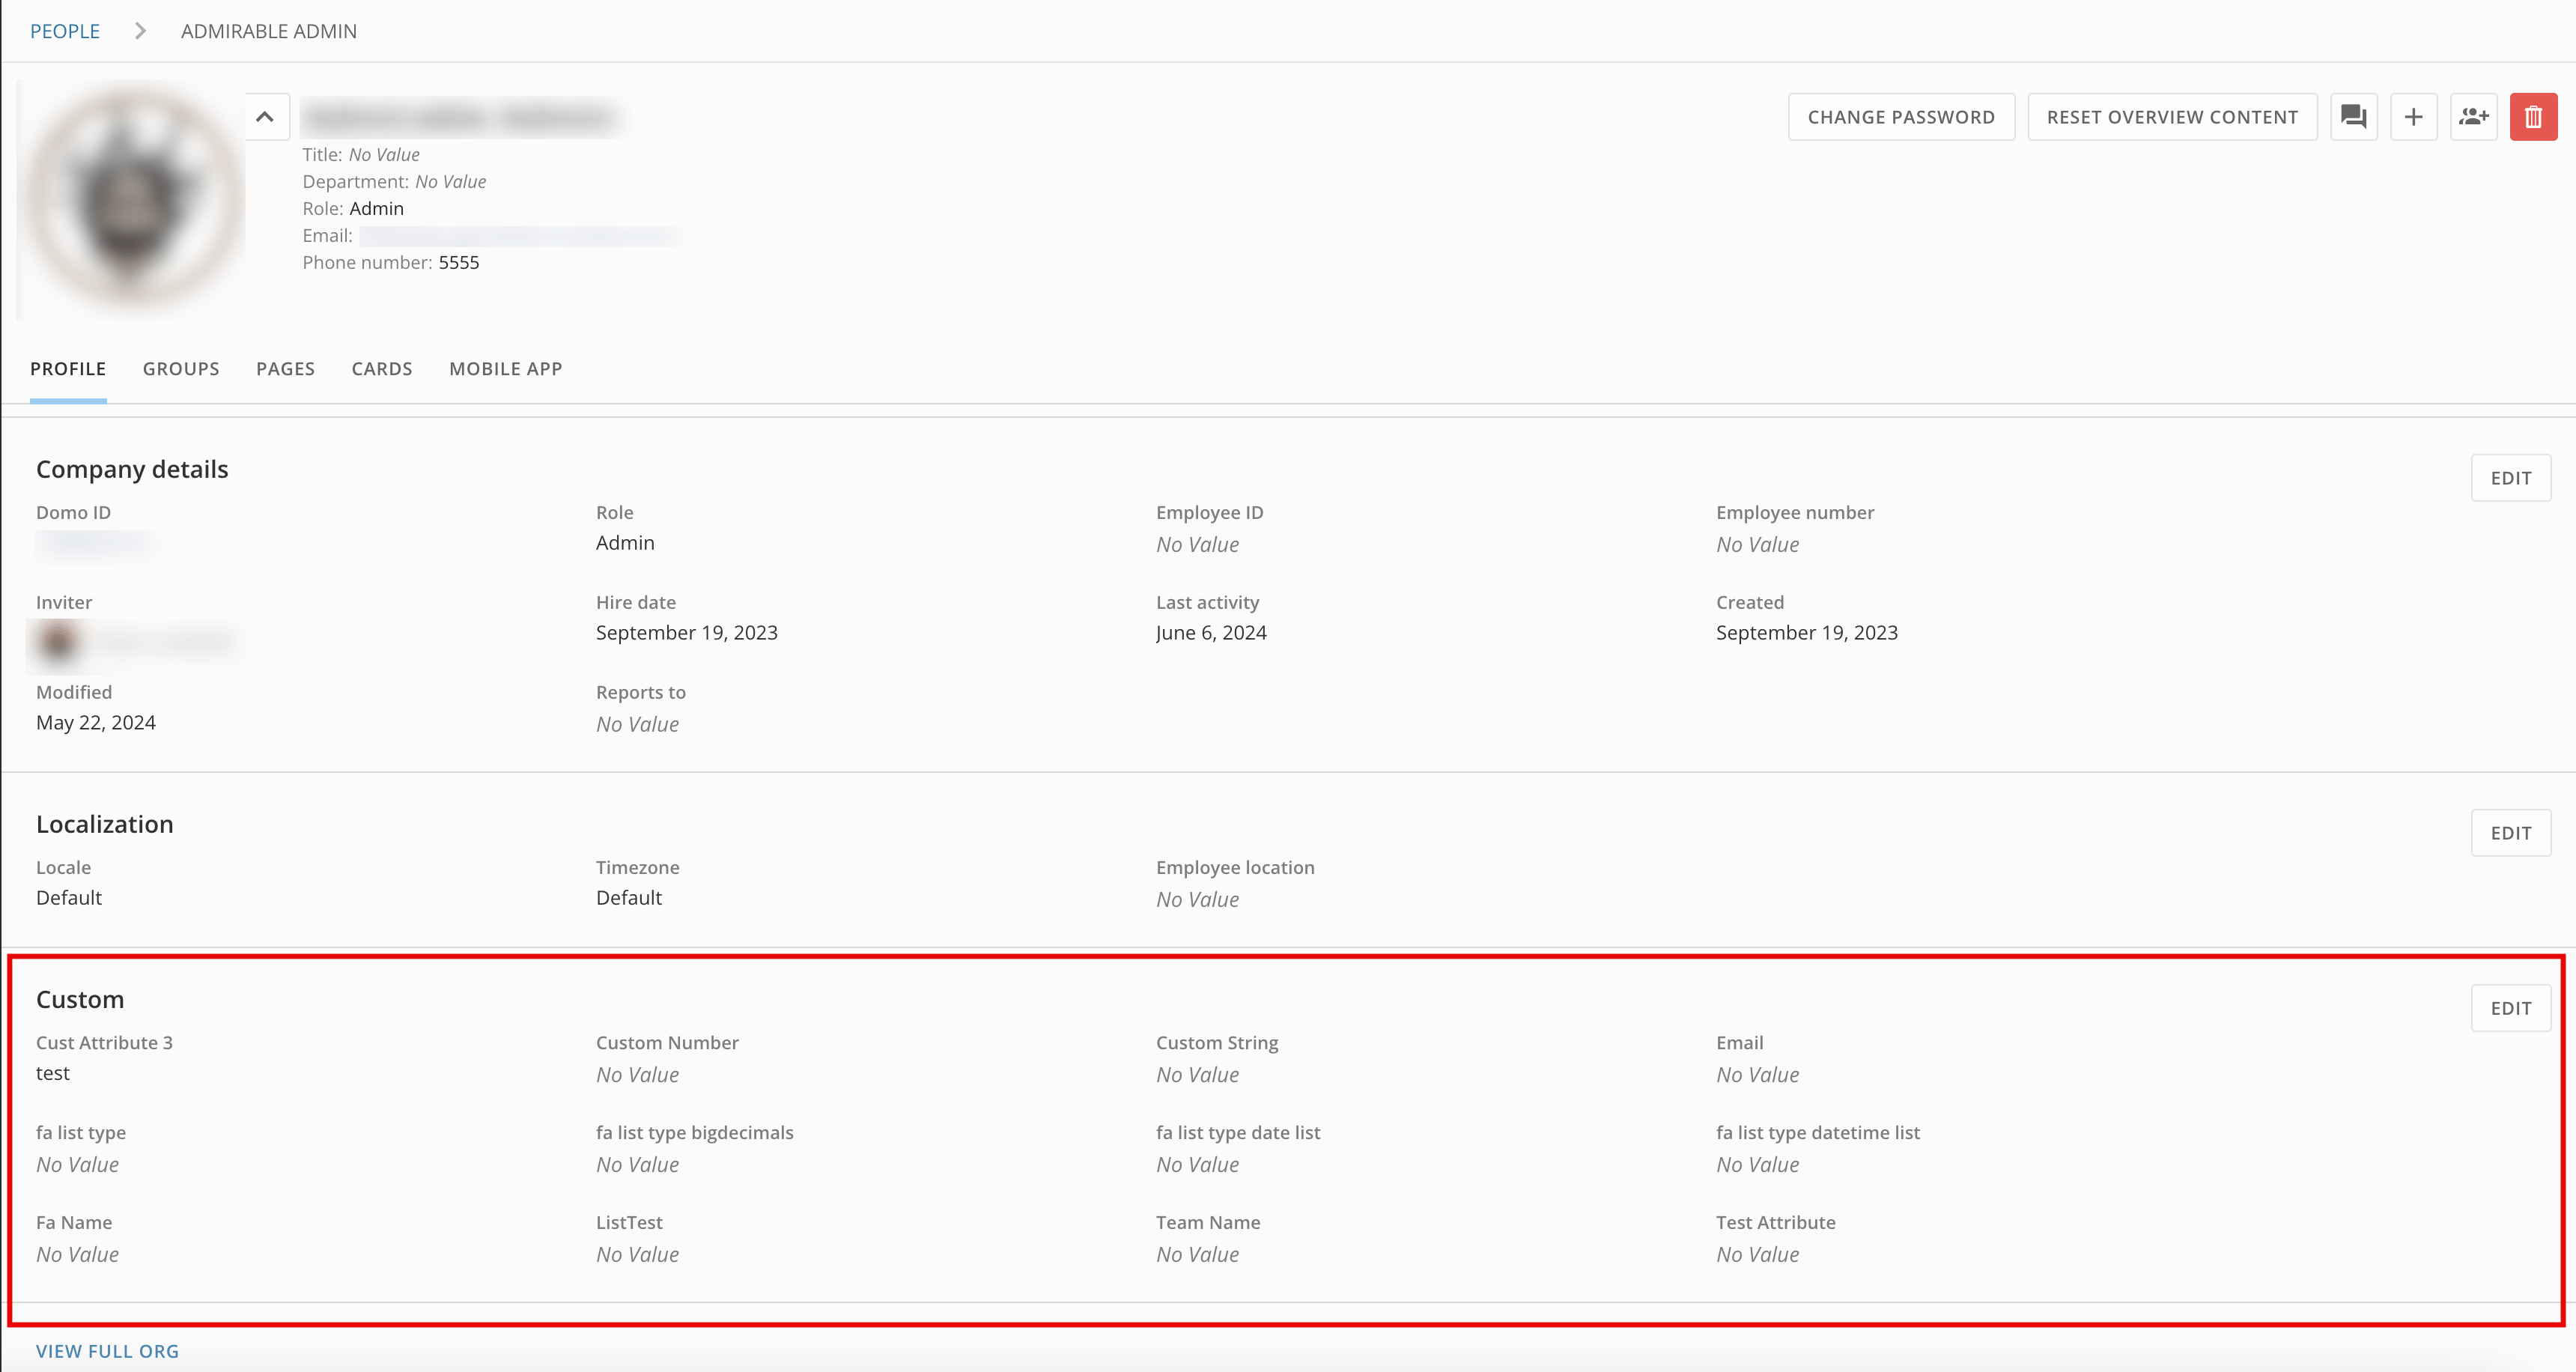
After adding custom attributes through your configuration DataSet, you can check that they were configured correctly by viewing the profile page for a person or group included in the configuration DataSet (**Admin** > **Governance** > **People** > **\<\< *user>>***).
Under **Custom**, the user/group's custom attributes and their values are listed.
7. Submit your changes and run the job.
# View Custom Attributes
After adding custom attributes through your configuration DataSet, you can check that they were configured correctly by viewing the profile page for a person or group included in the configuration DataSet (**Admin** > **Governance** > **People** > **\<\< *user>>***).
Under **Custom**, the user/group's custom attributes and their values are listed.
 ### Remote Instance Configuration
With remote instance configuration, you can be in one Domo instance and manage individuals in other instances you have access to. You can manage individuals remotely by setting up the [configuration DataSet](#configuration_dataset). Configure the [Domo Access Token account](#configure_domo_access_token) with either a [Domo Access token](#generate_access_token) or a username and password for the remote instance.
# Configure User Management for Remote Instance
You can also configure your User Management setting for any remote instances you have access to. Follow the steps below to configure User Management for a remote instance:
1. While creating or editing a job, under
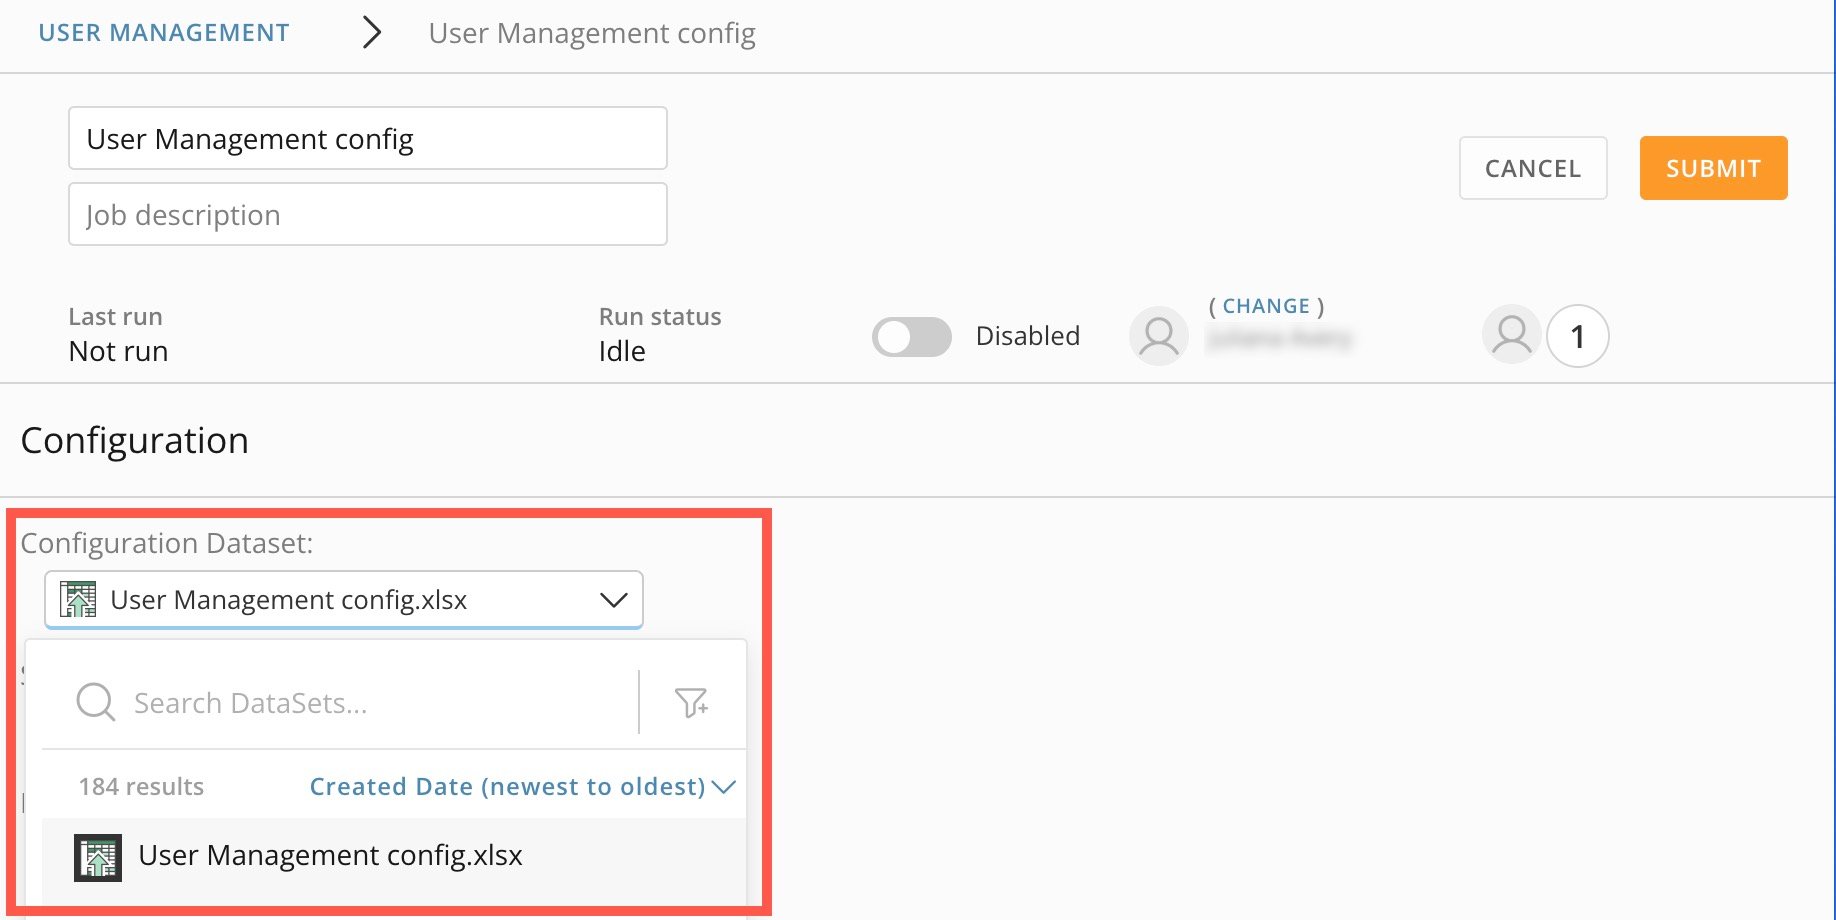
**Configuration**, select a configuration DataSet. This DataSet should be populated with valid values for the remote instance according to User Management guidelines given [above](#configuration_dataset).
2. Under
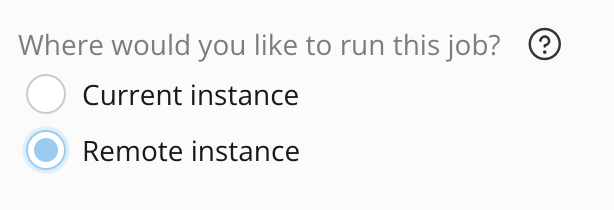
**Where would you like to run this job?** select **Remote Instance**.
### Remote Instance Configuration
With remote instance configuration, you can be in one Domo instance and manage individuals in other instances you have access to. You can manage individuals remotely by setting up the [configuration DataSet](#configuration_dataset). Configure the [Domo Access Token account](#configure_domo_access_token) with either a [Domo Access token](#generate_access_token) or a username and password for the remote instance.
# Configure User Management for Remote Instance
You can also configure your User Management setting for any remote instances you have access to. Follow the steps below to configure User Management for a remote instance:
1. While creating or editing a job, under
**Configuration**, select a configuration DataSet. This DataSet should be populated with valid values for the remote instance according to User Management guidelines given [above](#configuration_dataset).
2. Under
**Where would you like to run this job?** select **Remote Instance**.
 3. In the
**Instance:** field, enter the domain for the remote instance you want to manage PDP for. The domain format must be *[example.domo.com](http://example.domo.com)*.
4. Use the
**Select the account for your instance:** dropdown to select a valid Domo Access Account. Learn how to configure a Domo Access Token Account [below](#configure_domo_access_token).
5. Choose where to save run logs under
**Reporting**.
**Note:** The notification emails and metric logs are written to the instance the policy is running from, not to the remote instance.
6. Select
**Submit** to save your changes.
# Configure a Domo Access Token Account
Follow these steps to configure a Domo Access Token account:
1. In Domo, navigate to
**Accounts**.
2. Select
**Add New** > **Account** and use the dropdown to choose a Domo Access Token account.
3. In the
**Instance:** field, enter the domain for the remote instance you want to manage PDP for. The domain format must be *[example.domo.com](http://example.domo.com)*.
4. Use the
**Select the account for your instance:** dropdown to select a valid Domo Access Account. Learn how to configure a Domo Access Token Account [below](#configure_domo_access_token).
5. Choose where to save run logs under
**Reporting**.
**Note:** The notification emails and metric logs are written to the instance the policy is running from, not to the remote instance.
6. Select
**Submit** to save your changes.
# Configure a Domo Access Token Account
Follow these steps to configure a Domo Access Token account:
1. In Domo, navigate to
**Accounts**.
2. Select
**Add New** > **Account** and use the dropdown to choose a Domo Access Token account.
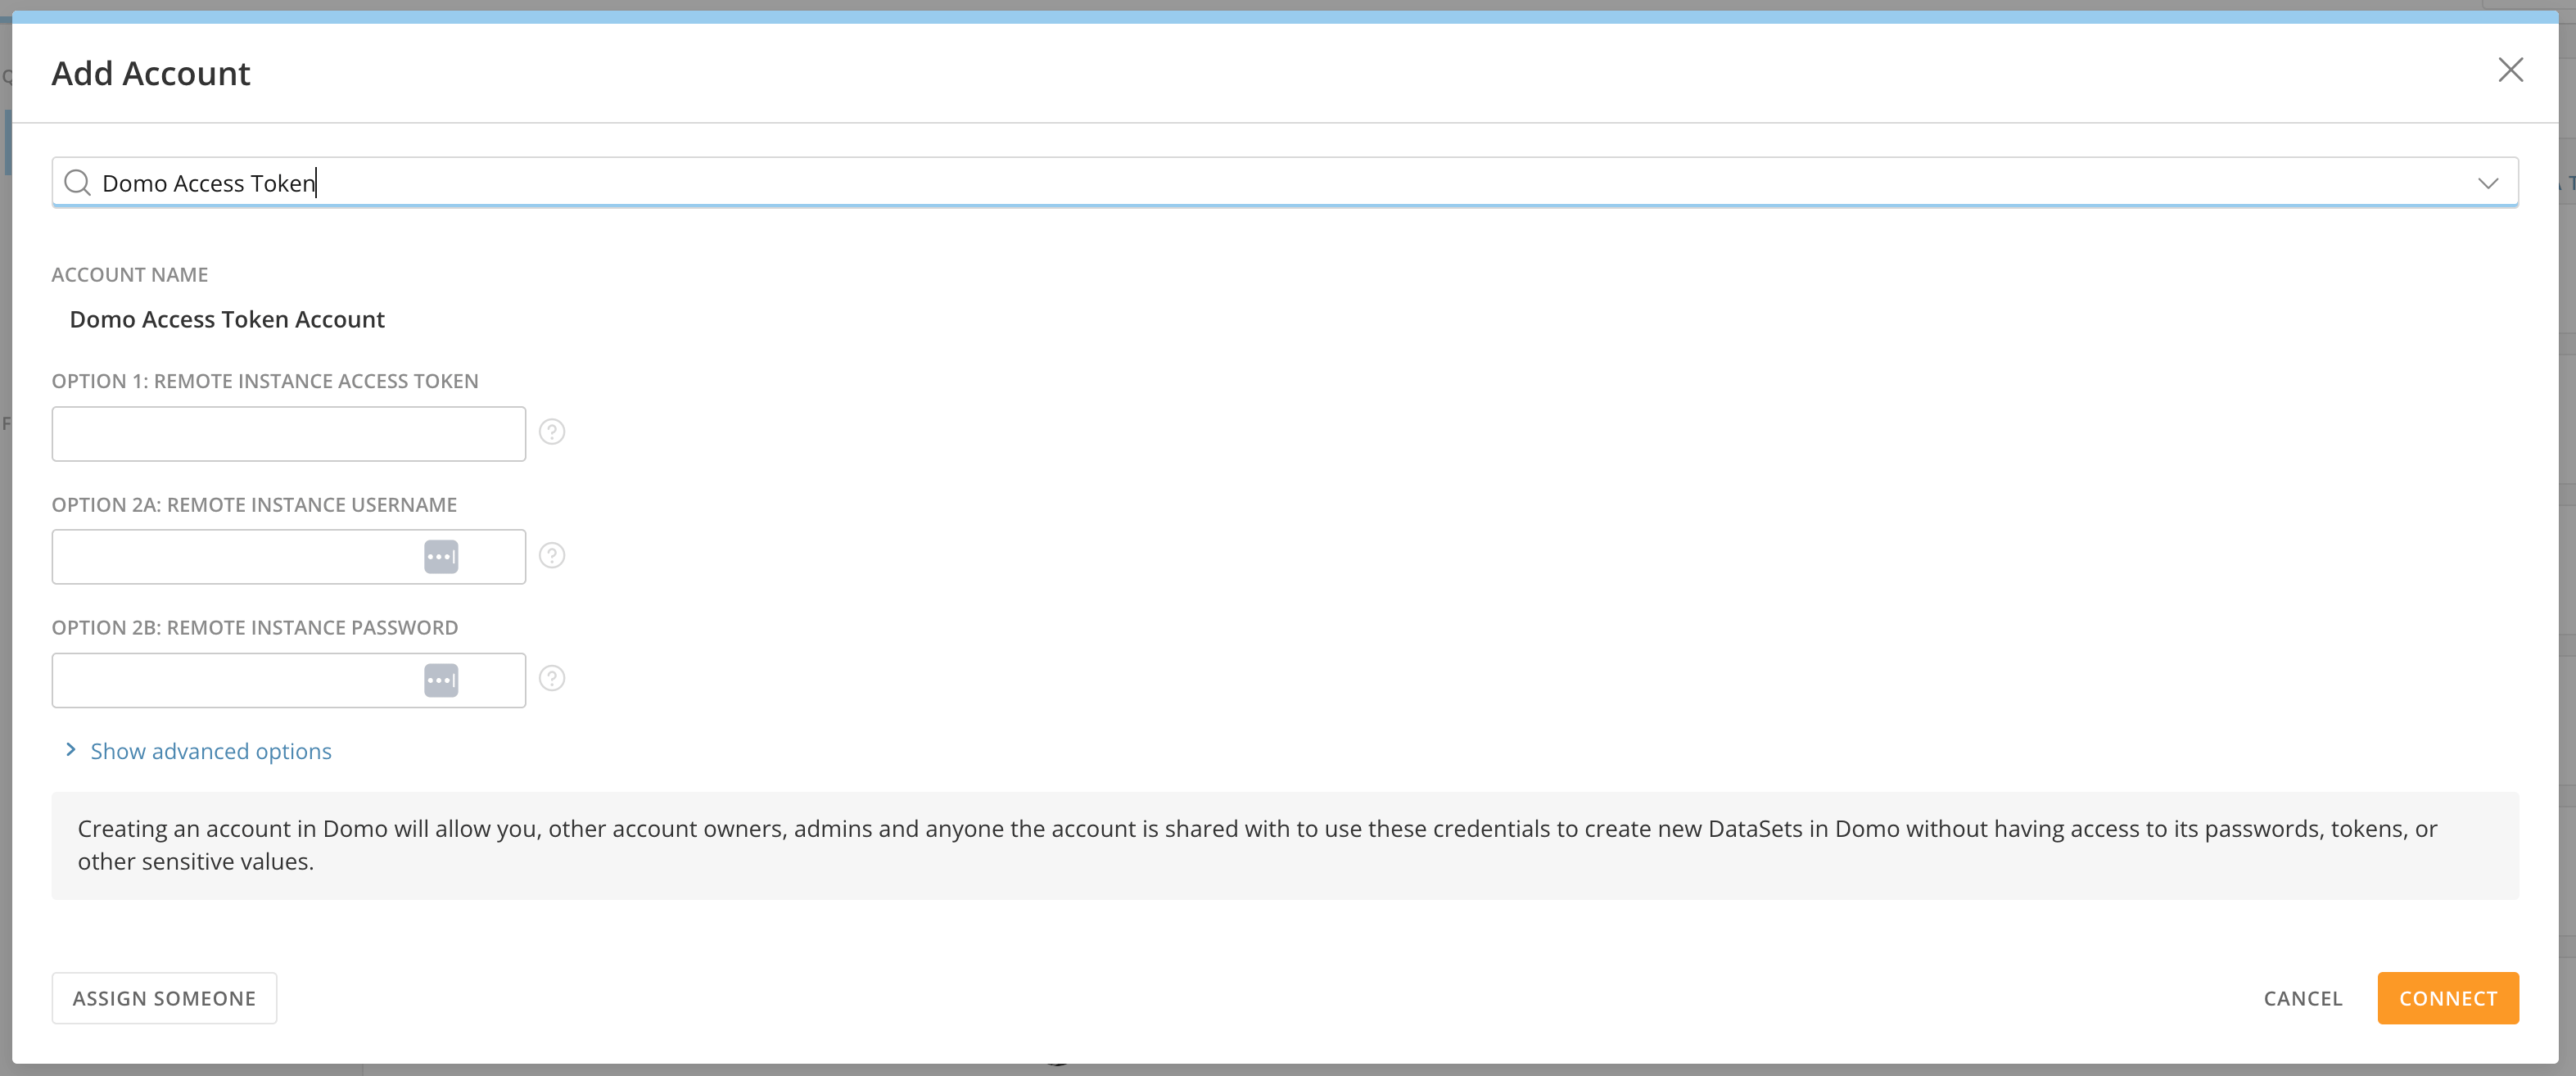 3. In the modal, complete one of the following options:
* **Access Token —**
Enter an access token in the **Remote Instance Access Token** field.
* **Username and password —**
Enter your credentials in the **Remote Instance Username** and **Remote Instance Password** fields.
4. Select
**Connect**.
# Generate an Access Token
Follow these steps to generate an access token:
1. Navigate to
**Admin** > **Authentication** > **Access tokens**.
2. On the
**Access tokens** page, select **+ Generate access token**.
3. In the modal, complete one of the following options:
* **Access Token —**
Enter an access token in the **Remote Instance Access Token** field.
* **Username and password —**
Enter your credentials in the **Remote Instance Username** and **Remote Instance Password** fields.
4. Select
**Connect**.
# Generate an Access Token
Follow these steps to generate an access token:
1. Navigate to
**Admin** > **Authentication** > **Access tokens**.
2. On the
**Access tokens** page, select **+ Generate access token**.
 3. Enter a description in the
**Access token description** field.
3. Enter a description in the
**Access token description** field.
 4. Search for and select a user for whom you are generating the access token.
5. Select an expiration interval in the
**Expire after** list.
6. Select
**Generate**.
7. Copy the code to use.
4. Search for and select a user for whom you are generating the access token.
5. Select an expiration interval in the
**Expire after** list.
6. Select
**Generate**.
7. Copy the code to use.