> ## Documentation Index
> Fetch the complete documentation index at: https://domoinc-openapi-sync-dataflows.mintlify.site/llms.txt
> Use this file to discover all available pages before exploring further.
# Configuring Goals Settings
export const InlineImage = ({src, alt = '', height = '1.6em'}) => {
return  ;
};
## Intro
As an admin, you can change the Domo Goals settings for your organization. Some actions will need to be taken before others can use Domo Goals. This article discusses how to configure various administrative features.
Actions in this article can only be executed by Admin users or those with the Manage All Goals grant enabled. For more information, see [Managing Custom Roles](/s/article/360043438973).
## Managing General Settings
Admins can specify general settings for Domo Goals. This includes choosing nomenclature, creating time periods for goals, and setting the check-in cadence.
#### Configuring Goals Nomenclature
1. In the navigation header, go to
**More > Admin**.
2. From the
**Features** section, select **Goals**.
3. In
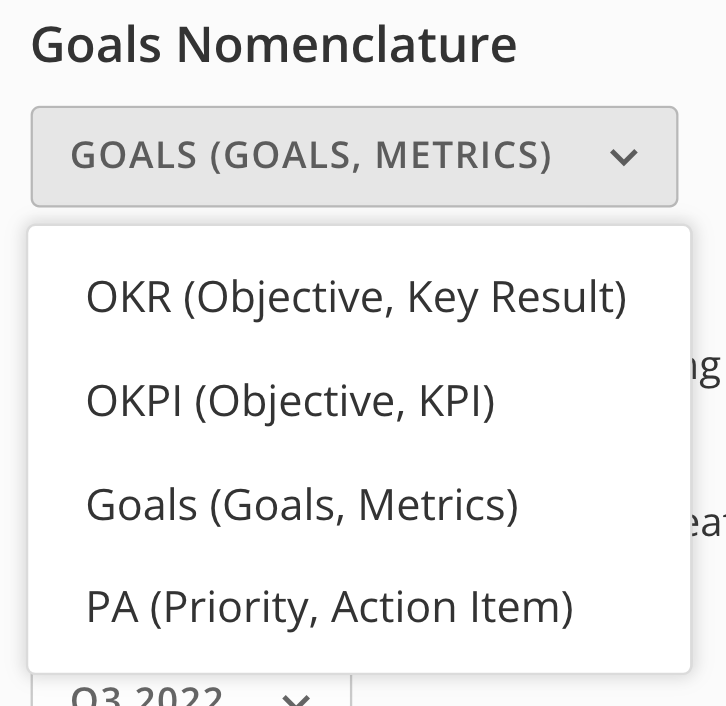
**General** tab, select an option from the **Goals Nomenclature** menu.
Several choices display allowing you to determine if your organization will use Goals and Metrics, Objectives and Key Results, Objectives and KPIs, or Priorities and Action Items. Your choice of terminology will not affect the Goals functionality.
;
};
## Intro
As an admin, you can change the Domo Goals settings for your organization. Some actions will need to be taken before others can use Domo Goals. This article discusses how to configure various administrative features.
Actions in this article can only be executed by Admin users or those with the Manage All Goals grant enabled. For more information, see [Managing Custom Roles](/s/article/360043438973).
## Managing General Settings
Admins can specify general settings for Domo Goals. This includes choosing nomenclature, creating time periods for goals, and setting the check-in cadence.
#### Configuring Goals Nomenclature
1. In the navigation header, go to
**More > Admin**.
2. From the
**Features** section, select **Goals**.
3. In
**General** tab, select an option from the **Goals Nomenclature** menu.
Several choices display allowing you to determine if your organization will use Goals and Metrics, Objectives and Key Results, Objectives and KPIs, or Priorities and Action Items. Your choice of terminology will not affect the Goals functionality.
 4. Select
**Save**.
The Goals feature now uses your organization's chosen nomenclature.
#### Configuring Goals Time Periods
In Domo Goals, you use time periods to determine when a goal should be completed. These generally correspond to your company’s fiscal quarters, months, or years (depending on how often you expect people to create new goals). The **Name** is what the people will see when selecting the time period during the goal creation process.
**Important:**
You will NOT be able to create any goals until time periods are created.
1. In the navigation header, go to
**More > Admin**.
2. From the
**Features** section, select **Goals**.
3. In the
**General** tab, go to the **Select a period to edit** menu.
4. From the menu, choose a period to edit. Give the time period a
**Name**, and select T**ime period start and end dates**.
5. Select
**Save**.
6. (Optional)
Repeat this process for multiple time periods.
Members of your organization can now create goals within the specified time period(s).
#### Configuring a Check-In Cadence
1. In the navigation header, go to
**More > Admin**.
2. From the
**Features** section, select **Goals**.
3. In the
**General** tab, locate the **Weekly Goals email** toggle.
Switching the toggle to "enabled" sends a weekly email to members of your organization with reminders to update the progress of their goals and metrics.
4. (Conditional) Select the day and time you wish the weekly goals check-in reminder email to be sent to all people who have active goals.
4. Select
**Save**.
The Goals feature now uses your organization's chosen nomenclature.
#### Configuring Goals Time Periods
In Domo Goals, you use time periods to determine when a goal should be completed. These generally correspond to your company’s fiscal quarters, months, or years (depending on how often you expect people to create new goals). The **Name** is what the people will see when selecting the time period during the goal creation process.
**Important:**
You will NOT be able to create any goals until time periods are created.
1. In the navigation header, go to
**More > Admin**.
2. From the
**Features** section, select **Goals**.
3. In the
**General** tab, go to the **Select a period to edit** menu.
4. From the menu, choose a period to edit. Give the time period a
**Name**, and select T**ime period start and end dates**.
5. Select
**Save**.
6. (Optional)
Repeat this process for multiple time periods.
Members of your organization can now create goals within the specified time period(s).
#### Configuring a Check-In Cadence
1. In the navigation header, go to
**More > Admin**.
2. From the
**Features** section, select **Goals**.
3. In the
**General** tab, locate the **Weekly Goals email** toggle.
Switching the toggle to "enabled" sends a weekly email to members of your organization with reminders to update the progress of their goals and metrics.
4. (Conditional) Select the day and time you wish the weekly goals check-in reminder email to be sent to all people who have active goals.
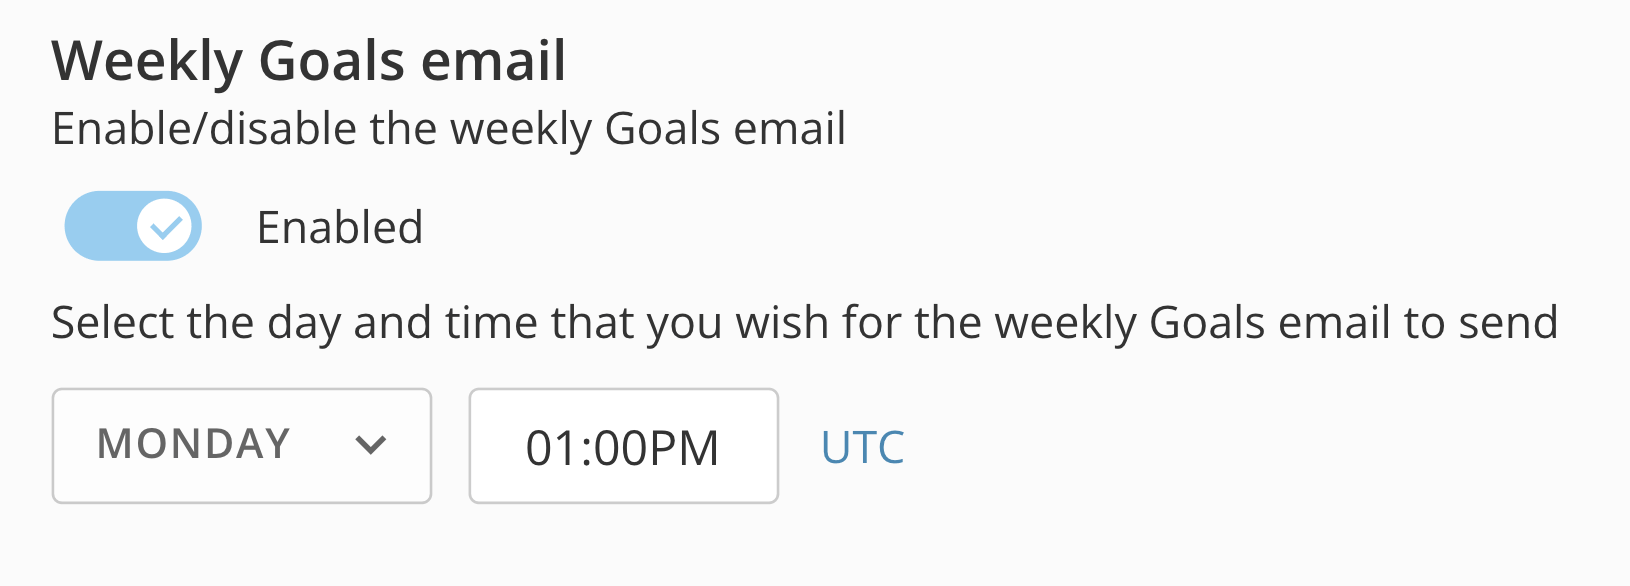 Weekly reminders send at the specified time. Switch the toggle to **Disabled** if you no longer wish to send check-in emails.
#### Configuring Goal Status Settings
Administrators can give users the option for goal statuses to be automatically or manually updated.
1. In the navigation header, go to
**More > Admin**.
2. From the
**Features** section, select **Goals**.
3. In the
**Objectives and Key Results** tab, locate the **Automatic Objective Status** toggle.
Weekly reminders send at the specified time. Switch the toggle to **Disabled** if you no longer wish to send check-in emails.
#### Configuring Goal Status Settings
Administrators can give users the option for goal statuses to be automatically or manually updated.
1. In the navigation header, go to
**More > Admin**.
2. From the
**Features** section, select **Goals**.
3. In the
**Objectives and Key Results** tab, locate the **Automatic Objective Status** toggle.
 By enabling Automatic Objective Status, the status for all new goals will automatically be determined by the average progress of associated metrics. Users can choose to override the Automatic Objective Status for individual goals.
By disabling Automatic Objective Status, the status for all new goals will be chosen by their owners. Users can choose to enable Automatic Objective Status for individual goals.
**Note:**
Enabling or disabling the Automatic Objective Status does not affect the status of existing goals.
## Managing Delegates Settings
In Goals, you can allow someone else to create and manage goals on your behalf. This person is called a delegate. For example, an operations specialist might create goals for a team, or an executive assistant might create goals for a CFO.
1. In the navigation header, go to
**More > Admin**.
2. From the
**Features** section, select **Goals**.
3. Select the
**Delegates** tab.
4. Specify
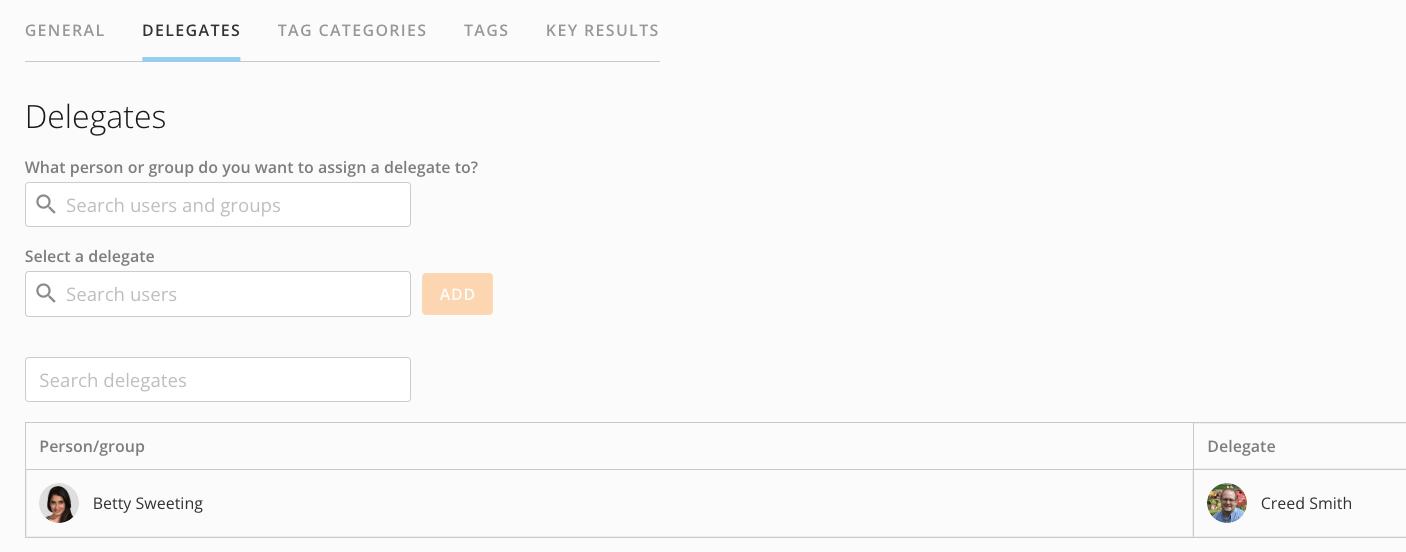
**What person or group you want to assign a delegate to** and **Select a delegate.**
5. Select
**Add**.
6. (Optional) Search for existing delegates in the
**Search delegates** field.
People/groups and their delegates appear in a list in the main **Delegates** tab.
By enabling Automatic Objective Status, the status for all new goals will automatically be determined by the average progress of associated metrics. Users can choose to override the Automatic Objective Status for individual goals.
By disabling Automatic Objective Status, the status for all new goals will be chosen by their owners. Users can choose to enable Automatic Objective Status for individual goals.
**Note:**
Enabling or disabling the Automatic Objective Status does not affect the status of existing goals.
## Managing Delegates Settings
In Goals, you can allow someone else to create and manage goals on your behalf. This person is called a delegate. For example, an operations specialist might create goals for a team, or an executive assistant might create goals for a CFO.
1. In the navigation header, go to
**More > Admin**.
2. From the
**Features** section, select **Goals**.
3. Select the
**Delegates** tab.
4. Specify
**What person or group you want to assign a delegate to** and **Select a delegate.**
5. Select
**Add**.
6. (Optional) Search for existing delegates in the
**Search delegates** field.
People/groups and their delegates appear in a list in the main **Delegates** tab.
 ## Managing Tag Categories
In Domo Goals, you can use tags to help identify your goals. Tags can be created and assigned to a goal at anytime. To stay organized, Admins can create pre-defined tags for other users and add levels of hierarchy with tag categories.
1. In the navigation header, go to
**More > Admin**.
2. From the
**Features** section, select **Goals**.
3. Select the
**Tag Categories** tab.
4. To create a new tag category, select the
**Create** button.
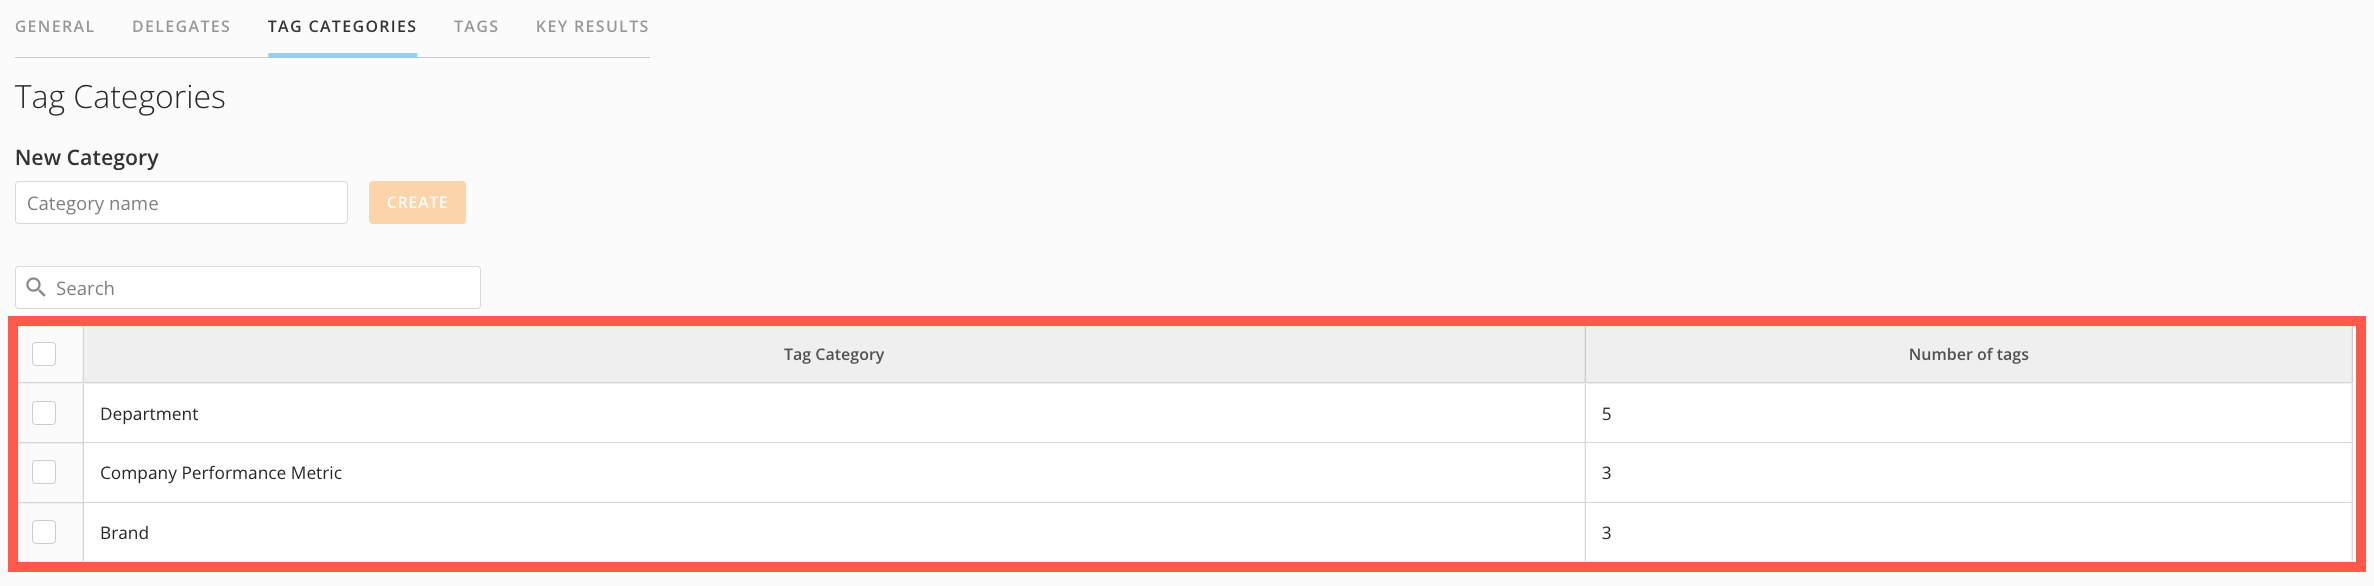
The new category is added to the **Tag Category** list. The **Number of tags list** displays the number of tags within each category.
## Managing Tag Categories
In Domo Goals, you can use tags to help identify your goals. Tags can be created and assigned to a goal at anytime. To stay organized, Admins can create pre-defined tags for other users and add levels of hierarchy with tag categories.
1. In the navigation header, go to
**More > Admin**.
2. From the
**Features** section, select **Goals**.
3. Select the
**Tag Categories** tab.
4. To create a new tag category, select the
**Create** button.
The new category is added to the **Tag Category** list. The **Number of tags list** displays the number of tags within each category.
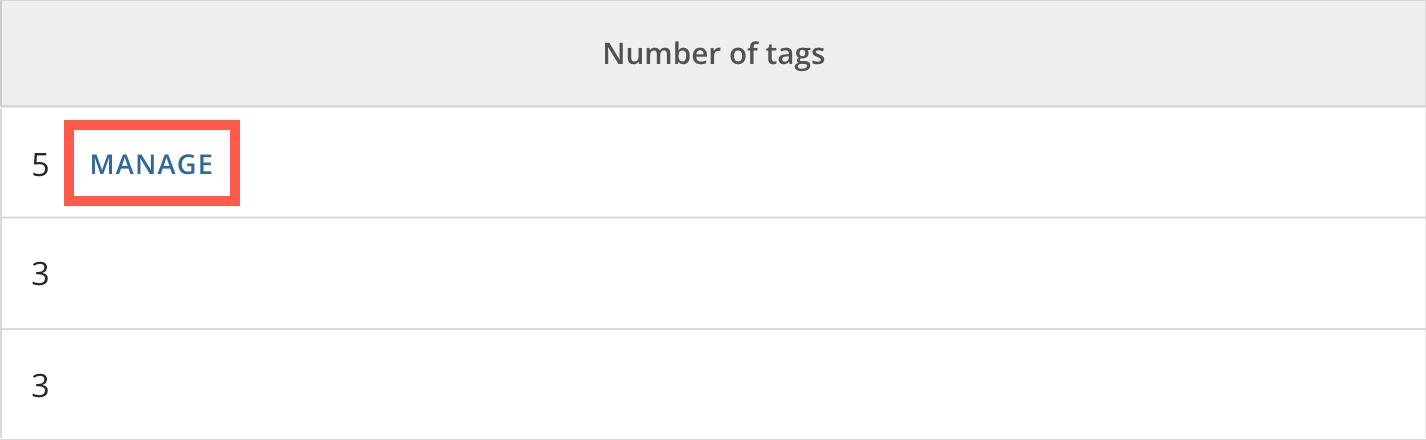
 5. To add a tag to a category, hover next to the number of tags.
A **Manage** option displays.
5. To add a tag to a category, hover next to the number of tags.
A **Manage** option displays.
 6. Select
**Manage.** A list of tags in the chosen category displays. In the **Select tags** menu, add new tags to the category. To create a new tag, begin typing a new title and select the **+** *Your Tag* button.
7. (Optional) To remove tags from the category, select
delete next to the tag.
8. (Optional) To remove a tag category, select the box next to the category's name. Select
delete.
A modal displays confirming the category's deletion. The tags associated with this category will be uncategorized.
9. Select
**Delete**.
## Managing Tags
Teams and individuals can track and organize goals with tags. Tags can be created by admins or regular users. They can also be sorted into any of the tag categories.
#### Adding a Tag
1. In the navigation header, go to
**More > Admin**.
2. From the
**Features** section, select **Goals**.
3. Select the
**Tag** tab.
4. To add a new tag, begin typing its title in the
**New name** field. (Optional) select a tag category and click **Create.**
The new tag is added to the **Tag name** list.
5. (Optional) To assign a tag to a category, hover next to the existing category name or
**Uncategorized**. Select edit. From the menu, select an existing category and click **Save**.
The tag is added to the specified category and can be viewed in the **Tag Categories** tab.
#### Deleting a Tag
1. To delete a tag, check the box next to its name. Select
delete.
A window displays confirming the tag's deletion.
2. Select
**Delete.**
#### Renaming a Tag
To rename a tag, select edit next to its name.
#### Merging a Tag
1. To merge a tag, select the boxes next to multiple tag names. Select
merge.
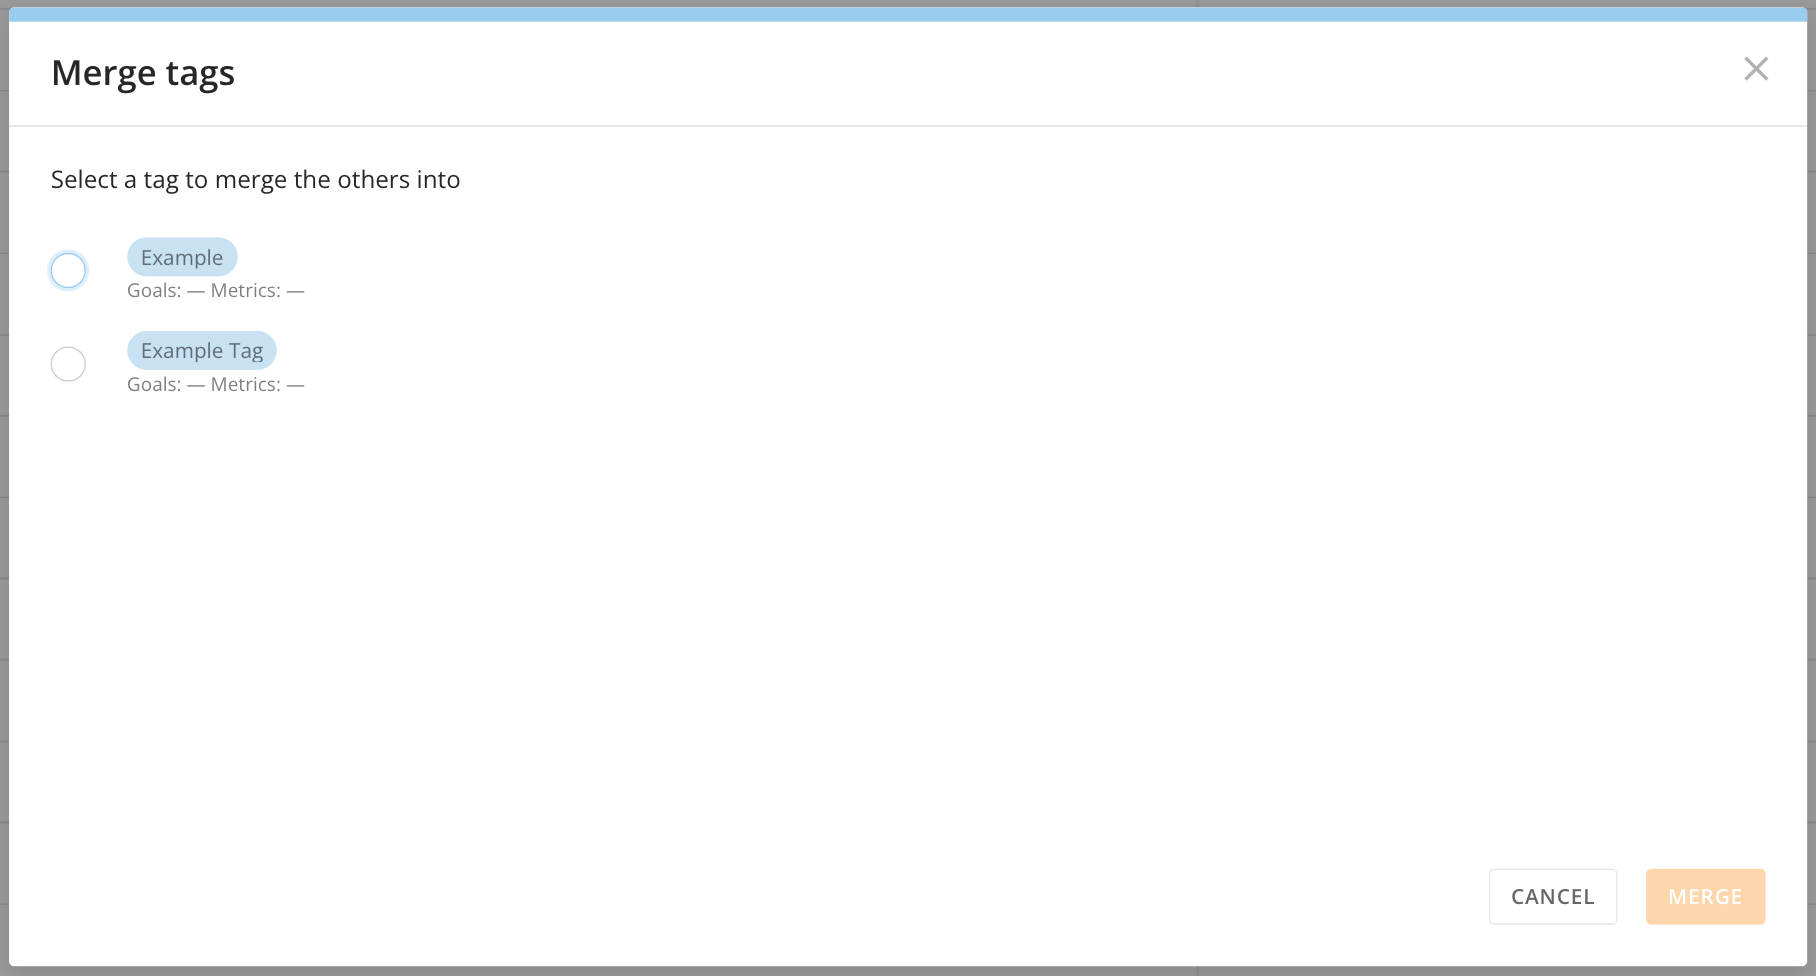
The **Merge tags** modal displays.
2.. Select which tag you'd like to keep. This merges all other selected tags with it.
6. Select
**Manage.** A list of tags in the chosen category displays. In the **Select tags** menu, add new tags to the category. To create a new tag, begin typing a new title and select the **+** *Your Tag* button.
7. (Optional) To remove tags from the category, select
delete next to the tag.
8. (Optional) To remove a tag category, select the box next to the category's name. Select
delete.
A modal displays confirming the category's deletion. The tags associated with this category will be uncategorized.
9. Select
**Delete**.
## Managing Tags
Teams and individuals can track and organize goals with tags. Tags can be created by admins or regular users. They can also be sorted into any of the tag categories.
#### Adding a Tag
1. In the navigation header, go to
**More > Admin**.
2. From the
**Features** section, select **Goals**.
3. Select the
**Tag** tab.
4. To add a new tag, begin typing its title in the
**New name** field. (Optional) select a tag category and click **Create.**
The new tag is added to the **Tag name** list.
5. (Optional) To assign a tag to a category, hover next to the existing category name or
**Uncategorized**. Select edit. From the menu, select an existing category and click **Save**.
The tag is added to the specified category and can be viewed in the **Tag Categories** tab.
#### Deleting a Tag
1. To delete a tag, check the box next to its name. Select
delete.
A window displays confirming the tag's deletion.
2. Select
**Delete.**
#### Renaming a Tag
To rename a tag, select edit next to its name.
#### Merging a Tag
1. To merge a tag, select the boxes next to multiple tag names. Select
merge.
The **Merge tags** modal displays.
2.. Select which tag you'd like to keep. This merges all other selected tags with it.
 ## Managing Key Results
Admins can manage their organization's key result (or metric) attributes. This includes changing progress percentages, enabling pacing, and determining if a card-based metric will continue to be updated even after the goal's time period has passed.
#### Setting the Key Result Progress Color Changer
1. In the navigation header, go to
**More > Admin**.
2. From the
**Features** section, select **Goals**.
3. Select the
**Key Results** tab.
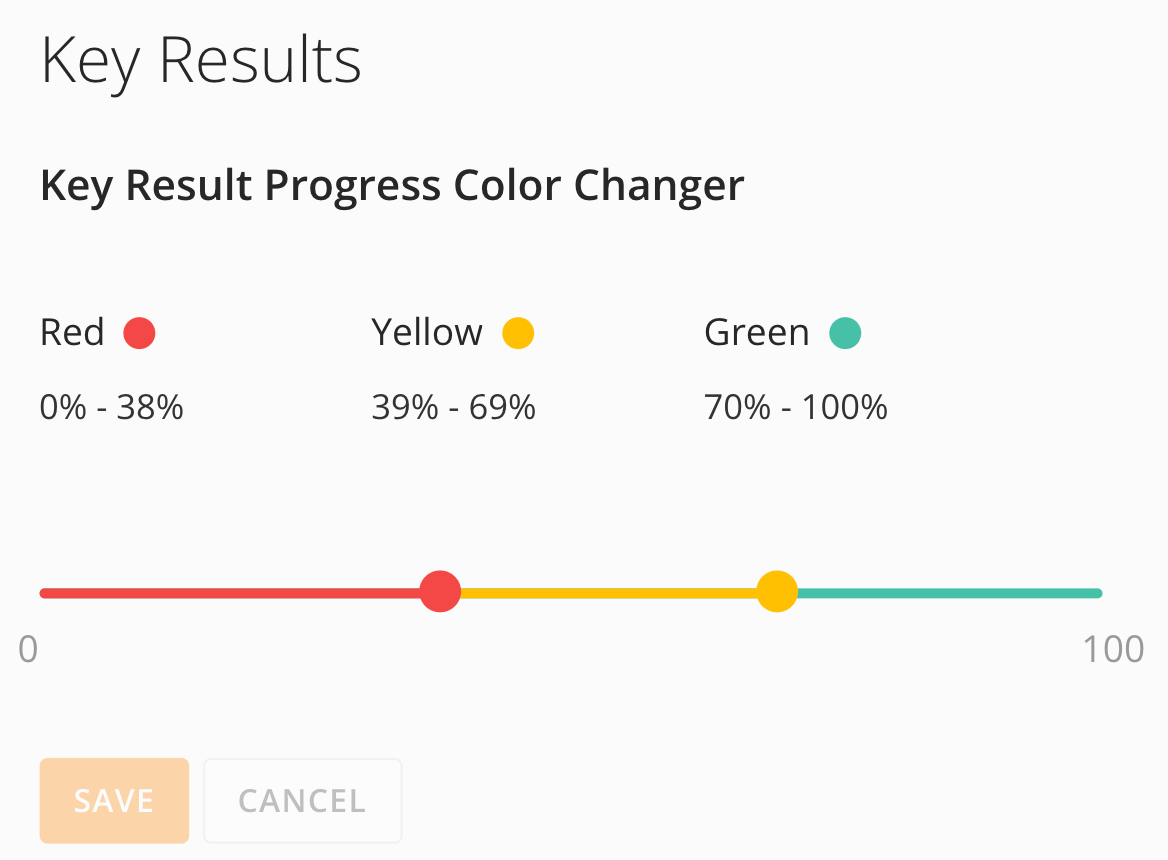
4. Use the sliders to determine which percentages will make a metric At Risk (Red), Needs Attention (Yellow), or On Track (Green).
5. After adjusting the sliders to your preferred percentages, select
**Save**.
## Managing Key Results
Admins can manage their organization's key result (or metric) attributes. This includes changing progress percentages, enabling pacing, and determining if a card-based metric will continue to be updated even after the goal's time period has passed.
#### Setting the Key Result Progress Color Changer
1. In the navigation header, go to
**More > Admin**.
2. From the
**Features** section, select **Goals**.
3. Select the
**Key Results** tab.
4. Use the sliders to determine which percentages will make a metric At Risk (Red), Needs Attention (Yellow), or On Track (Green).
5. After adjusting the sliders to your preferred percentages, select
**Save**.
 #### Enabling Key Result Pacing
In Domo Goals, you can enable key result pacing. This calculates key result progress based on time remaining until the achieve by date and percent completion towards the value target. Key result pacing is optional.
1. In the navigation header, go to
**More > Admin**.
2. From the
**Features** section, select **Goals**.
[3. In](http://3.In) the **Key Results** tab, toggle **Key Results Pacing** to enabled.
Metrics now uses key result pacing to determine progress.
#### Enabling Continuous Card Metric Updates
In Domo Goals, you can allow card-linked data to continue updating the key result after the achieve by date. This can be useful if all the data for your time period isn’t reflected until after the time period ends. Continuous card-based metric updates are optional.
1. In the navigation header, go to
**More > Admin**.
2. From the
**Features** section, select **Goals**.
[3.In](http://3.In) the **Key Results** tab, toggle **Continue updating card data after achieve by date** to enabled.
Card-based metrics will continue to be updated even after the goal's time period has passed.
#### Enabling Key Result Pacing
In Domo Goals, you can enable key result pacing. This calculates key result progress based on time remaining until the achieve by date and percent completion towards the value target. Key result pacing is optional.
1. In the navigation header, go to
**More > Admin**.
2. From the
**Features** section, select **Goals**.
[3. In](http://3.In) the **Key Results** tab, toggle **Key Results Pacing** to enabled.
Metrics now uses key result pacing to determine progress.
#### Enabling Continuous Card Metric Updates
In Domo Goals, you can allow card-linked data to continue updating the key result after the achieve by date. This can be useful if all the data for your time period isn’t reflected until after the time period ends. Continuous card-based metric updates are optional.
1. In the navigation header, go to
**More > Admin**.
2. From the
**Features** section, select **Goals**.
[3.In](http://3.In) the **Key Results** tab, toggle **Continue updating card data after achieve by date** to enabled.
Card-based metrics will continue to be updated even after the goal's time period has passed.