> ## Documentation Index
> Fetch the complete documentation index at: https://domoinc-openapi-sync-dataflows.mintlify.site/llms.txt
> Use this file to discover all available pages before exploring further.
# Snowflake Dashboard | Installation Guide
Snowflake is a data warehouse that makes it easy to bring together all your data and make it available to all users and systems that need to analyze it. The Snowflake QuickStart helps you to evaluate your database performance. It provides you a better user experience with schemas, databases, and query types while promoting wide user adoptions across your organization.
The Snowflake QuickStart gives database administrators and stake holders a clear picture about their database performance, error tracking, user experiences, cost utilization, and many more.
### Installing the Snowflake Dashboard
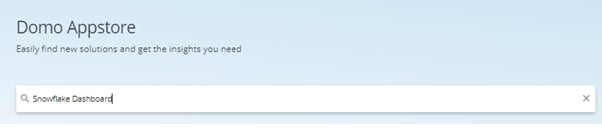
1. Visit the
Appstore and search for **Snowflake Dashboard** in the search bar.
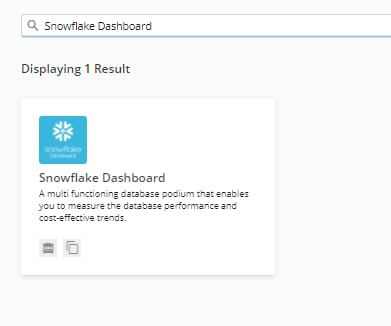
 2. Click on the Snowflake Dashboard.
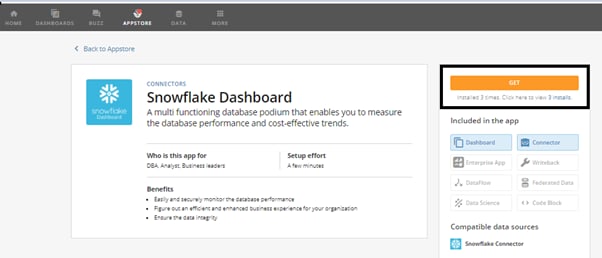
 3. The Snowflake Dashboard
overview page will appear.
4. Click on the
**Get** button.
3. The Snowflake Dashboard
overview page will appear.
4. Click on the
**Get** button.
 5. As soon as you click the **Get** button, the system will begin creating the App. It will take only a few minutes to install it.
6. Ensure
that the Snowflake Dashboard is installed successfully with sample data.
### Powering up the Snowflake Dashboard with actual (live) data
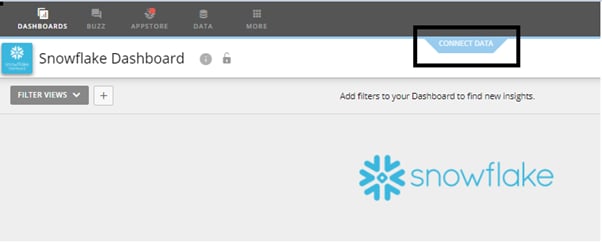
1. Click on **Connect Data** button.
5. As soon as you click the **Get** button, the system will begin creating the App. It will take only a few minutes to install it.
6. Ensure
that the Snowflake Dashboard is installed successfully with sample data.
### Powering up the Snowflake Dashboard with actual (live) data
1. Click on **Connect Data** button.
 2. The following icon will appear.
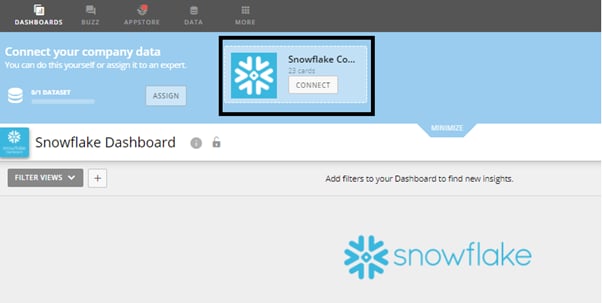 3. Click on the
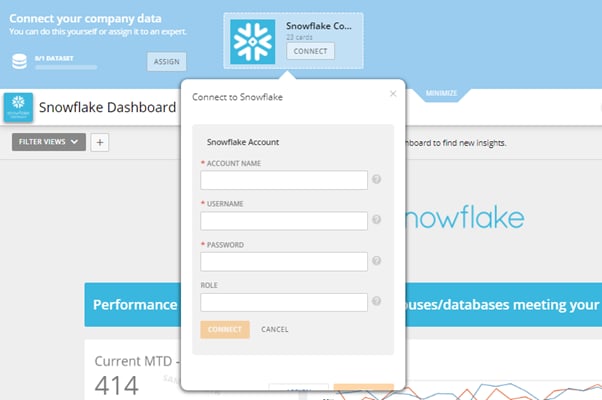
**Connect** button, and enter the required credentials to add the account.
3. Click on the
**Connect** button, and enter the required credentials to add the account.
 4. Once the account is added, select the required warehouse.
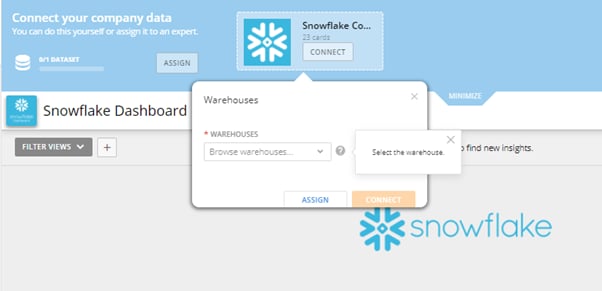 5. Click the
**Connect** button.
5. Click the
**Connect** button.
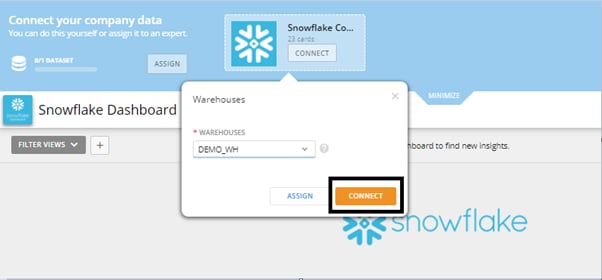 6. As soon as you click the
**Connect** button, the system will create all datasets and dataflows associated with this Dashboard and replace the sample data with the live data. It will take only a few minutes.
7. Refresh the page and you are ready to go.
6. As soon as you click the
**Connect** button, the system will create all datasets and dataflows associated with this Dashboard and replace the sample data with the live data. It will take only a few minutes.
7. Refresh the page and you are ready to go.