 3. Click
**New registration**.
4. Enter the application name and select the supported account type as below. Enter the Redirect URI for Web as **[https://oauth.domo.com/api/data/v1/oauth/providers/power-bi-writeback/exchange](https://oauth.domo.com/api/data/v1/oauth/providers/power-bi-writeback/exchange)**.
3. Click
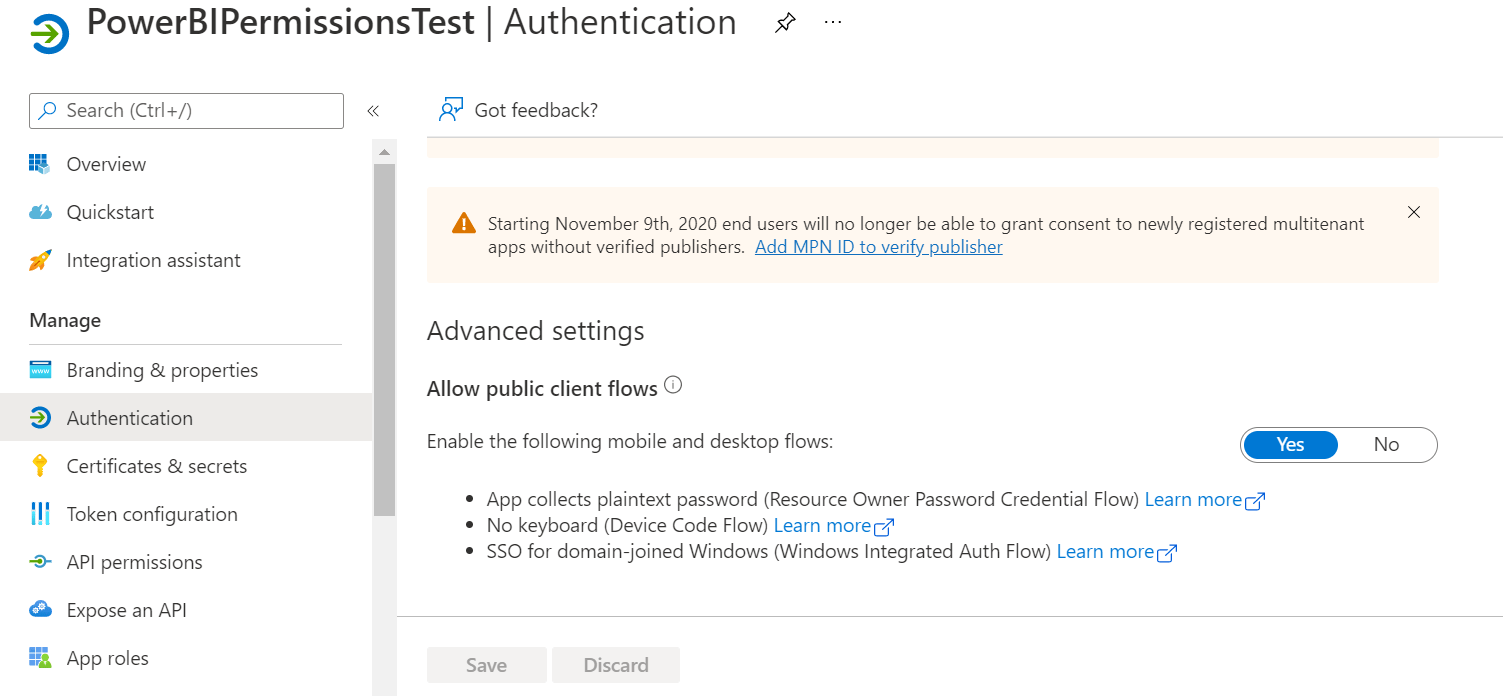
**New registration**.
4. Enter the application name and select the supported account type as below. Enter the Redirect URI for Web as **[https://oauth.domo.com/api/data/v1/oauth/providers/power-bi-writeback/exchange](https://oauth.domo.com/api/data/v1/oauth/providers/power-bi-writeback/exchange)**.
 5. Click
**Register**. Once the application is registered, you can view the Client ID (application ID), client secret, and tenant ID.
6. Once the application is registered, assign the required API permissions for your application.
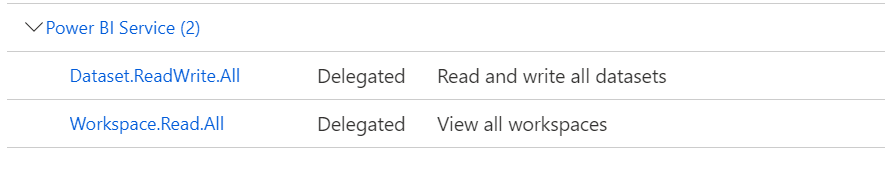
7. Click **API Permissions > +Add a permission**.
8. Request API Permissions page will appear displaying the commonly used APIs.
9. Select the API, and add the Delegated and Application permissions.
5. Click
**Register**. Once the application is registered, you can view the Client ID (application ID), client secret, and tenant ID.
6. Once the application is registered, assign the required API permissions for your application.
7. Click **API Permissions > +Add a permission**.
8. Request API Permissions page will appear displaying the commonly used APIs.
9. Select the API, and add the Delegated and Application permissions.
 10. Click on
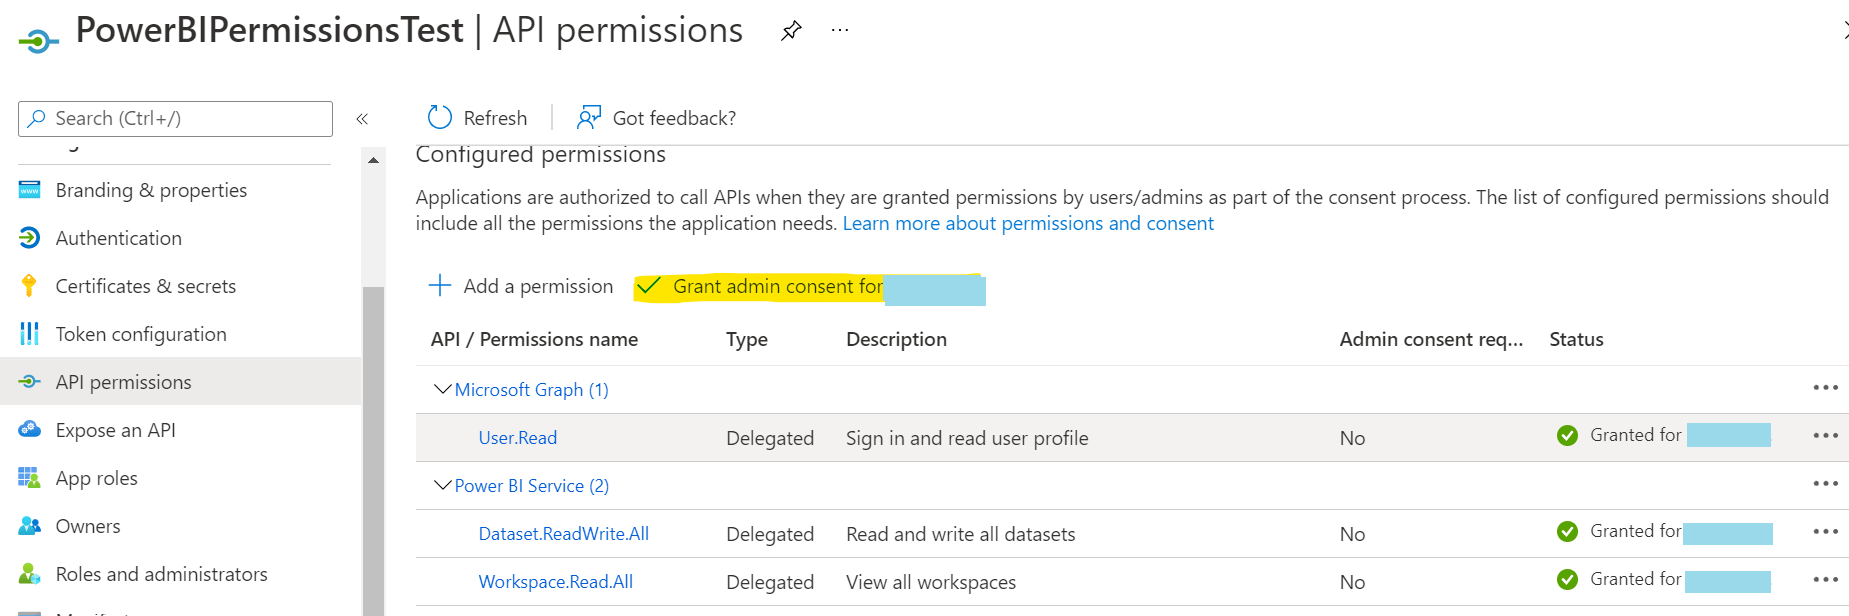
**Grant admin consent**, then click **Yes** to allow the admin consent for your permissions. The added permissions will appear in the **Configured permissions** section with their details.
11. Now, click on
**Certificates & Secrets**. Certificates can be used as secrets to prove the application’s identity when requesting a token. Also, can be referred to as public keys.
12. Click on
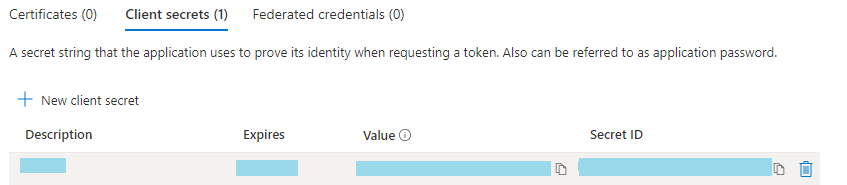
**+ New Client Secret** button.
10. Click on
**Grant admin consent**, then click **Yes** to allow the admin consent for your permissions. The added permissions will appear in the **Configured permissions** section with their details.
11. Now, click on
**Certificates & Secrets**. Certificates can be used as secrets to prove the application’s identity when requesting a token. Also, can be referred to as public keys.
12. Click on
**+ New Client Secret** button.
 13. Specify the client secret description and the expiry period for your client secret, and click **Add**.
14. Copy the **value** and paste it into the **Client Secret** field in the Connector credentials section in Domo.
13. Specify the client secret description and the expiry period for your client secret, and click **Add**.
14. Copy the **value** and paste it into the **Client Secret** field in the Connector credentials section in Domo.
 ### Granting Admin consent in App registration
1. Go to
[https://portal.azure.com](https://portal.azure.com/ "https://portal.azure.com").
2. Select
**Azure Active Directory > App registrations**.
3. Find and click on your web app that you want to enable the admin consent for.
4. Select API permissions.
5. Review the permissions that the application requires. If you agree, select
**Grant admin consent**.
### Granting Admin consent in App registration
1. Go to
[https://portal.azure.com](https://portal.azure.com/ "https://portal.azure.com").
2. Select
**Azure Active Directory > App registrations**.
3. Find and click on your web app that you want to enable the admin consent for.
4. Select API permissions.
5. Review the permissions that the application requires. If you agree, select
**Grant admin consent**.
 ### REST API limitations
Ensure to check the following list of limitations before using the push datasets APIs:
* 75 max columns
* 75 max tables
* 10,000 max rows per single POST rows request
* 1,000,000 rows added per hour per dataset
* 5 max pending POST rows requests per dataset
* 120 POST rows requests per minute per dataset
* If a table contains 250,000 or more rows, 120 POST rows requests per hour per dataset
* 200,000 max rows stored per table in FIFO dataset
* 5,000,000 max rows stored per table in 'none retention policy' dataset
* 4,000 characters per value for string column in POST rows operation
## Configuring the Connection
This section enumerates the options in the **Credentials** and **Details** panes in the Power BI Writeback Connector page. The components of the other panes in this page, **Scheduling** and **Name & Describe Your DataSet**, are universal across most Connector types and are discussed in greater length in [Adding a DataSet Using a Connector](https://domo-support.domo.com/s/article/360042926274?language=en_US "Adding a DataSet Using a Connector").
### Credentials Pane
This pane contains fields for entering credentials to connect to your Power BI account. The following table describes what is needed for each field:
### REST API limitations
Ensure to check the following list of limitations before using the push datasets APIs:
* 75 max columns
* 75 max tables
* 10,000 max rows per single POST rows request
* 1,000,000 rows added per hour per dataset
* 5 max pending POST rows requests per dataset
* 120 POST rows requests per minute per dataset
* If a table contains 250,000 or more rows, 120 POST rows requests per hour per dataset
* 200,000 max rows stored per table in FIFO dataset
* 5,000,000 max rows stored per table in 'none retention policy' dataset
* 4,000 characters per value for string column in POST rows operation
## Configuring the Connection
This section enumerates the options in the **Credentials** and **Details** panes in the Power BI Writeback Connector page. The components of the other panes in this page, **Scheduling** and **Name & Describe Your DataSet**, are universal across most Connector types and are discussed in greater length in [Adding a DataSet Using a Connector](https://domo-support.domo.com/s/article/360042926274?language=en_US "Adding a DataSet Using a Connector").
### Credentials Pane
This pane contains fields for entering credentials to connect to your Power BI account. The following table describes what is needed for each field:
Field | Description |
|---|---|
| Azure Application Client ID | Enter the client ID (GUID) of the client web app obtained from Azure Active Directory configuration. For more information, see " Obtaining the Azure App Client ID". |
| Azure Application Client Secret | Enter the secret key of the client web app. For more information, see "Obtaining the Azure App Client Secret". |
| Azure Tenant ID | Enter your Tenant ID. For more information, see " Obtaining the Tenant ID". |
| Username | Enter your Azure Active Directory username. |
| Password | Enter your Azure Active Directory password. |
Menu | Description |
|---|---|
Input DataSet ID | Enter the DataSet ID (GUID) for the DataSet you want to copy to Sharepoint Online. You can find the ID by opening the details view for the DataSet in the Data Center and looking at the portion of the URL following data sources/. For example, in the URL [https://mycompany.domo.com/datasources/845305d8-da3d-4107-a9d6-13ef3f86d4a4/details/overview](https://mycompany.domo.com/datasources/845305d8-da3d-4107-a9d6-13ef3f86d4a4/details/overview) , the DataSet ID is 845305d8-da3d-4107-a9d6-13ef3f86d4a4. |
| Select Group | Select the group. This is a mandatory field. To learn more about Power BI groups, visit Microsoft's documentation refer to [https://learn.microsoft.com/en-us/power-bi/create-reports/desktop-grouping-and-binning/](https://learn.microsoft.com/en-us/power-bi/create-reports/desktop-grouping-and-binning/) . |
| Enter Dataset Name | Enter the dataset name. |
| Enter Table Name | Enter the table name. |