> ## Documentation Index
> Fetch the complete documentation index at: https://domoinc-openapi-sync-dataflows.mintlify.site/llms.txt
> Use this file to discover all available pages before exploring further.

# FedEx Writeback Connector

## Intro

FedEx Corporation is an American multinational delivery services company. The company is known for its overnight shipping service and pioneering a system that could track packages and provide real-time updates on package location. FedEx help connect people and improve their lives. Use Domo's FedEx Writeback connector to get detailed tracking status information for your tracking numbers.

You connect to your FedEx Writeback account in the Data Center. This topic discusses the fields and menus that are specific to the FedEx Writeback connector user interface. General information for adding DataSets, setting update schedules, and editing DataSet information is discussed in [Adding a DataSet Using a Data Connector](/s/article/360042926274).

<Note>
  **Note:** The owner of a writeback dataset must also be an owner or co-owner of the input dataset.
</Note>

## Prerequisites

To connect to your FedEx Writeback account and get detailed tracking status information for your tracking numbers, you must have the following:

* Developer Test Key
* Password or Security code
* FedEx Shipping Account number
* FedEx Meter number
* Integrator ID

##### To get your credentials, do the following:

1. Visit the [FedEx Developer Resource Center](https://www.fedex.com/en-us/developer.html "https://www.fedex.com/en-us/developer.html").

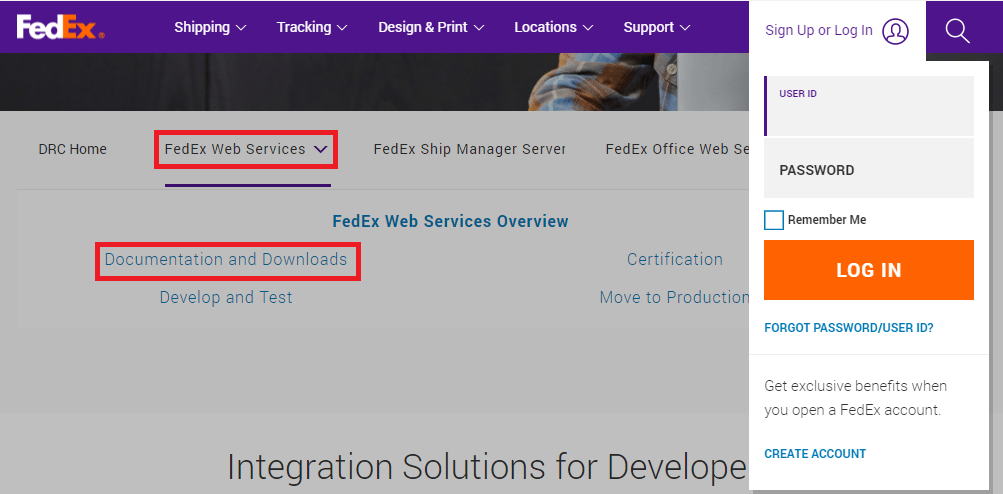
2. Click on **FedEx Web Services** > **Documentation & Downloads**. A Login window will appear.

<Frame>
  <img alt="clipboard_e28f1aeb6e26018cd7e4e72ac1babb05b.png" src="https://mintcdn.com/domoinc-openapi-sync-dataflows/blcgkVgnZv6gj_XY/images/kb/ka05w00000123Ps-00N5w00000Ri7BU-0EM5w000005vO9V.png?fit=max&auto=format&n=blcgkVgnZv6gj_XY&q=85&s=8307e5a04e21c037e508811d6be0e25e" width="1003" height="494" data-path="images/kb/ka05w00000123Ps-00N5w00000Ri7BU-0EM5w000005vO9V.png" />
</Frame>

3. Login with your FedEx credentials.

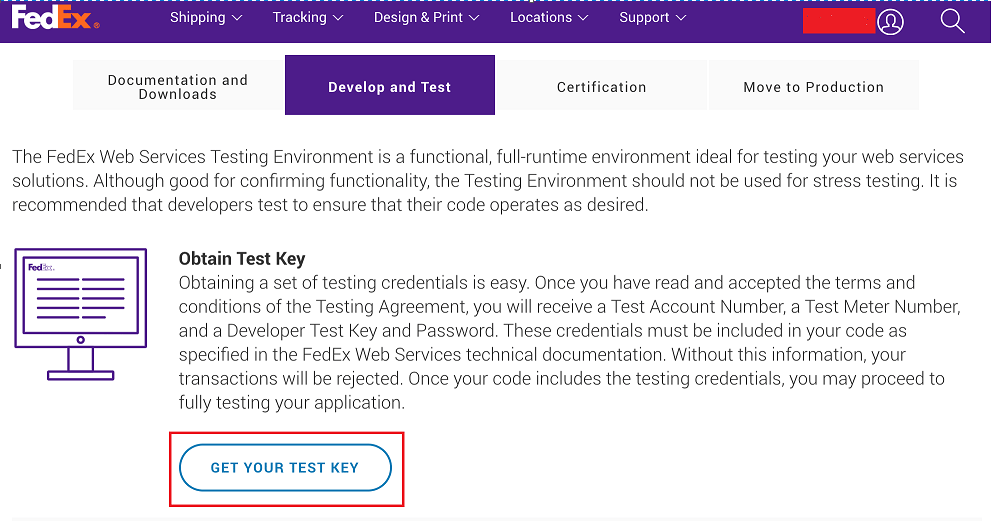
4. In the **Develop and Test** tab, click on **Get Your Test Key** button to get your Test Account Number, Test Meter Number, Developer Test Key, and Password.
<Frame>
  <img alt="Screen4.PNG" src="https://mintcdn.com/domoinc-openapi-sync-dataflows/blcgkVgnZv6gj_XY/images/kb/ka05w00000123Ps-00N5w00000Ri7BU-0EM5w000005vO9X.png?fit=max&auto=format&n=blcgkVgnZv6gj_XY&q=85&s=3f4d4cb3e454a042503f18cc06138a0a" width="991" height="521" data-path="images/kb/ka05w00000123Ps-00N5w00000Ri7BU-0EM5w000005vO9X.png" />
</Frame>

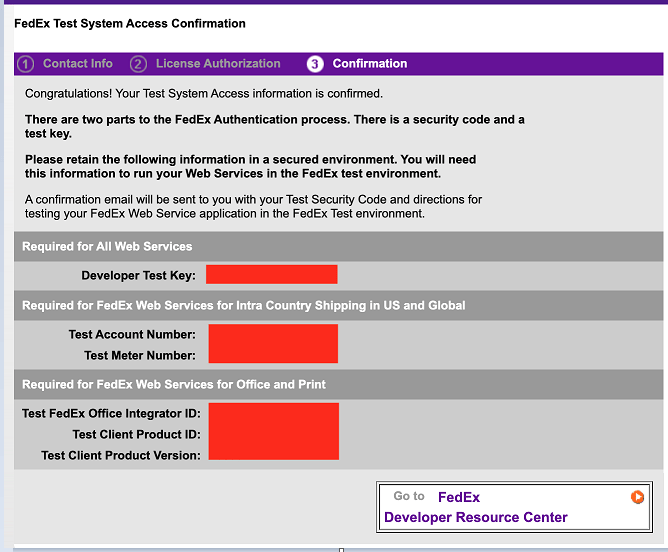
5. Fill out the requested information and click Submit. You will receive your account credentials on the confirmation page and in an email.
<Frame>
  <img alt="Screen5.PNG" src="https://mintcdn.com/domoinc-openapi-sync-dataflows/blcgkVgnZv6gj_XY/images/kb/ka05w00000123Ps-00N5w00000Ri7BU-0EM5w000005vO9Q.png?fit=max&auto=format&n=blcgkVgnZv6gj_XY&q=85&s=f0c982e159805da9ddceeb3e11003871" width="668" height="552" data-path="images/kb/ka05w00000123Ps-00N5w00000Ri7BU-0EM5w000005vO9Q.png" />
</Frame>

You will receive the **URL** and **Password** in an email while your **Developer Test Key**, **Test Account Number**, and **Test Meter Number** will appear on the confirmation page as well as in the email.

## Connecting to Your FedEx Writeback Account

This section enumerates the options in the **Credentials** and **Details** panes in the FedEx Writeback Connector page. The components of the other panes in this page, **Scheduling** and **Name & Describe Your DataSet**, are universal across most connector types and are discussed in greater length in [Adding a DataSet Using a Data Connector](/s/article/360042926274 "Adding a DataSet Using a Data Connector").

### Credentials Pane

This pane contains fields for entering credentials to connect to your FedEx Writeback account. The following table describes what is needed for each field:

<table border="1" cellpadding="1" cellspacing="1" data-aura-rendered-by="33:195;a"><thead><tr><th colspan="1" rowspan="1"><p><span class="s1"> Field </span></p></th><th colspan="1" rowspan="1"><p><span class="s1"> Description </span></p></th></tr></thead><tbody><tr><td colspan="1" rowspan="1"> URL </td><td colspan="1" rowspan="1"> Enter the API URL received in the email. For more information, see <a href="#h_01EJS4MJ988XNFX368HMDFHYSN" target="_self" title="FedEx Writeback Connector"> Prerequisites </a>. </td></tr><tr><td colspan="1" rowspan="1"> Key </td><td colspan="1" rowspan="1"> Enter your Developer Test key. For more information, see <a href="#h_01EJS4MJ988XNFX368HMDFHYSN" target="_self" title="FedEx Writeback Connector"> Prerequisites </a>. </td></tr><tr><td colspan="1" rowspan="1"> Password </td><td colspan="1" rowspan="1"> Enter the password received in the email. For more information, see <a href="#h_01EJS4MJ988XNFX368HMDFHYSN" target="_self" title="FedEx Writeback Connector"> Prerequisites </a>. </td></tr><tr><td colspan="1" rowspan="1"> Account number </td><td colspan="1" rowspan="1"> Enter your Test Account number. For more information, see <a href="#h_01EJS4MJ988XNFX368HMDFHYSN" target="_self" title="FedEx Writeback Connector"> Prerequisites </a>. </td></tr><tr><td colspan="1" rowspan="1"> Meter number </td><td colspan="1" rowspan="1"> Enter your Test Meter number. For more information, see <a href="#h_01EJS4MJ988XNFX368HMDFHYSN" target="_self" title="FedEx Writeback Connector"> Prerequisites </a>. </td></tr><tr><td colspan="1" rowspan="1"> Integrator ID </td><td colspan="1" rowspan="1"> Enter the integrator ID </td></tr></tbody></table>

Once you have entered valid credentials, you can use the same account any time you go to set up a new Domo-FedEx connection. You can manage connector accounts in the **Accounts** tab in the Data Center. For more information about this tab, see [Managing User Accounts for Connectors](/s/article/360042926054 "Managing User Accounts for Connectors").

### Details Pane

This pane contains a number of fields for specifying your data and indicating where it's going.

<table border="1" cellpadding="1" cellspacing="1" data-aura-rendered-by="33:195;a"><thead><tr><th colspan="1" rowspan="1"><p> Menu </p></th><th colspan="1" rowspan="1"><p> Description </p></th></tr></thead><tbody><tr><td colspan="1" rowspan="1"> Input DataSet ID </td><td colspan="1" rowspan="1"> Enter your Domo dataset ID (GUID) located in the dataset url. Example- <a href="https://customer.domo.com/datasources/" rel="noopener" target="_blank"> [https://customer.domo.com/datasources/](https://customer.domo.com/datasources/) </a><b><b> aaaaaaaa-bbbb-cccc-dddd-eeeeeeeeeeee </b></b> /details/settings </td></tr><tr><td colspan="1" rowspan="1"> Tracking number column name </td><td colspan="1" rowspan="1"> Enter the column name of the tracking numbers. </td></tr><tr><td colspan="1" rowspan="1"> How would you like us to proceed with invalid tracking numbers? </td><td colspan="1" rowspan="1"> Select if you would like to throw an error message or continue with empty values when invalid tracking numbers are encountered. </td></tr></tbody></table>

### Other Panes

For information about the remaining sections of the connector interface, including how to configure scheduling, retry, and update options, see [Adding a DataSet Using a Data Connector](/s/article/360042926274).
