> ## Documentation Index
> Fetch the complete documentation index at: https://domoinc-openapi-sync-dataflows.mintlify.site/llms.txt
> Use this file to discover all available pages before exploring further.

# Sharing Content Using Slideshows

export const InlineImage = ({src, alt = '', height = '1.6em'}) => {
  return <img noZoom src={src} alt={alt} style={{
    display: 'inline',
    verticalAlign: 'start',
    height: height,
    margin: '0'
  }} />;
};

### Intro

You can create and manage slideshows of your cards with the Slideshow Publications tool. When you create a slideshow publication, it displays in the list on the **Slideshow Publications** page.

Slideshows may be useful in any of the following situations:

* **Wallboards —** You can view vital data about team progress on a wallboard or large monitor.
* **Business presentations —** As the presenter, you can pause the slideshow to discuss slides in more detail.
* **Company kiosks —** You can play a slideshow on a monitor.
* **Departmental monitors —** You can play a slideshow of cards that pertain to a department. For example, your sales team could view a slideshow of cards displaying sales during a selected time period.

# Slideshow Types

There are two types of slideshows in Domo:

* **Slideshow Publications —** Display your content in a slideshow publication. You can either export the slideshow publications to other formats or securely publish them to the web.
* **One-time Page Slideshows —** These are simple Slideshows of all of the cards on a dashboard. They are unsaved—you simply select the **View Page as Slideshow** option for a dashboard and the Slideshow plays.

You can view your slideshow publication in kiosk mode on a wallboard, TV, or large monitor in a web browser by signing in to Domo and playing the slideshow publication.

<Note>
  **Note:** If you cannot see card labels in your slideshows, this may be because of resolution limitations when sizing the window. If you have this problem, try resizing your windows to fit the labels and then refreshing your screen.
</Note>

***

### Access Slideshow Publications

You can access Slideshow Publications from the main navigation by selecting **More** > **Slideshow** **Publications**.

Slideshow publications allow viewers outside of Domo to view the content. When you publish a slideshow, Domo creates a URL for accessing the slideshow on the web. You can send an email containing the URL link to others, inviting them to view the slideshow. You can publish the slideshow privately; this requires viewers to provide an access code to view the slideshow.

You can also schedule reports to be sent at specified intervals to users and groups in your organization.

<Note>
  **Note**: Domo Slideshows stay synced to the cards they contain. This means that when data in any card changes, the Slideshow instantly updates to reflect the changes. If you would prefer to have a one-time, unchanging snapshot of card data in your Slideshow, you can export a Slideshow as a Microsoft PowerPoint presentation. For more information, see [Export Visualization Cards](/s/article/360043437813).
</Note>

For information about the layout of the Publications Page, see [Publications Page Layout](/s/article/360042933014 "Publications Page Layout").

### Create a Slideshow Publication

There are two ways to create Slideshows in Domo:

* From the
  [**Publications** page](#slideshow_from_publications)
* From a
  [dashboard](#slideshow_from_dashboard)

#### Create a Slideshow from Publications

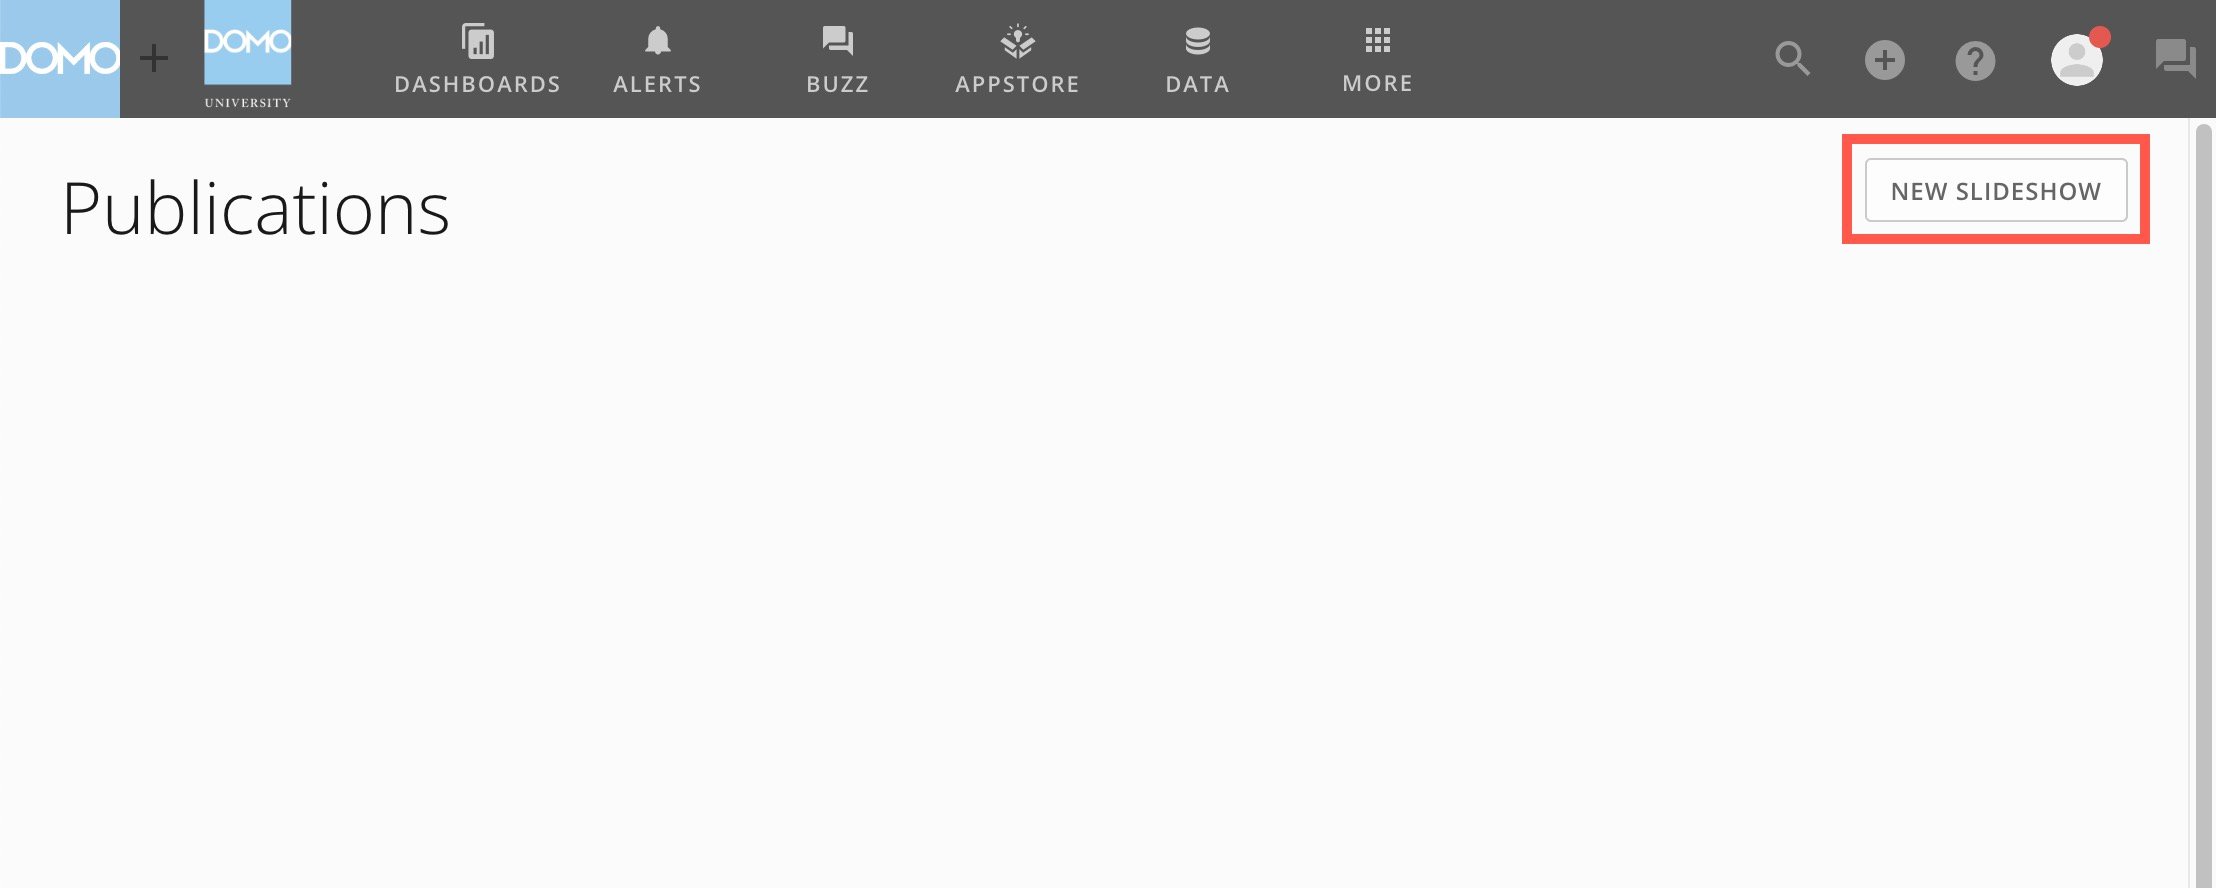
1. From the navigation header, select **More** > **Publications**.

   The **Publications** page displays.
2. Select **New Slideshow**.

   <Frame>
     <img src="https://mintcdn.com/domoinc-openapi-sync-dataflows/y73kYVYT02nhoBL7/images/kb/ka05w000001299I-00N5w00000Ri7BU-0EM5w000006v6pE.jpg?fit=max&auto=format&n=y73kYVYT02nhoBL7&q=85&s=8b3d84765c08d86e86e6f0a35e6c668e" width="2216" height="888" data-path="images/kb/ka05w000001299I-00N5w00000Ri7BU-0EM5w000006v6pE.jpg" />
   </Frame>

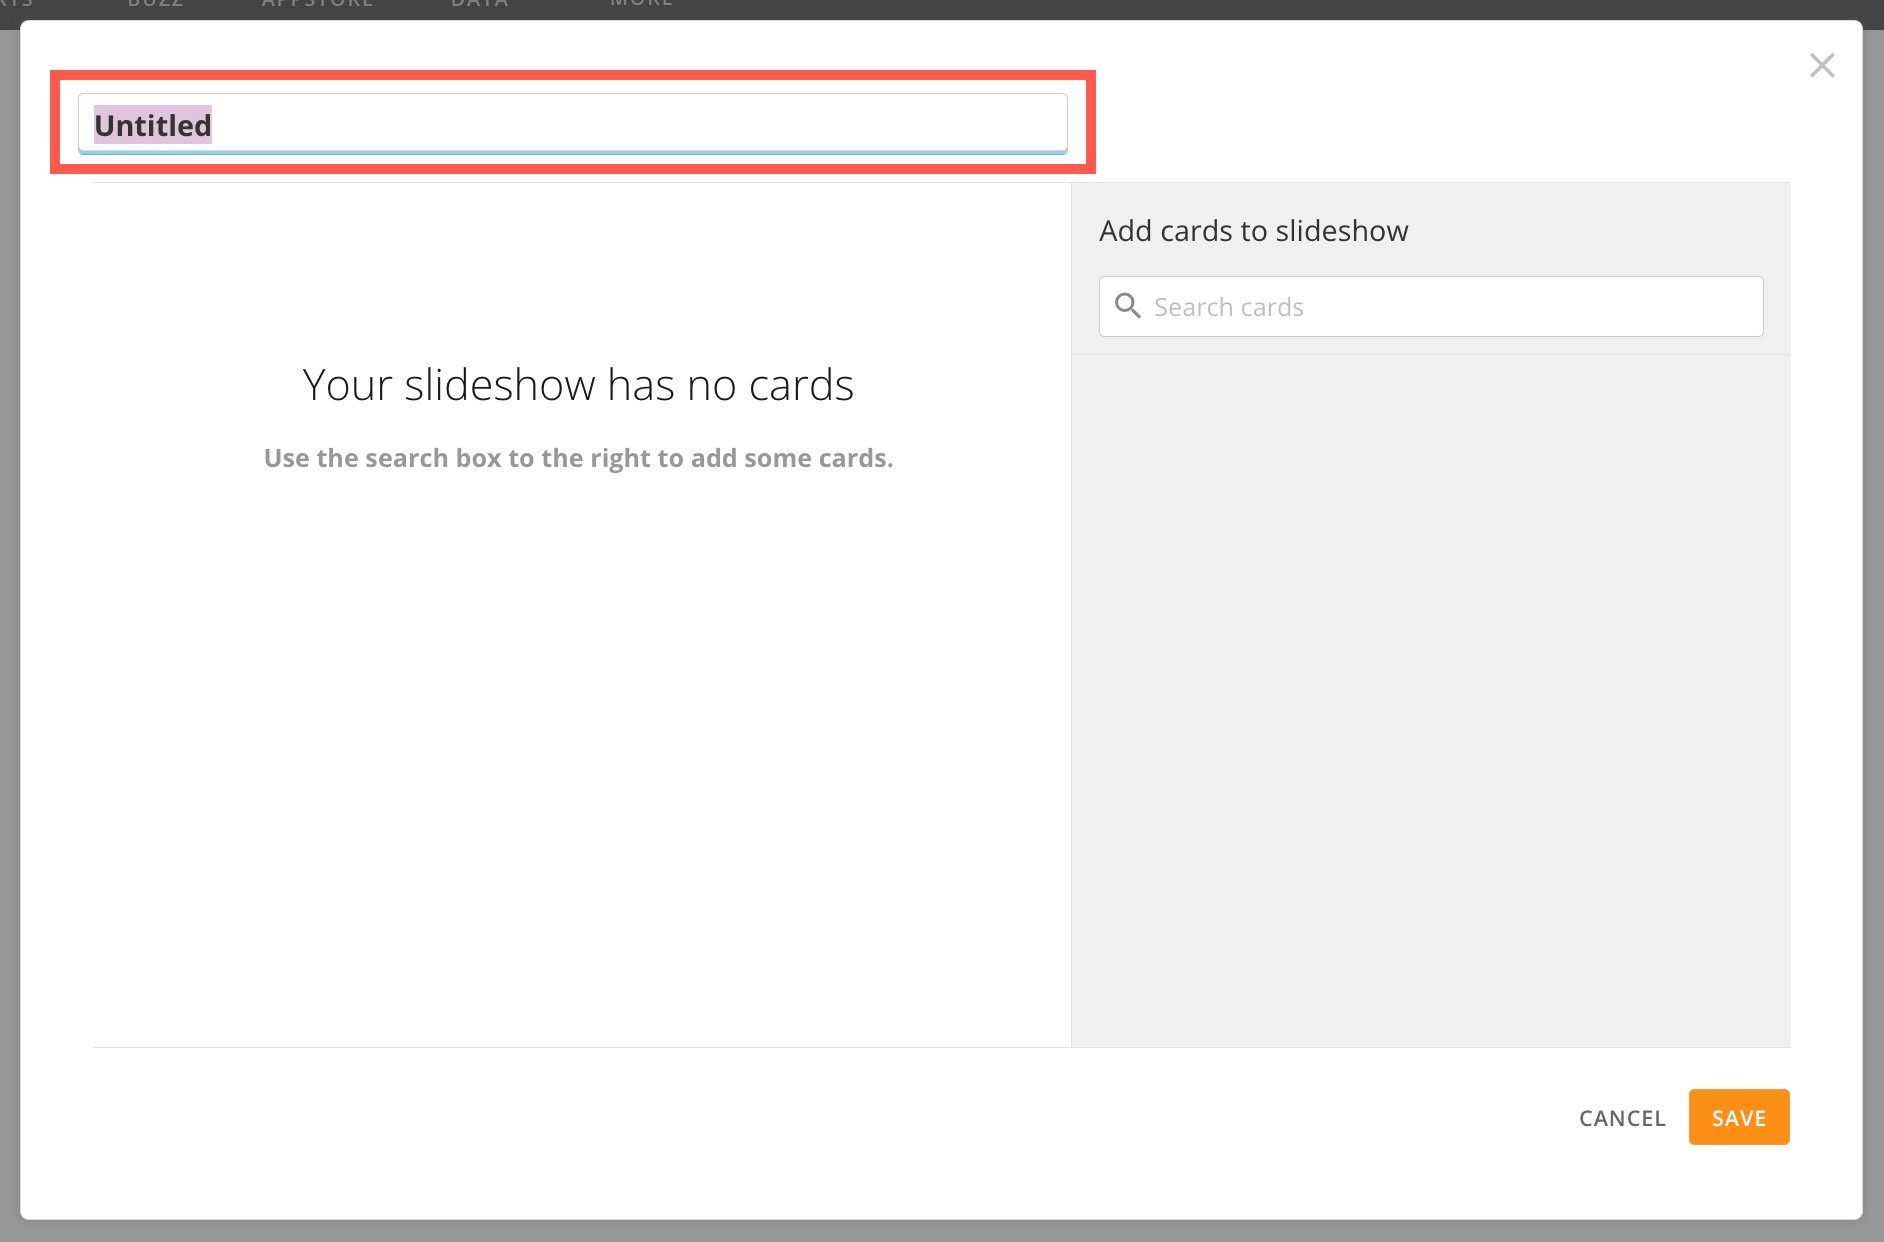
   A modal displays where you can add cards to your Slideshow.
3. Enter a title for your Slideshow. The default name is "Untitled."
   <Frame>
     <img alt="enter a title.jpg" src="https://mintcdn.com/domoinc-openapi-sync-dataflows/y73kYVYT02nhoBL7/images/kb/ka05w000001299I-00N5w00000Ri7BU-0EM5w000006v6l3.jpg?fit=max&auto=format&n=y73kYVYT02nhoBL7&q=85&s=b8a379c1f7e609b4078e48fd654abcfb" style={{width: 678.984, height: 445.987}} width="1884" height="1242" data-path="images/kb/ka05w000001299I-00N5w00000Ri7BU-0EM5w000006v6l3.jpg" />
   </Frame>
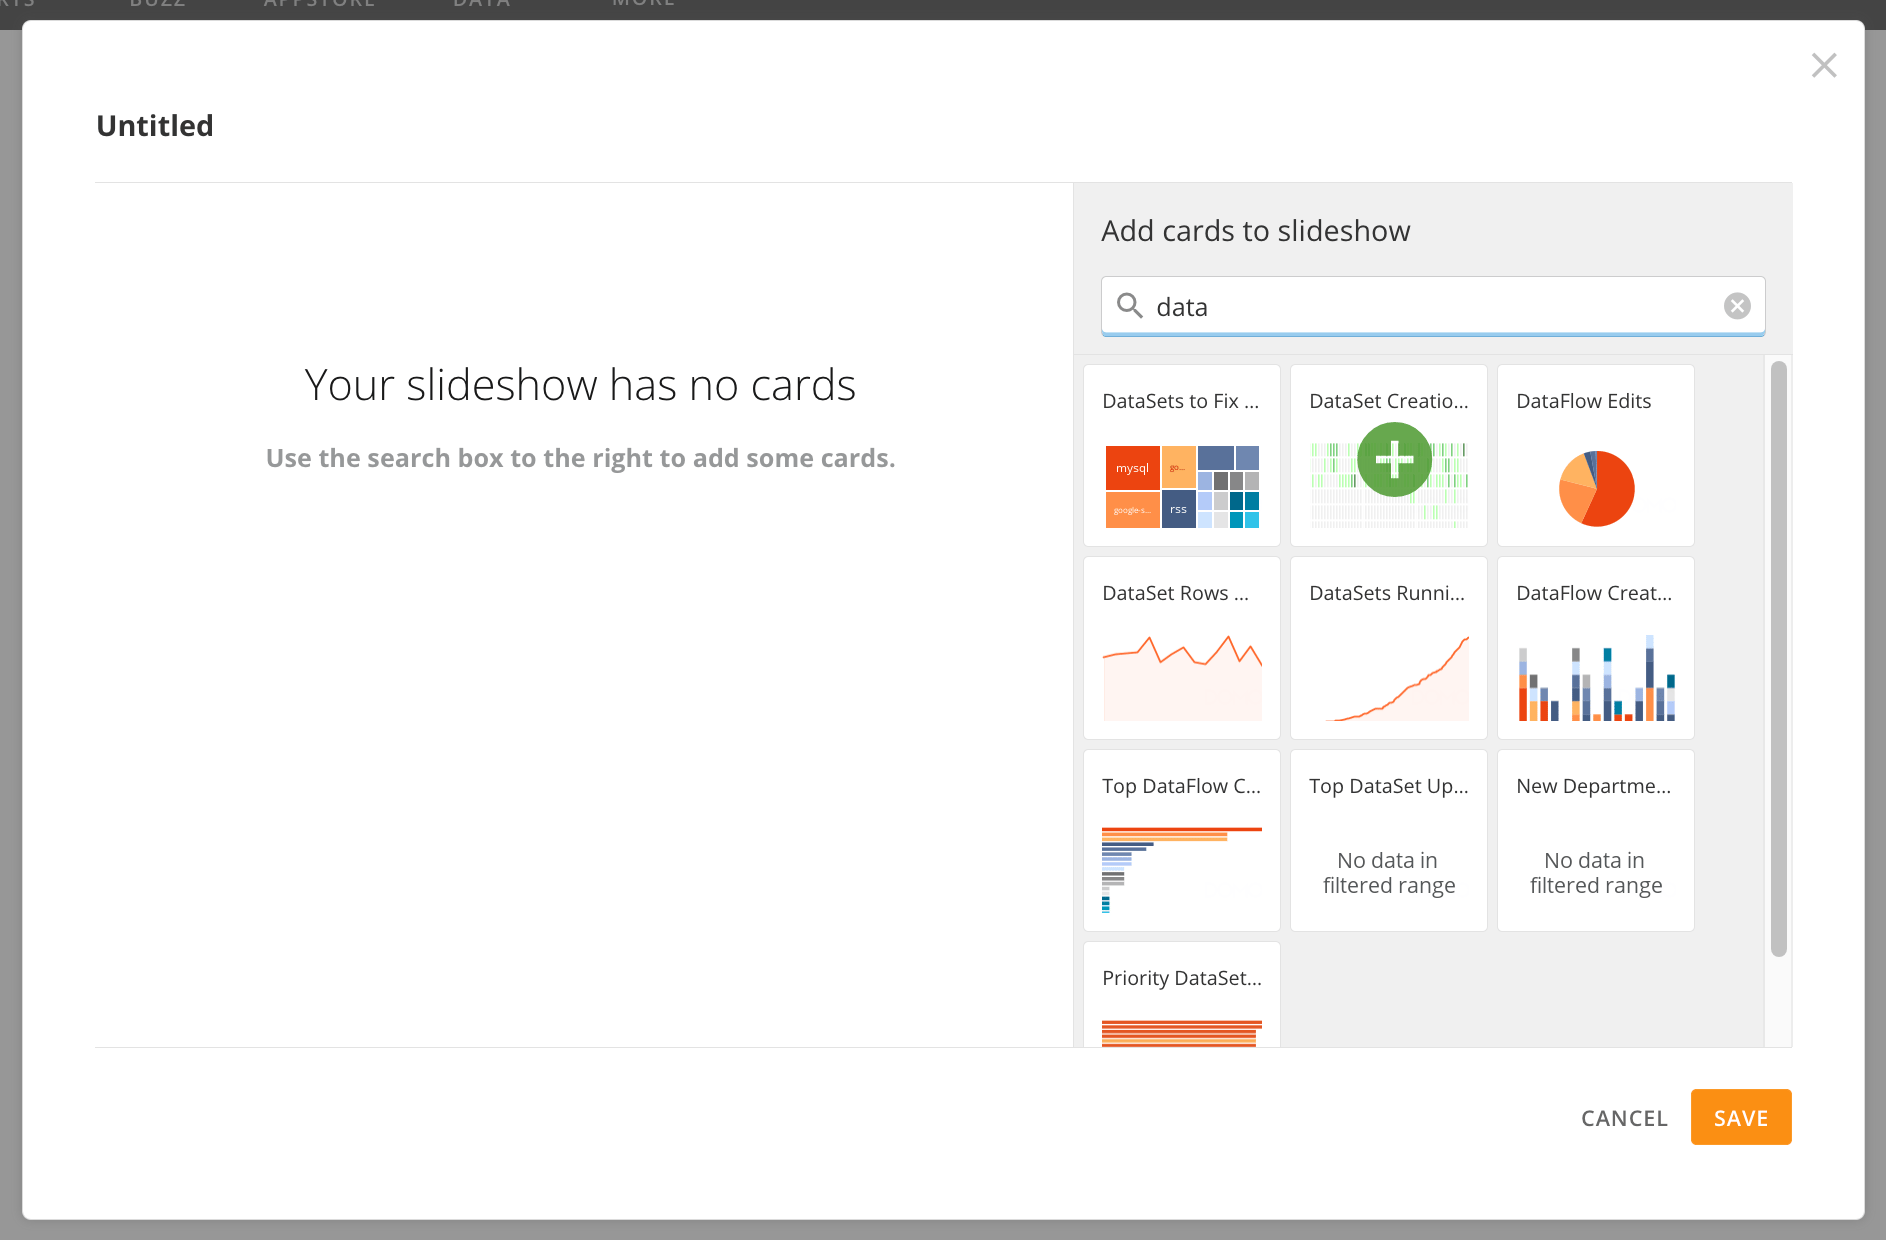
4. In the dialog, search for and select cards you want to add to your Slideshow. When you hover over a card in the search area, a
   <InlineImage src="/images/kb/ka05w000001299I-00N5w00000Ri7BU-0EM5w000006v6ql.jpg" /> green plus displays. Select it to add the card to your Slideshow.

   <Frame>
     <img alt="Screenshot 2023-06-23 at 4.07.05 PM.png" src="https://mintcdn.com/domoinc-openapi-sync-dataflows/y73kYVYT02nhoBL7/images/kb/ka05w000001299I-00N5w00000Ri7BU-0EM5w000006v6qg.jpg?fit=max&auto=format&n=y73kYVYT02nhoBL7&q=85&s=5deb91bcce51f5c7fe2d5987ea5a2ff9" style={{width: 678.991, height: 445.994}} width="1886" height="1240" data-path="images/kb/ka05w000001299I-00N5w00000Ri7BU-0EM5w000006v6qg.jpg" />
   </Frame>
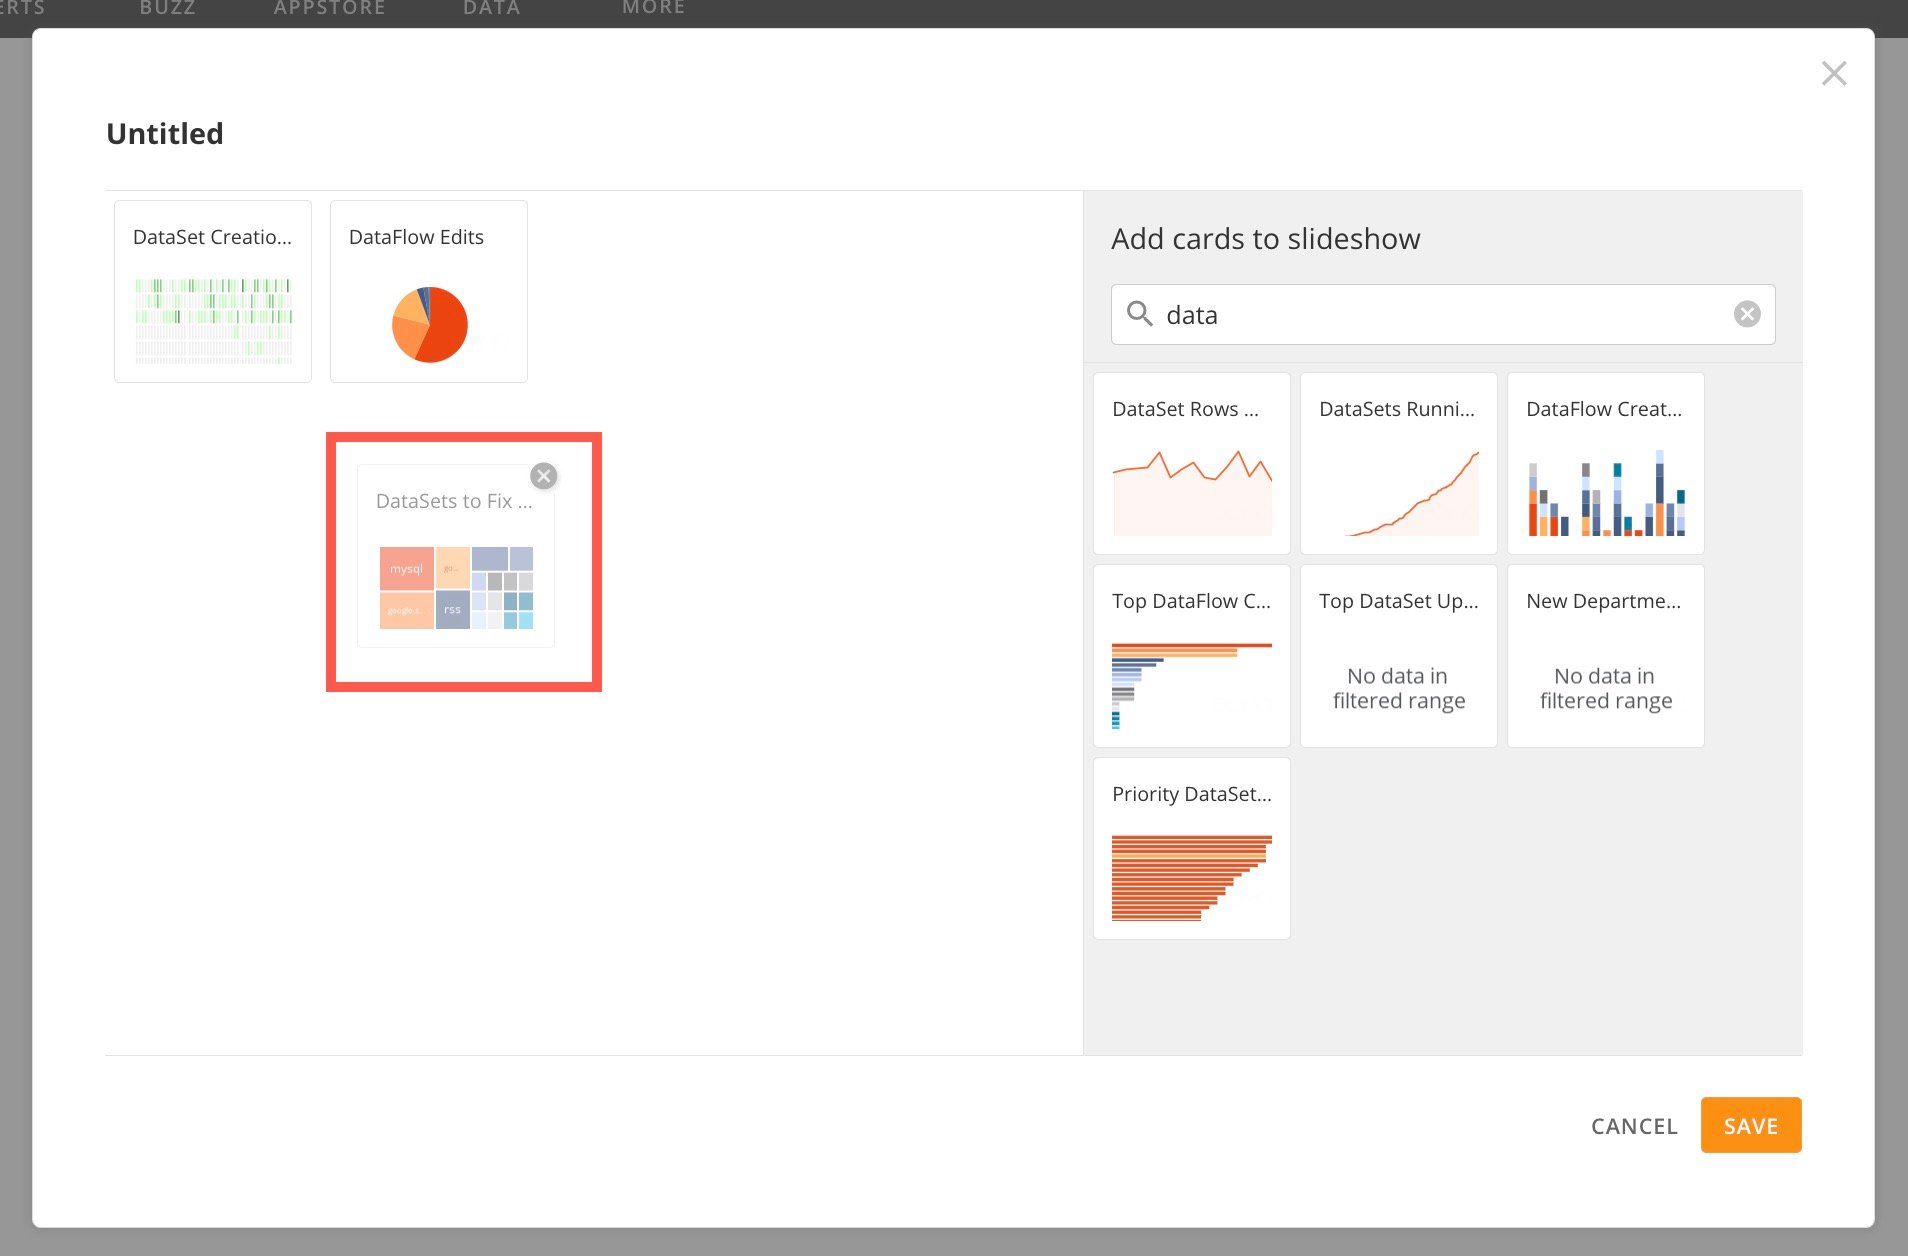
5. (Optional) The order of the cards in the modal is the order in which they display in the Slideshow. Drag the cards to reorder them if necessary.
   <Frame>
     <img alt="drag card.jpg" src="https://mintcdn.com/domoinc-openapi-sync-dataflows/y73kYVYT02nhoBL7/images/kb/ka05w000001299I-00N5w00000Ri7BU-0EM5w000006v6r5.jpg?fit=max&auto=format&n=y73kYVYT02nhoBL7&q=85&s=2e4a17e855cd81dcaea4a555234f8d3f" style={{width: 678.984, height: 445.987}} width="1908" height="1256" data-path="images/kb/ka05w000001299I-00N5w00000Ri7BU-0EM5w000006v6r5.jpg" />
   </Frame>
6. (Optional) Hover over a card and select
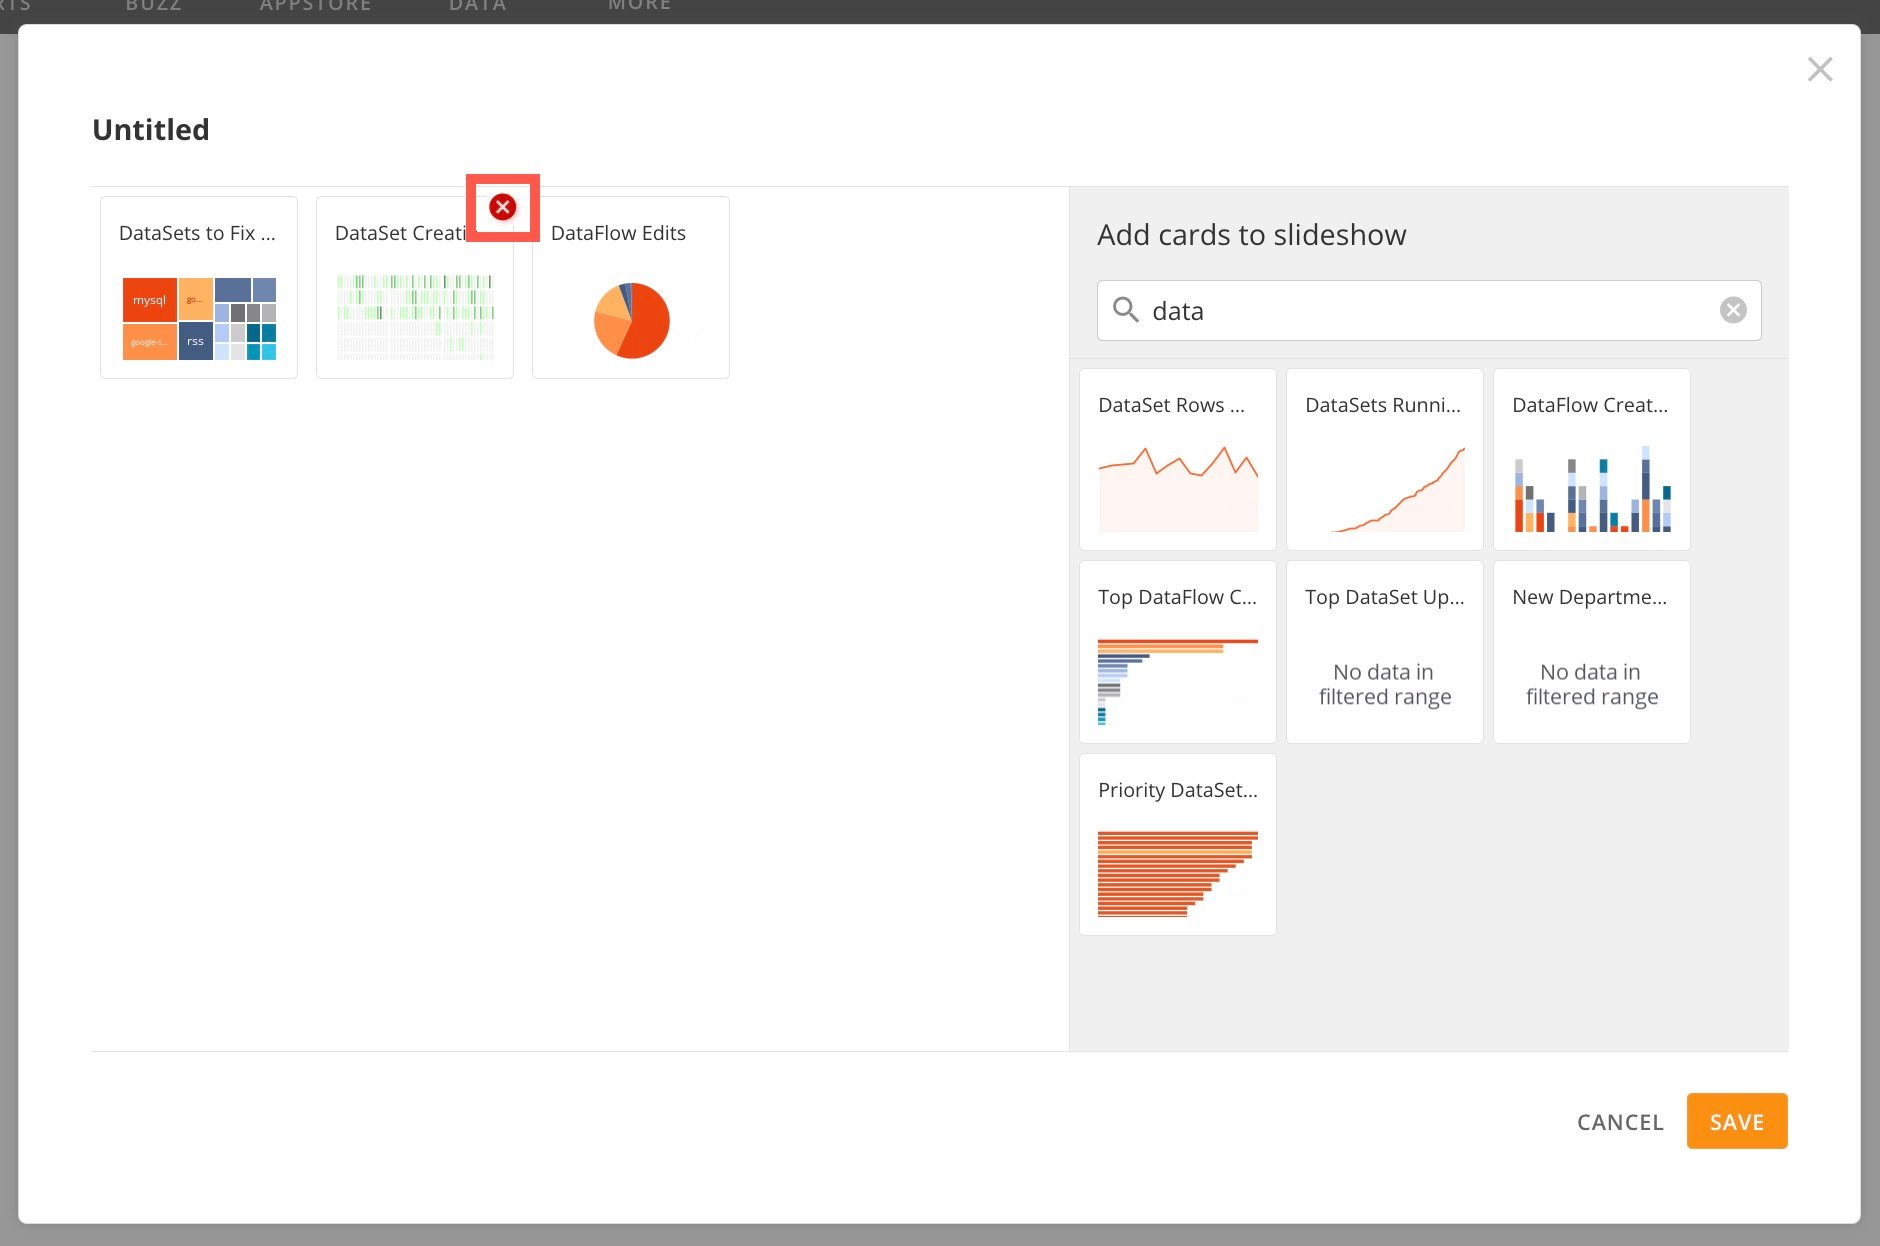
   <InlineImage src="/images/kb/ka05w000001299I-00N5w00000Ri7BU-0EM5w000006v6qv.jpg" /> **Delete** to remove the card from your Slideshow.

   <Frame>
     <img alt="remove card.jpg" src="https://mintcdn.com/domoinc-openapi-sync-dataflows/y73kYVYT02nhoBL7/images/kb/ka05w000001299I-00N5w00000Ri7BU-0EM5w000006v6r0.jpg?fit=max&auto=format&n=y73kYVYT02nhoBL7&q=85&s=db580f9477ca198fb0e59a40e4bdc43a" style={{width: 678.984, height: 445.987}} width="1880" height="1246" data-path="images/kb/ka05w000001299I-00N5w00000Ri7BU-0EM5w000006v6r0.jpg" />
   </Frame>
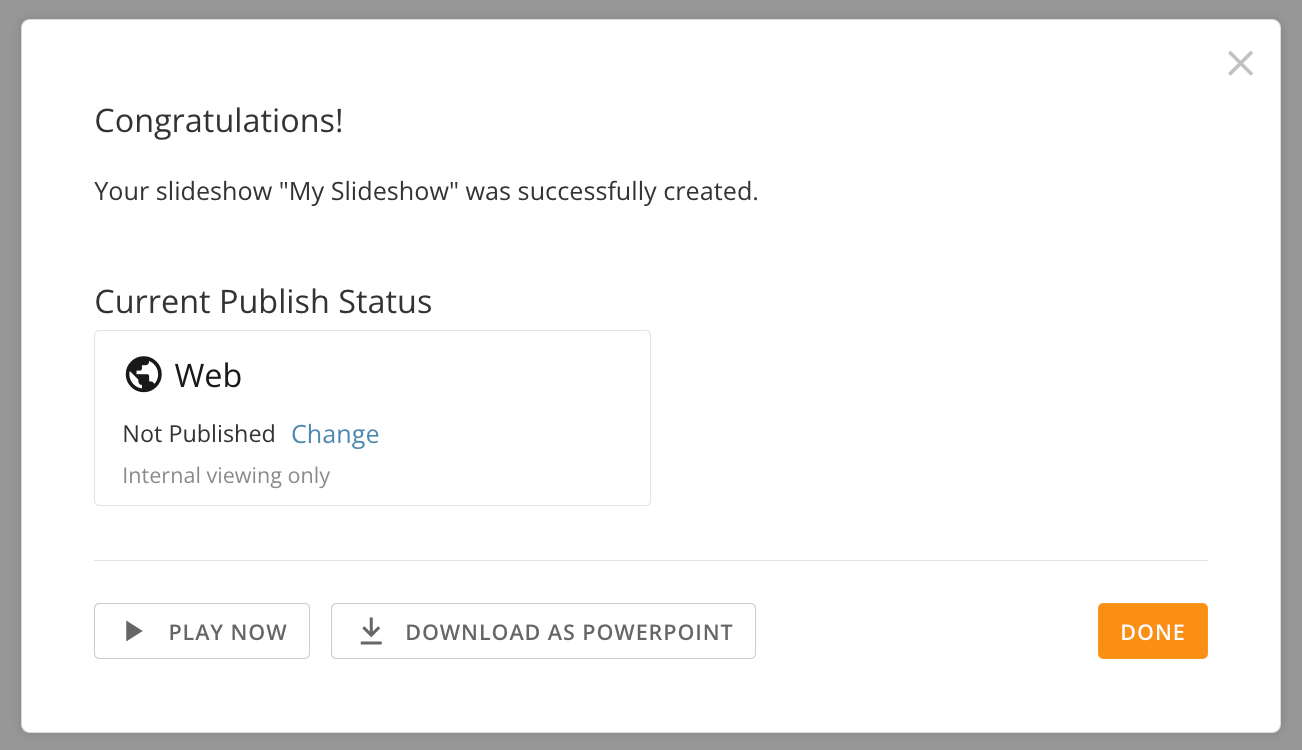
7. Select **Save**. A dialog indicates that your Slideshow has been created successfully and displays the current publish status of the Slideshow.
   <Frame>
     <img alt="Screenshot 2023-06-23 at 4.37.12 PM.png" src="https://mintcdn.com/domoinc-openapi-sync-dataflows/y73kYVYT02nhoBL7/images/kb/ka05w000001299I-00N5w00000Ri7BU-0EM5w000006v6ro.jpg?fit=max&auto=format&n=y73kYVYT02nhoBL7&q=85&s=a7c28bfd510be9c5fe65b6c5104b6959" style={{width: 484.993, height: 278.999}} width="1302" height="750" data-path="images/kb/ka05w000001299I-00N5w00000Ri7BU-0EM5w000006v6ro.jpg" />
   </Frame>
8. (Optional) Select **Change** if you want to publish your Slideshow to the web. There are three publishing options, described below: **Not Published —** Only internal users can view the Slideshow. **Public —** Anyone with a link to the Slideshow can view it. If you select this option, an editable URL displays as well as an option to **Email Web Link**. Select **Done** when finished. **Private —** The Slideshow is published to the web, but people must have a link and an access code to view it. If you select this option, an editable URL and access code display. Select **Done** when finished.
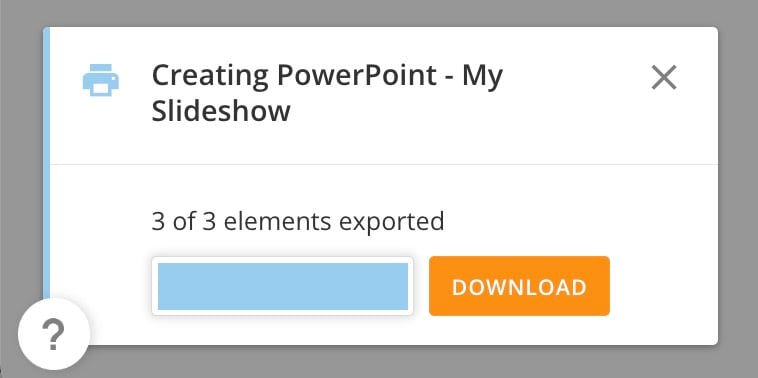
9. (Optional) From this dialog, you have four options, described below: Select **Done** to view your Slideshow on the **Publications** page. Select **Play Now** to view the Slideshow in presentation mode. Learn more about presentation mode below. Select **Download as PowerPoint** to create a PPT file of your Slideshow. When the file is ready, a popup indicates that the file is ready. Select **Download** to download the file to your machine.
   <Frame>
     <img alt="ppt file ready.jpg" src="https://mintcdn.com/domoinc-openapi-sync-dataflows/y73kYVYT02nhoBL7/images/kb/ka05w000001299I-00N5w00000Ri7BU-0EM5w000006v6sD.jpg?fit=max&auto=format&n=y73kYVYT02nhoBL7&q=85&s=fac37a966ad9a97f3689f28f18c04a45" style={{width: 339.993, height: 170}} width="758" height="378" data-path="images/kb/ka05w000001299I-00N5w00000Ri7BU-0EM5w000006v6sD.jpg" />
   </Frame>

#### Create a Slideshow from a Dashboard

1. Select **New Slideshow** on the **Publications** page and [add each card to the Slideshow individually](#add_cards_individually).
2. Select
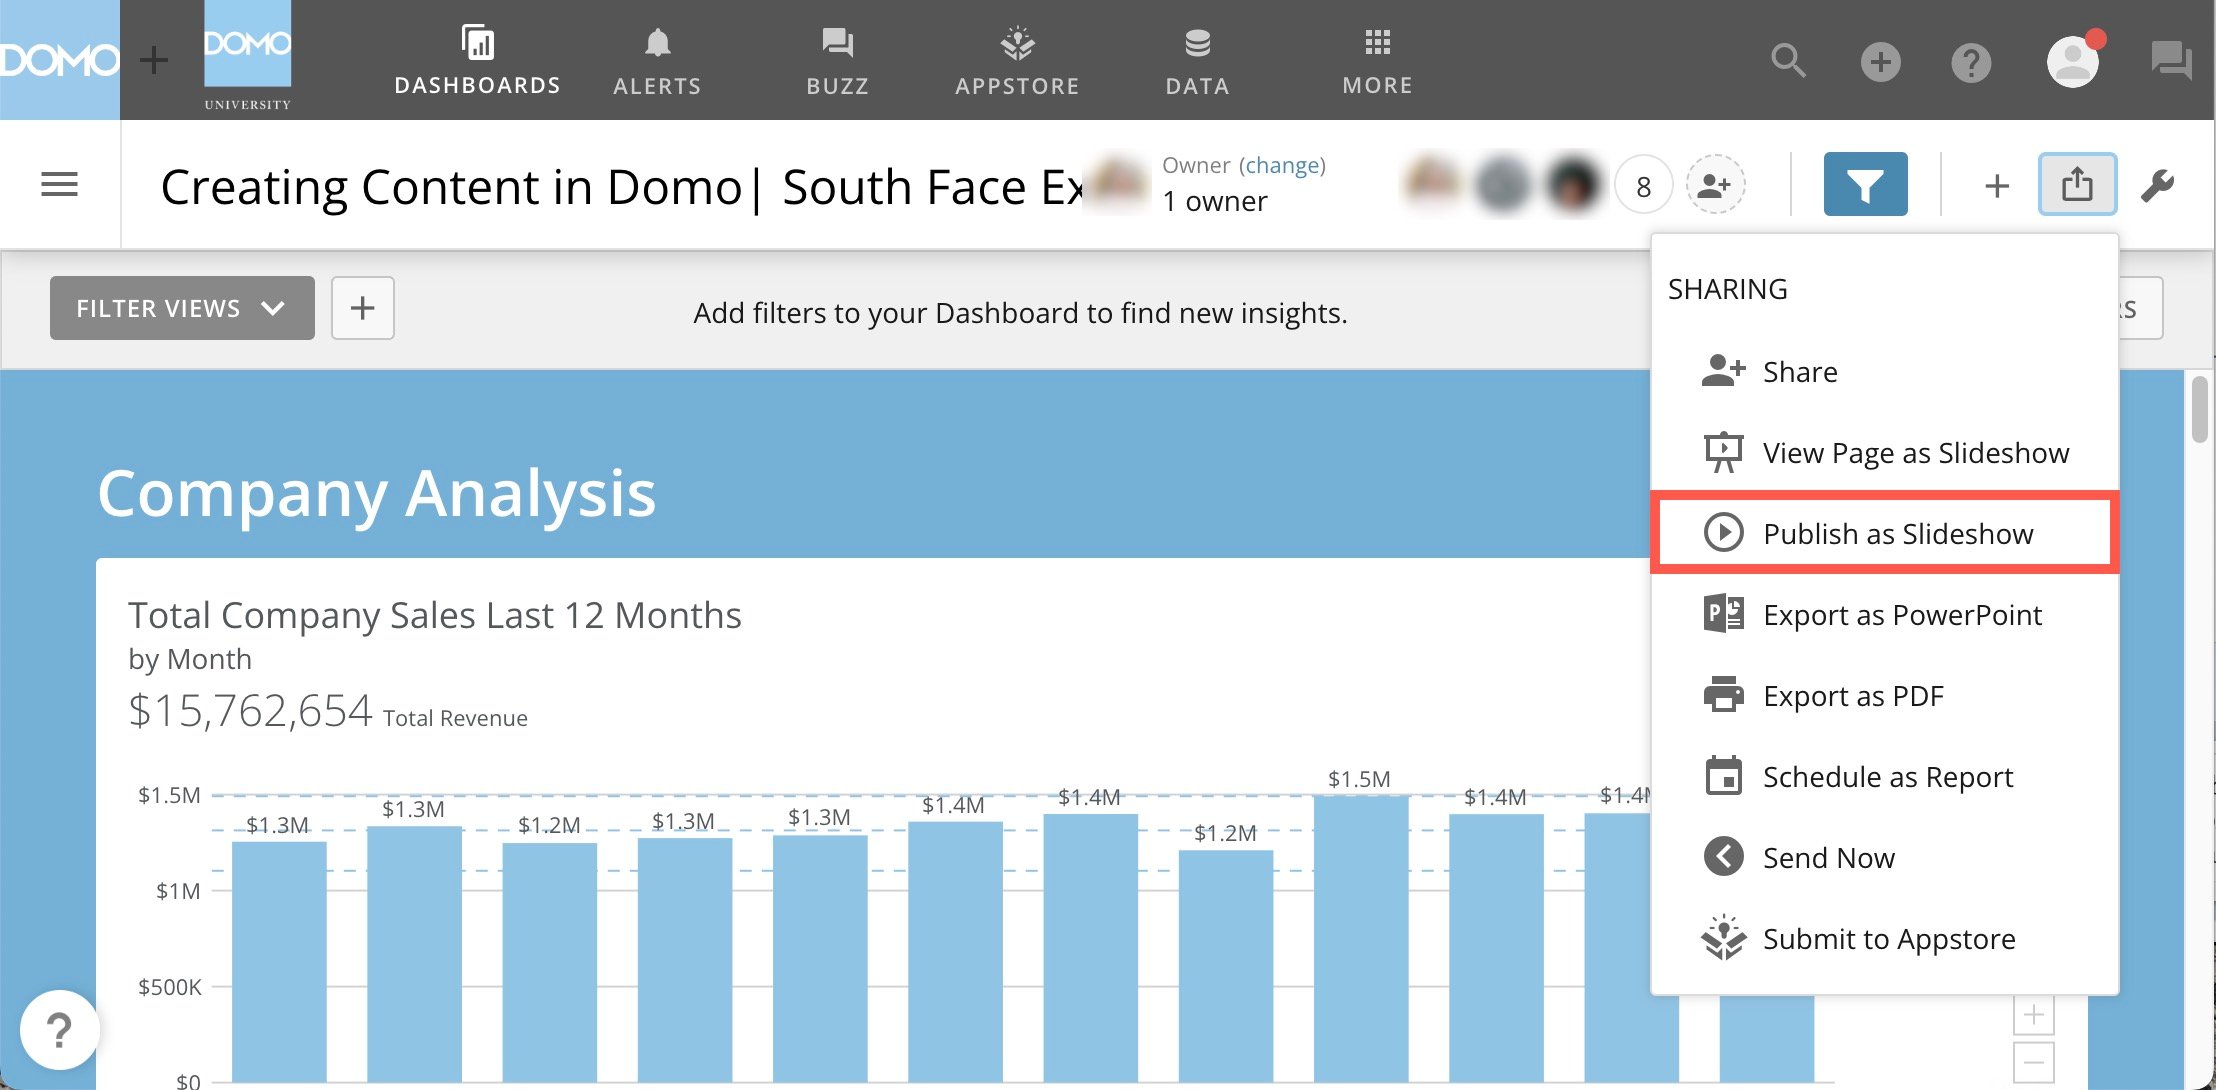
   <InlineImage src="/images/kb/ka05w000001299I-00N5w00000Ri7BU-0EM5w000006v6pY.jpg" /> **Sharing** > **Publish as Slideshow** from a dashboard. This creates a Slideshow from all of the cards on that dashboard. You can then add additional cards if you would like.

   <Frame>
     <img alt="publish as slideshow.jpg" src="https://mintcdn.com/domoinc-openapi-sync-dataflows/y73kYVYT02nhoBL7/images/kb/ka05w000001299I-00N5w00000Ri7BU-0EM5w000006v6pd.jpg?fit=max&auto=format&n=y73kYVYT02nhoBL7&q=85&s=7f52bca4c014aeb7f3c46a3b195cd0ba" style={{width: 653.984, height: 321.996}} width="2216" height="1090" data-path="images/kb/ka05w000001299I-00N5w00000Ri7BU-0EM5w000006v6pd.jpg" />
   </Frame>

#### Add Cards Individually

Follow these steps to create a Slideshow by adding individual cards:

<Note>
  **Note:** If you add cards with Analyzer-filtered data to a Slideshow, the filtered version is the one that appears in the Slideshow. Likewise, if you add a card to a Slideshow in which the data is filtered due to PDP policies, the filtered version appears in the Slideshow. This is the version *all* users see when they view the published Slideshow, regardless of their permissions. For more information about Analyzer, see [Analyzer Layout](/s/article/360042924034 "Analyzing Data").
</Note>

1. (Optional) To reorder slides in a Slideshow, reposition the cards as necessary by dragging them to where you want and cropping them.
2. Select **Save**.
3. (Optional) Do any of the following:

   * Share the Slideshow with others by clicking **Change** and selecting the Publish option you want.
   * View the Slideshow by clicking **Play Now**.
   * Export the Slideshow as a Microsoft PowerPoint presentation by clicking **Download as PowerPoint**.
4. Click **Done**.

**To create a Publication from all the Cards in a Page,**

1. Navigate to the Page with Cards you want to add to a Slideshow.
2. Click
   <InlineImage src="/images/kb/ka05w00000124S5-00N5w00000Ri7BU-0EM5w000005vOAW.png" /> in the upper right area of the Page.
3. Select **Publish as Slideshow**.

   Domo adds the Cards on the Page as slides in a Slideshow that you can save.
4. (Optional) Edit the name of the Slideshow.
5. (Optional) Add additional Cards to your Slideshow by specifying Cards by name.
6. Click **Save** to add the selected Cards as slides in your Slideshow.

   By default, your Slideshow is not published.
7. Do one of the following:

* Publish the Slideshow by clicking **Change**, selecting the Publish option you want, then clicking **Done**.
* Play the Slideshow by clicking **Play Now**.
* Export the Slideshow as a Microsoft PowerPoint presentation by clicking **Download as PowerPoint**.

#### Publication options

The following table describes the available options when publishing a Publication:

<table border="1" cellpadding="1" cellspacing="1" data-aura-rendered-by="33:199;a"><thead><tr><th colspan="1" rowspan="1"><p> Publication Status </p></th><th colspan="1" rowspan="1"><p> Description </p></th></tr></thead><tbody><tr><td colspan="1" rowspan="1"><p> Not Published </p><p /></td><td colspan="1" rowspan="1"><p> The Slideshow is viewable from Domo but is <em> not </em> published to the Web. </p></td></tr><tr><td colspan="1" rowspan="1"><p> Public </p></td><td colspan="1" rowspan="1"><p> The Slideshow is available publicly on the Web using the URL. You can email the URL link to others. </p></td></tr><tr><td colspan="1" rowspan="1"><p> Private </p></td><td colspan="1" rowspan="1"><p> The Slideshow is available privately on the Web using the URL and the access code. You can email the URL link and access code to others. </p></td></tr></tbody></table>

#### Adding Cards to a Publication

You can add Cards to a saved Publication in the Publication Page.

You can add an individual Card on a Page to an existing report by selecting <InlineImage src="/images/kb/ka05w00000126DW-00N5w00000Ri7BU-0EM5w000005vZ3K.png" /> > Schedule Report then choosing the Add to Report option. You can then choose the report you want to add the Card to.

**To add Cards to a Publication,**

1. Select **More > Publications**.

2. For the Slideshow you want to add Cards to, select
   <InlineImage src="/images/kb/ka05w00000126DW-00N5w00000Ri7BU-0EM5w000005vZ3K.png" /> **> Edit**.

3. Enter the name of the Card you want to add in the **Search for additional Cards to add** field.

   The top results for your search appear automatically in a list as you enter characters and filter accordingly as you add or remove characters.

4. Select the Card you want to add in the list.

   The name of the Card is added to the field.

   <Note>
     **Note:** If you add Cards with Analyzer-filtered data to a Slideshow, the filtered version is the one that appears in the Slideshow. Likewise, if you add a Card to a Slideshow in which the data is filtered by PDP policies, the Slideshow is filtered based on your access, as defined by PDP. All users will see data based on the access of the user that creates the Publication. For more information about Analyzer, see [Analyzer Layout](/s/article/360042924034 "Analyzing Data").
   </Note>

5. (Optional) Add additional Cards to this Slideshow by repeating the previous two steps.

6. (Optional) Remove a Card from the field by clicking the "x" to the right of the Card name.

7. Click **Add** to add all Cards whose names appear in the field into the Slideshow.

Slides for the Cards you added appear in this Publication. The order of Cards in the Slideshow is determined by the order of Cards in this dialog. You can rearrange Cards in the dialog by clicking and dragging as necessary.

<Note>
  **Note:** The order of Cards in a Slideshow is set when the Slideshow is generated—that is, changing the order of Cards in the source Page does *not* affect the Slideshow.
</Note>

#### Sharing a Publication

With any Publication, you can choose whether you want to share it with selected individuals or not. When you publish a Publication, you can publish it publicly (URL) or privately (URL and access code). Also, you can send an email to let others know how to access the Publication.

**To share a Publication,**

1. In the Publications Page, mouse over the Slideshow you want, then select **Publish**.
2. Select the publish option you want.
3. (Optional) If you publish the Slideshow publicly or privately, you can send an email by clicking **Email web link**, then completing the email message.
4. Click **Done**.

   The publish status appears on the Slideshow on the Publications Page.

### Managing Publications

You can manage Publications in the Publications Page, which displays Slideshows you have created or which others have shared with you. When you mouse over a Slideshow, the Slideshow object flips over to reveal a number of options. You can learn more about these options in the following table:

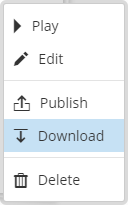
<table border="1" cellpadding="1" cellspacing="1" data-aura-rendered-by="33:199;a"><thead><tr><th colspan="1" rowspan="1"><p> Option </p></th><th colspan="1" rowspan="1"><p> Description </p></th></tr></thead><tbody><tr><td colspan="1" rowspan="1"><p> Play </p></td><td colspan="1" rowspan="1"><p> Plays the Slideshow in the viewer in Domo. For more information about the Slideshow viewer, see <a href="/s/article/360043437793" target="_self" title="Creating and Managing Slideshows"> Using the Slideshow viewer </a>. </p></td></tr><tr><td colspan="1" rowspan="1"><p> Edit </p></td><td colspan="1" rowspan="1"><p> Opens a dialog where you can add or remove Card slides, reorder slides, and rename the Slideshow. Any changes you make are saved when you click <b> Save </b>. </p></td></tr><tr><td colspan="1" rowspan="1"><p> Publish </p></td><td colspan="1" rowspan="1"><p> Displays a dialog where you can set the options for sharing the Slideshow. </p></td></tr><tr><td colspan="1" rowspan="1"><p> Download </p></td><td colspan="1" rowspan="1"><p> Exports the slides in the Slideshow as a Microsoft PowerPoint presentation. For more information, see <a href="/s/article/360043437793" target="_self"> Exporting Publications </a>. </p></td></tr><tr><td colspan="1" rowspan="1"><p> Delete </p></td><td colspan="1" rowspan="1"><p> Deletes the Slideshow from Domo. </p></td></tr></tbody></table>

Add the following rows:

<table border="1" cellpadding="1" cellspacing="1" data-aura-rendered-by="33:199;a"><tbody><tr><td colspan="1" rowspan="1"><div class="comment"><div class="mt-comment-content"><p> Send Report Now </p></div></div></td><td colspan="1" rowspan="1"><div class="comment"><div class="mt-comment-content"><p> Lets you email this report to selected individuals and/or groups in your organization. </p></div></div></td></tr><tr><td colspan="1" rowspan="1"><div class="comment"><div class="mt-comment-content"><p> Schedule Report </p></div></div></td><td colspan="1" rowspan="1"><div class="comment"><div class="mt-comment-content"><p> Lets you set up a schedule to send this report to selected individuals and/or groups in your organization. </p></div></div></td></tr></tbody></table>

You can also add Cards from a Card Page or **Details** view to a report. You do this by selecting <InlineImage src="/images/kb/ka05w00000126DW-00N5w00000Ri7BU-0EM5w000005vZ3K.png" /> **> Schedule Report** for the Card you want to add then clicking the **Add to Report** option. You can then select all of the existing reports you want to add this Card to.

## Exporting Publications

You can export slides of KPI Cards from a Publication as a Microsoft PowerPoint presentation. Exporting may be useful when you want to present a *snapshot* of your data (as opposed to a dynamic Slideshow that updates when Card data is updated).

The following table lists the major similarities and differences between exported Publications and those viewed in Domo:

<table border="1" cellpadding="1" cellspacing="1" data-aura-rendered-by="33:199;a"><thead><tr><th colspan="1" rowspan="1"><p> In PowerPoint... </p></th><th colspan="1" rowspan="1"><p> In Domo </p></th></tr></thead><tbody><tr><td colspan="1" rowspan="1"><ul><li><p> Each Card appears as a slide </p></li><li><p> Cards are <em> static </em>; Cards are <em> not </em> automatically updated when the data they represent changes; useful when you want to present a <em> snapshot </em> of your data </p></li><li><p> Exported Slideshows are viewed in Microsoft PowerPoint </p></li></ul></td><td colspan="1" rowspan="1"><ul><li><p> Each Card appears as a slide </p></li><li><p> Cards are <em> dynamic </em>; Cards are automatically updated when the data they represent changes </p></li><li><p> Slideshows appear in a Web browser </p></li></ul></td></tr></tbody></table>

You can also download one or all of the Cards in a Page to PowerPoint without first creating a Slideshow in Domo. For more information, see [Exporting KPI Cards](/s/article/360043437813 "Exporting KPI Cards").

**To export a Publication to Microsoft PowerPoint,**

1. In the Publications Page, locate the Slideshow you want to export.
2. Select
   <InlineImage src="/images/kb/ka05w00000126DW-00N5w00000Ri7BU-0EM5w000005vZ3K.png" /> **> Download**.

<Frame>
  <img alt="" src="https://mintcdn.com/domoinc-openapi-sync-dataflows/3A4Whxu66v2UwluW/images/kb/ka05w00000123Xu-00N5w00000Ri7BU-0EM5w000005vOVZ.png?fit=max&auto=format&n=3A4Whxu66v2UwluW&q=85&s=9b13ac9b8301ecd3ef49728fce32b54d" style={{width: 128, height: 205}} width="128" height="205" data-path="images/kb/ka05w00000123Xu-00N5w00000Ri7BU-0EM5w000005vOVZ.png" />
</Frame>

You can also export a Slideshow after editing a Slideshow by clicking **Save**, then clicking **Download as PowerPoint**.

<Note>
  **Note:** Of the various types of Cards (KPI, image, notebook, document, poll, etc.), you can *only* export KPI Cards to a Microsoft PowerPoint presentation.
</Note>

You can view the exported presentation in Microsoft PowerPoint.

### Administer Publications

You can administer Publications in the Admin Settings. Administrative options include removing Web access to a Publication, removing individual Cards from the Publication, or deleting a Publication entirely.

For information about the Admin Settings interface, see our [Admin Settings Overview](https://domo-support.domo.com/s/article/360042934234).

**To administer Publications,**

1. Select **More** **> Admin**.

   The Admin Settings appears.
2. Under **Content**, click **Publications**.

   A list of Slideshows and details of the selected Slideshow appear.
3. Select the Slideshow you want to administer.
4. Perform any of the following actions:

   <table border="1" cellpadding="1" cellspacing="1"><thead><tr><th colspan="1" rowspan="1"><p> Action </p></th><th colspan="1" rowspan="1"><p> Description </p></th></tr></thead><tbody><tr><td colspan="1" rowspan="1"><p> Stop sharing the Slideshow </p></td><td colspan="1" rowspan="1"><p> Click <b> Stop Publishing </b> to remove Web access to the Slideshow. </p></td></tr><tr><td colspan="1" rowspan="1"><p> Remove a Card from the Slideshow </p></td><td colspan="1" rowspan="1"><p> Click <b> Remove </b> next to the slide you want to remove from the Slideshow. When prompted, click <b> Delete </b> to confirm deleting the Card from the Slideshow. </p></td></tr><tr><td colspan="1" rowspan="1"><p> Delete the Slideshow </p></td><td colspan="1" rowspan="1"><p> Click <b> Delete </b> to delete the selected Slideshow from Domo. When prompted, click <b> Delete </b> to confirm deleting the Slideshow. </p></td></tr></tbody></table>

   <Note>
     **Note:** When you perform an administrative action on a Slideshow, a notification is sent to the Slideshow owner.
   </Note>

## View a One-time Slideshow of Cards on a Dashboard

You can view Cards on a Page as a one-time (i.e. unsaved) Slideshow.

Because Page Slideshows show all Cards on a Page, you may want to create Pages designed specifically for Slideshows. For example, each project team in your Development department might have its own Page, and you want to showcase the progress made by each team in resolving software bugs. You could create a new Page containing those Cards from each Page that show this data, then play a Slideshow for the new Page.

<Note>
  **Notes:**

  * Playing a Slideshow of Cards on a Page is a quick way to review Cards on a Page but the Slideshow is
    *not* saved.<br />
    If you want to create and save a Slideshow of Cards on a Page that others can view at their convenience, the following options are available:

    * You can create a dynamic Slideshow by clicking
      <InlineImage src="/images/kb/ka05w00000124S5-00N5w00000Ri7BU-0EM5w000005vOAW.png" /> in the upper right area of the Page, selecting **Publish as Slideshow**, then clicking **Save**. This saves the Slideshow to your Domo instance. From here, you can download, play, publish, edit, or delete the Slideshow. For more information, see [Creating and Managing Publications](/s/article/360043437793 "Creating and Managing Slideshows").
    * You can export a Page of Cards directly to PowerPoint by selecting
      **Export to PowerPoint** from the Page <InlineImage src="/images/kb/ka05w00000124S5-00N5w00000Ri7BU-0EM5w000005vOAW.png" /> menu. In this case, no Slideshow is saved to Domo, and the data does not update dynamically. However, this is an excellent way to create a shareable snapshot of data quickly. For more information, see [Exporting KPI Cards](/s/article/360043437813 "Exporting KPI Cards").
  * From the Launcher Page, you can view Cards powered by a specific connector or data provider as a Slideshow. For more information, see
    Viewing Cards for Data Providers.
  * Notebook Cards are not currently supported using this Slideshow method.
</Note>

**To play a Slideshow of all of the Cards on a Page,**

1. Navigate to the Page with Cards you want to show.
2. Click
   <InlineImage src="/images/kb/ka05w00000124S5-00N5w00000Ri7BU-0EM5w000005vOAW.png" /> located in the upper right area of the Page.
3. Select **View Page as Slideshow**.

For information about the controls in the Slideshow viewer, see the next section.

## Use the Slideshow viewer

Domo contains a built-in Slideshow viewer that is used for presenting Cards one by one in full-screen mode. In the viewer, you have access to basic controls, including the ability to pause the Slideshow, skip to the next slide or backtrack to a previous slide, or specify the amount of time that slides remain on the screen.

The main controls in the Slideshow interface appear temporarily in the top right corner of the screen when you move the mouse. There are also other controls that appear in other parts of the screen when you hover in those areas. All of these are described in continuation.

### Main controls

The Slideshow feature in Domo has a main set of controls you can use to navigate through the slides, pause and play, specify the time between slides, and open a full-screen view. The controls appear in the top right corner of the screen when you start the Slideshow. These disappear after a few seconds but you can make them reappear by moving the mouse. These controls include the following:

<table border="1" cellpadding="1" cellspacing="1" data-aura-rendered-by="33:199;a"><thead><tr><th colspan="1" rowspan="1"><p> Control </p></th><th colspan="1" rowspan="1"><p> Description </p></th></tr></thead><tbody><tr><td colspan="1" rowspan="1"><p><InlineImage src="/images/kb/ka05w000001299I-00N5w00000Ri7BU-0EM5w000005vOVm.png" /></p></td><td colspan="1" rowspan="1"><p> Backtracks to the previous Card in the Page. </p></td></tr><tr><td colspan="1" rowspan="1"><p><InlineImage src="/images/kb/ka05w000001299I-00N5w00000Ri7BU-0EM5w000005vOVo.png" /></p></td><td colspan="1" rowspan="1"><p> Pauses the Slideshow. You can also use the space bar to pause. </p></td></tr><tr><td colspan="1" rowspan="1"><p><InlineImage src="/images/kb/ka05w000001299I-00N5w00000Ri7BU-0EM5w000005vOVh.png" /></p></td><td colspan="1" rowspan="1"><p> Plays the Slideshow after it has been paused. You can also use the space bar to play. </p></td></tr><tr><td colspan="1" rowspan="1"><p><InlineImage src="/images/kb/ka05w000001299I-00N5w00000Ri7BU-0EM5w000005vOVk.png" /></p></td><td colspan="1" rowspan="1"><p> Skips to the next Card in the Page. </p></td></tr><tr><td colspan="1" rowspan="1"><p><InlineImage src="/images/kb/ka05w000001299I-00N5w00000Ri7BU-0EM5w000005vOVr.png" /></p></td><td colspan="1" rowspan="1"><p> Allows you to select the amount of time that elapses before the next Card appears. <b> 10 Seconds </b> is the default interval. </p></td></tr><tr><td colspan="1" rowspan="1"><p><InlineImage src="/images/kb/ka05w000001299I-00N5w00000Ri7BU-0EM5w000005vOVt.png" /></p></td><td colspan="1" rowspan="1"><p> Opens a full-screen version of the Slideshow. </p></td></tr><tr><td colspan="1" rowspan="1"><p><InlineImage src="/images/kb/ka05w00000123kI-00N5w00000Ri7BU-0EM5w000005vOyM.png" /></p></td><td colspan="1" rowspan="1"><p> Exits the full-screen version of the Slideshow. </p></td></tr><tr><td colspan="1" rowspan="1"><p><InlineImage src="/images/kb/ka05w000001299I-00N5w00000Ri7BU-0EM5w000005vOVp.png" /></p></td><td colspan="1" rowspan="1"><p> Shows the <b> Slideshow Hints </b> panel. </p></td></tr><tr><td colspan="1" rowspan="1"><p><InlineImage src="/images/kb/ka05w000001299I-00N5w00000Ri7BU-0EM5w000005vOVi.png" /></p></td><td colspan="1" rowspan="1"><p> Ends the Slideshow, returning you to the Card Page. You can also press <b> Esc </b> to end the Slideshow. </p></td></tr></tbody></table>

### Previous/next arrows

When you hover near the left or right side of the screen, large arrows appear that take you to the previous or next slide when clicked. These arrows are similar to the arrows in the main set of controls. You may find these arrows more useful in navigating through slides.

### Card carousel

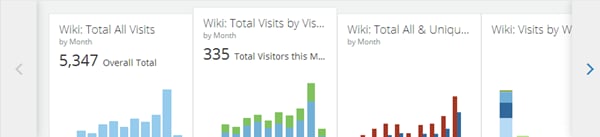
When you hover near the bottom of the screen, a row of Cards pops up—click a Card to jump to that Card in the Slideshow. If there are more than eight Cards in the Page, you can use the <InlineImage src="/images/kb/ka05w000001299I-00N5w00000Ri7BU-0EM5w000005vOVg.png" /> and <InlineImage src="/images/kb/ka05w000001299I-00N5w00000Ri7BU-0EM5w000005vOVf.png" /> arrows to "slide" the Card carousel left or right to show more Cards. If the arrows are dimmed, there are no more Cards on the Page in the direction indicated.

<Frame>
  <img alt="" src="https://mintcdn.com/domoinc-openapi-sync-dataflows/y73kYVYT02nhoBL7/images/kb/ka05w000001299I-00N5w00000Ri7BU-0EM5w000005vOVe.png?fit=max&auto=format&n=y73kYVYT02nhoBL7&q=85&s=c415a1731ce9d4813a1b01725c314d5a" style={{width: 600, height: 137}} width="600" height="137" data-path="images/kb/ka05w000001299I-00N5w00000Ri7BU-0EM5w000005vOVe.png" />
</Frame>

**Video - Creating a Slideshow**

<iframe allowfullscreen="allowfullscreen" frameborder="1" height="315" src="//www.youtube-nocookie.com/embed/-5wASnp366A" width="560" />