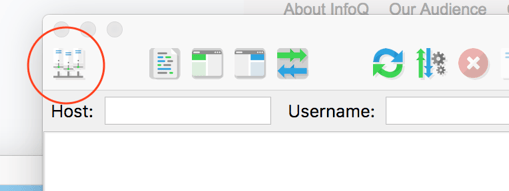
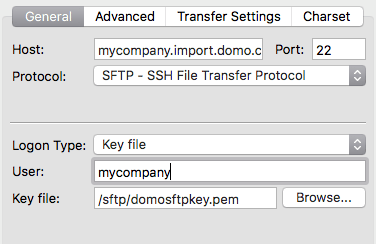
 5. In the ****General**** tab, configure settings as follows:
For this setting... | ...do this |
|---|---|
Host | Enter the Host name URL found in the How to Upload tab in the Details view for the DataSet. |
Port | Enter 22. |
Protocol | Select SFTP . |
Logon Type | Select Key file . |
User | Enter the value next to User name in the How to Upload tab in the details view for the DataSet. |
Key file | Locate your .pem key in the file browser. |
 6. Open the connection to the site you just configured.
7. Drag the Excel file you want to upload from the
**Local file** window to the **Remote site** window.
6. Open the connection to the site you just configured.
7. Drag the Excel file you want to upload from the
**Local file** window to the **Remote site** window.
 8. Close the connection or quit FileZilla.
You should now see the file being uploaded into Domo.
### Uploading an Excel File Using the Command Line
You can send an Excel file to a Domo SFTP server using a command line client. These instructions are specific to Mac/Linux systems and may not work on Windows.
****To send an Excel file to a Domo SFTP server using the command line,****
1. Configure the Excel connector in Domo by following the instructions under [Connecting to Your Excel File](# "Microsoft Excel SFTP Connector").
2. Move your.pem file into a directory on your machine.
In this example we use the /sftp directory.
3. Create a Excel file in the /sftp directory with the same name as the new DataSet's ID (which you can find in the ****How to Upload**** tab in the details view for the DataSet).
For example, if your DataSet ID was cb4ba6a0-0934-440f-8572-1253b9f7525a, the Excel filename would be cb4ba6a0-0934-440f-8572-1253b9f7525a.Excel.
4. In the /sftp directory, connect to the SFTP server using this command:
8. Close the connection or quit FileZilla.
You should now see the file being uploaded into Domo.
### Uploading an Excel File Using the Command Line
You can send an Excel file to a Domo SFTP server using a command line client. These instructions are specific to Mac/Linux systems and may not work on Windows.
****To send an Excel file to a Domo SFTP server using the command line,****
1. Configure the Excel connector in Domo by following the instructions under [Connecting to Your Excel File](# "Microsoft Excel SFTP Connector").
2. Move your.pem file into a directory on your machine.
In this example we use the /sftp directory.
3. Create a Excel file in the /sftp directory with the same name as the new DataSet's ID (which you can find in the ****How to Upload**** tab in the details view for the DataSet).
For example, if your DataSet ID was cb4ba6a0-0934-440f-8572-1253b9f7525a, the Excel filename would be cb4ba6a0-0934-440f-8572-1253b9f7525a.Excel.
4. In the /sftp directory, connect to the SFTP server using this command:sftp –i domosftpkey.pem username\@mycompany.import.domo.com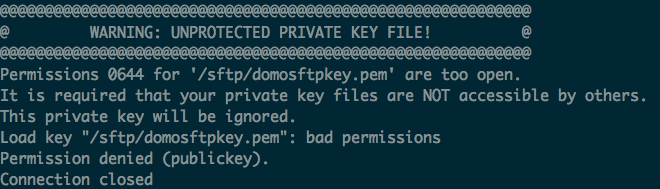 If this occurs, run the following command then try connecting again:
```
chmod 600 /sftp/domosftpkey.pem
```
where **domosftpkey.pem** is the name of your key.
### Uploading a Excel File Using a Third-Party Service
You can send an Excel file to a Domo SFTP server using any of various third-party services. These instructions show you how to deliver analytics reports using Adobe Analytics. For instructions about uploading files using other services, peruse the documentation for those services or do a Google search.
****To send an Adobe Analytics Excel file to a Domo SFTP server,****
1. Configure the Excel connector in Domo by following the instructions under [Connecting to Your Excel File](# "Microsoft Excel SFTP Connector"). Make sure you set the following options:
* Under ****Generate or Select Key****, choose the ****Use my own key**** option. Then paste the RSA public key you received from Adobe in the text field.
* Under ****Parsing Options****...
* Set the delimiter to ****Comma****.
* Leave ****Includes Header Row**** checked unless you have it set up to not include one in Adobe.
2. Switch to Adobe Analytics and log into your account.
3. Navigate to ****Tools > Data Warehouse****.
If this occurs, run the following command then try connecting again:
```
chmod 600 /sftp/domosftpkey.pem
```
where **domosftpkey.pem** is the name of your key.
### Uploading a Excel File Using a Third-Party Service
You can send an Excel file to a Domo SFTP server using any of various third-party services. These instructions show you how to deliver analytics reports using Adobe Analytics. For instructions about uploading files using other services, peruse the documentation for those services or do a Google search.
****To send an Adobe Analytics Excel file to a Domo SFTP server,****
1. Configure the Excel connector in Domo by following the instructions under [Connecting to Your Excel File](# "Microsoft Excel SFTP Connector"). Make sure you set the following options:
* Under ****Generate or Select Key****, choose the ****Use my own key**** option. Then paste the RSA public key you received from Adobe in the text field.
* Under ****Parsing Options****...
* Set the delimiter to ****Comma****.
* Leave ****Includes Header Row**** checked unless you have it set up to not include one in Adobe.
2. Switch to Adobe Analytics and log into your account.
3. Navigate to ****Tools > Data Warehouse****.
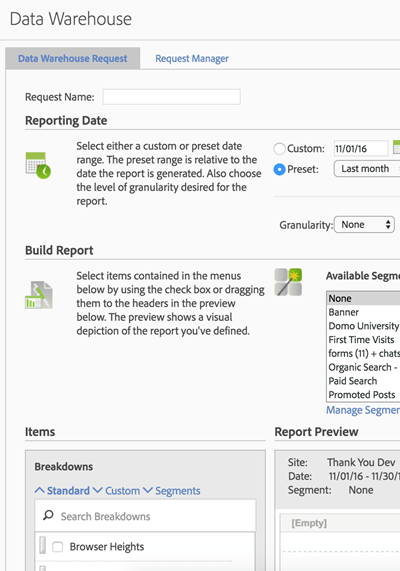
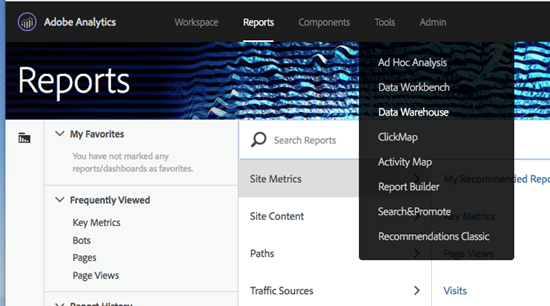 4. In the ****Data Warehouse Request**** tab, enter all the parameters needed to define the report you want to send to Domo. These parameters include ****Request Name****, ****Reporting Date****, ****Segments****, ****Items****, ****Breakdowns****, ****Metrics****, etc.
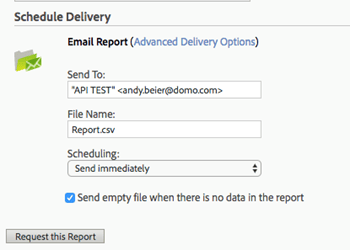
 5. In the ****Schedule Delivery**** section at the bottom of the page, click ****Advanced Delivery Options****.
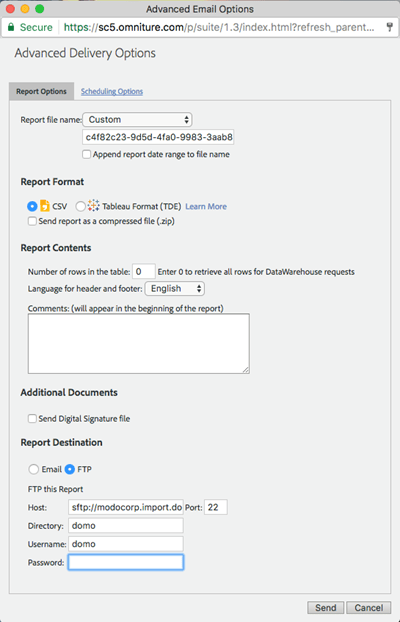
 6. Set delivery options as follows:
For this option... | ...do this | ||||||||||
|---|---|---|---|---|---|---|---|---|---|---|---|
Report file name | Select Custom , then enter the Domo DataSet ID in the text field with a.Excelextension. | ||||||||||
Report Format | Select Excel . | ||||||||||
Report Destination | Select FTP . Then enter information in the fields as follows:
Optionally, you can also click the Scheduling Options tab to specify a one-time immediate delivery or a recurring schedule. |
 7. Once you have specified all advanced delivery options, click ****Send****.
You are taken back to the ****Data Warehouse Request**** page.
8. Click ****Request this Report**** to save all your settings.
7. Once you have specified all advanced delivery options, click ****Send****.
You are taken back to the ****Data Warehouse Request**** page.
8. Click ****Request this Report**** to save all your settings.
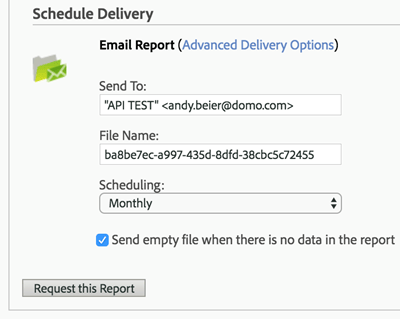 Adobe now queues the report and delivers it to Domo when ready. It may take some time for Adobe to complete the request.