> ## Documentation Index
> Fetch the complete documentation index at: https://domoinc-openapi-sync-dataflows.mintlify.site/llms.txt
> Use this file to discover all available pages before exploring further.
# Managing Your Personal Photos
export const InlineImage = ({src, alt = '', height = '1.6em'}) => {
return  ;
};
In the Profile page, you can upload any personal photos you want others in your organization to be able to see. Photos in your personal photo store are different from profile pictures in that they do *not* represent you throughout Domo as profile pictures do. Personal photos help to tell others about yourself and are found only in your Profile page.
;
};
In the Profile page, you can upload any personal photos you want others in your organization to be able to see. Photos in your personal photo store are different from profile pictures in that they do *not* represent you throughout Domo as profile pictures do. Personal photos help to tell others about yourself and are found only in your Profile page.
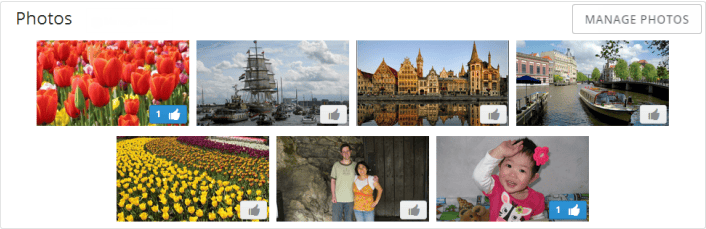 You can upload as many personal photos to Domo as you want. When you select a photo for uploading, Domo gives you options to crop and rotate it before you upload it. You can click a photo to show it in a larger view, as well as "like" a photo by clicking on its "thumbs up" icon. You can also delete any photo you've uploaded.
**Note:** You can manage other users' personal photos *only* if you have sufficient permissions in Domo. For more information about permissions, see [Default Security Role Reference](/s/article/360043438953).
**To upload a new photo to your Profile page,**
1. Open your Profile page by clicking your profile picture in the top right corner of the screen. (If you have not yet selected a profile picture, a icon appears instead.)
2. Scroll down to the **Photos** area of the page, which is located towards the bottom.
3. Click **Manage Photos**.
A dialog appears containing all of the photos you have uploaded.
4. Click **Upload Photo**.
5. Select the photo file you want to upload and click **Open**.
A new dialog appears with options for cropping and rotating the photo.
6. (Optional) To crop the photo, click and drag the rectangle to the portion of the image you want to preserve. You can also click and drag any of the square handles to resize the crop area.
7. (Optional) To rotate the photo left or right, click
or , respectively.
8. When you are satisfied with how your photo looks, click **Crop**.
The image is added to your store of personal photos.
9. Click the photo in the store to add it to your Profile page and make it visible to others.
**To Take a new photo from your Web Cam for your Profile page,**
1. Open your Profile page by clicking your profile picture in the top right corner of the screen. (If you have not yet selected a profile picture, a icon appears instead.)
2. Scroll down to the **Photos** area of the page, which is located towards the bottom.
3. Click **Manage Photos**.
A dialog appears containing all of the photos you have uploaded.
4. Click **Take** **Photo**.
A new dialog appears with a preview of your Webcam.
5. Click The Orange, **Take Photo** button, and the preview will freeze.
6. Click The Orange, **Save Photo**.
A new dialog appears with options for cropping and rotating the photo.
7. (Optional) To crop the photo, click and drag the rectangle to the portion of the image you want to preserve. You can also click and drag any of the square handles to resize the crop area.
8. (Optional) To rotate the photo left or right, click
or , respectively.
9. When you are satisfied with how your photo looks, click **Crop**. The image is added to your store of personal photos.
10. Click the photo in the store to add it to your Profile page and make it visible to others.
**To delete a photo from your profile image store,**
1. Open your Profile page by clicking your profile picture in the top right corner of the screen. (If you have not yet selected a profile picture, a icon appears instead.)
2. Scroll down to the Photos area of the page, which is located towards the bottom.
3. Click **Manage Photos**.
A dialog appears containing all of the photos you have uploaded.
4. Mouse over the picture you want to delete.
5. Click the trash can icon that appears in the top right corner of the picture.
You can upload as many personal photos to Domo as you want. When you select a photo for uploading, Domo gives you options to crop and rotate it before you upload it. You can click a photo to show it in a larger view, as well as "like" a photo by clicking on its "thumbs up" icon. You can also delete any photo you've uploaded.
**Note:** You can manage other users' personal photos *only* if you have sufficient permissions in Domo. For more information about permissions, see [Default Security Role Reference](/s/article/360043438953).
**To upload a new photo to your Profile page,**
1. Open your Profile page by clicking your profile picture in the top right corner of the screen. (If you have not yet selected a profile picture, a icon appears instead.)
2. Scroll down to the **Photos** area of the page, which is located towards the bottom.
3. Click **Manage Photos**.
A dialog appears containing all of the photos you have uploaded.
4. Click **Upload Photo**.
5. Select the photo file you want to upload and click **Open**.
A new dialog appears with options for cropping and rotating the photo.
6. (Optional) To crop the photo, click and drag the rectangle to the portion of the image you want to preserve. You can also click and drag any of the square handles to resize the crop area.
7. (Optional) To rotate the photo left or right, click
or , respectively.
8. When you are satisfied with how your photo looks, click **Crop**.
The image is added to your store of personal photos.
9. Click the photo in the store to add it to your Profile page and make it visible to others.
**To Take a new photo from your Web Cam for your Profile page,**
1. Open your Profile page by clicking your profile picture in the top right corner of the screen. (If you have not yet selected a profile picture, a icon appears instead.)
2. Scroll down to the **Photos** area of the page, which is located towards the bottom.
3. Click **Manage Photos**.
A dialog appears containing all of the photos you have uploaded.
4. Click **Take** **Photo**.
A new dialog appears with a preview of your Webcam.
5. Click The Orange, **Take Photo** button, and the preview will freeze.
6. Click The Orange, **Save Photo**.
A new dialog appears with options for cropping and rotating the photo.
7. (Optional) To crop the photo, click and drag the rectangle to the portion of the image you want to preserve. You can also click and drag any of the square handles to resize the crop area.
8. (Optional) To rotate the photo left or right, click
or , respectively.
9. When you are satisfied with how your photo looks, click **Crop**. The image is added to your store of personal photos.
10. Click the photo in the store to add it to your Profile page and make it visible to others.
**To delete a photo from your profile image store,**
1. Open your Profile page by clicking your profile picture in the top right corner of the screen. (If you have not yet selected a profile picture, a icon appears instead.)
2. Scroll down to the Photos area of the page, which is located towards the bottom.
3. Click **Manage Photos**.
A dialog appears containing all of the photos you have uploaded.
4. Mouse over the picture you want to delete.
5. Click the trash can icon that appears in the top right corner of the picture.