> ## Documentation Index
> Fetch the complete documentation index at: https://domoinc-openapi-sync-dataflows.mintlify.site/llms.txt
> Use this file to discover all available pages before exploring further.
# Form Viewer App
export const InlineImage = ({src, alt = '', height = '1.6em'}) => {
return  ;
};
## Intro
Form Viewer is a free app you can use to view, edit, and submit forms. Use the [Form Builder App](http://domo-support.domo.com/s/article/360043438373?language=en_US) to create forms and templates, and then use Form Viewer to enter data into those forms. You can download and install both apps from the Domo Appstore.
Form Viewer can exist on one or more Domo dashboards. The response data from Form Viewer is stored in App DB, and then synced to the Domo Data Center. Typically, you must then transform the data in Domo.
This article details the configuration process for the Form Viewer app. If you are creating multiple instances of Form Viewer, we strongly recommend that you complete the configuration process once, for a single instance of Form Viewer, and then choose **Save As** to create another app card so that you do not have to go through the configuration process again.
After creating and configuring a form, you can make it available in your Domo instance or use public embed to make it available for non-Domo users. For more information about public embed, see the [Public Embed](#public_embed) heading later in this article and our article on [Sharing Content Outside of Domo with Embed](http://domo-support.domo.com/s/article/360043437993?language=en_U).
Each user can only interact with one form in an instance of Form Viewer, but you can make multiple submissions to that form and return to edit submissions anytime unless the form is deleted, depending on the configuration in the [Form Builder App](http://domo-support.domo.com/s/article/360043438373?language=en_US). To learn more, see [Previous Submissions](#previous-submissions), below.
To learn about how the response data is collected, see the heading for [Response DataSets](#response-datasets).
## Configuration
Begin by downloading Form Viewer from the Appstore.
;
};
## Intro
Form Viewer is a free app you can use to view, edit, and submit forms. Use the [Form Builder App](http://domo-support.domo.com/s/article/360043438373?language=en_US) to create forms and templates, and then use Form Viewer to enter data into those forms. You can download and install both apps from the Domo Appstore.
Form Viewer can exist on one or more Domo dashboards. The response data from Form Viewer is stored in App DB, and then synced to the Domo Data Center. Typically, you must then transform the data in Domo.
This article details the configuration process for the Form Viewer app. If you are creating multiple instances of Form Viewer, we strongly recommend that you complete the configuration process once, for a single instance of Form Viewer, and then choose **Save As** to create another app card so that you do not have to go through the configuration process again.
After creating and configuring a form, you can make it available in your Domo instance or use public embed to make it available for non-Domo users. For more information about public embed, see the [Public Embed](#public_embed) heading later in this article and our article on [Sharing Content Outside of Domo with Embed](http://domo-support.domo.com/s/article/360043437993?language=en_U).
Each user can only interact with one form in an instance of Form Viewer, but you can make multiple submissions to that form and return to edit submissions anytime unless the form is deleted, depending on the configuration in the [Form Builder App](http://domo-support.domo.com/s/article/360043438373?language=en_US). To learn more, see [Previous Submissions](#previous-submissions), below.
To learn about how the response data is collected, see the heading for [Response DataSets](#response-datasets).
## Configuration
Begin by downloading Form Viewer from the Appstore.
 When you download the app, Domo creates a dashboard for it automatically. You can add additional cards for the app from the Domo **Asset Library**.
 ### Connecting to the FormDefinition DataSets
When you configure Form Builder for the first time, a series of FormDefinition DataSets are created that display in the Data Center. When you deploy Form Viewer for the first time, it has a series of placeholder DataSets. To use Form Viewer, you must disconnect from its placeholder DataSets and connect to the FormDefinition DataSets created by Form Builder.
**Important:** After you connect to the FormDefinition DataSets for one instance of Form Viewer, we strongly recommend that you **Save As** if you want to create other instances of Form Viewer to avoid needing to complete the configuration process again.
There are nine FormDefinition DataSets, as follows:
* ExportForms
* ExportGroups
* ExportTags
* ExportSubmittedUsers
* ExportSections
* ExportItems
* ExportColumns
* ExportFilters
* ExportPreviousResponseItems
When you first open a new instance Form Viewer, there is an option to connect to the Form Definition DataSets from a ribbon at the top of the screen, shown here.
### Connecting to the FormDefinition DataSets
When you configure Form Builder for the first time, a series of FormDefinition DataSets are created that display in the Data Center. When you deploy Form Viewer for the first time, it has a series of placeholder DataSets. To use Form Viewer, you must disconnect from its placeholder DataSets and connect to the FormDefinition DataSets created by Form Builder.
**Important:** After you connect to the FormDefinition DataSets for one instance of Form Viewer, we strongly recommend that you **Save As** if you want to create other instances of Form Viewer to avoid needing to complete the configuration process again.
There are nine FormDefinition DataSets, as follows:
* ExportForms
* ExportGroups
* ExportTags
* ExportSubmittedUsers
* ExportSections
* ExportItems
* ExportColumns
* ExportFilters
* ExportPreviousResponseItems
When you first open a new instance Form Viewer, there is an option to connect to the Form Definition DataSets from a ribbon at the top of the screen, shown here.
 If you close the ribbon or come back to connect the DataSets at another time, the ribbon may not display. In that case, follow the steps below to connect Form Viewer to the FormDefinition DataSets.
1. Navigate to your instance of Form Viewer.
2. Hover over the app card to display
**Card options** in the top ribbon.
3. Select **Card options** > **Edit Card**.
The card editor displays.
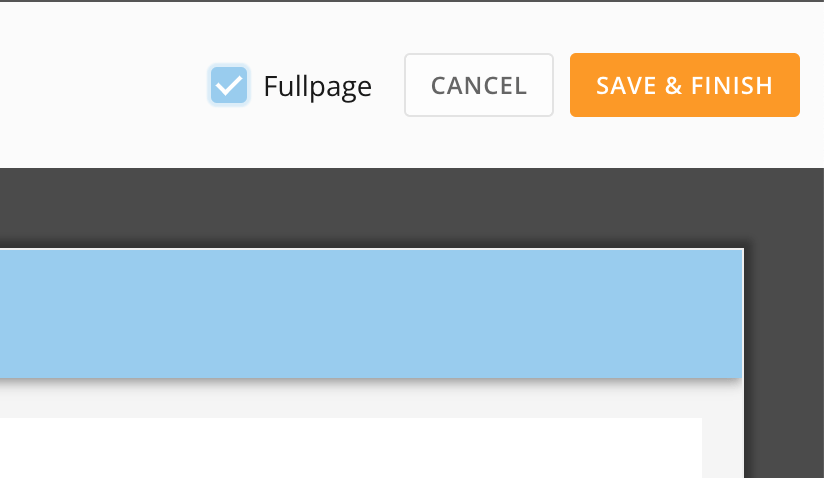
4. (Optional) Check the box for **Fullpage** if you want to see the full page of the app as you edit.
If you close the ribbon or come back to connect the DataSets at another time, the ribbon may not display. In that case, follow the steps below to connect Form Viewer to the FormDefinition DataSets.
1. Navigate to your instance of Form Viewer.
2. Hover over the app card to display
**Card options** in the top ribbon.
3. Select **Card options** > **Edit Card**.
The card editor displays.
4. (Optional) Check the box for **Fullpage** if you want to see the full page of the app as you edit.
 5. Go to the bottom of the card editor screen to view the data **Mapping** area. There are two tabs: **DataSets** and **Collections**.
During the configuration process, if you see a red indicator like the one shown below for either tab, it means there is an issue with the mapping for that tab.
5. Go to the bottom of the card editor screen to view the data **Mapping** area. There are two tabs: **DataSets** and **Collections**.
During the configuration process, if you see a red indicator like the one shown below for either tab, it means there is an issue with the mapping for that tab.
 6. In the
**DataSets** tab, select the DataSet list at the top of the tab to view and search for the FormDefinition DataSets.
6. In the
**DataSets** tab, select the DataSet list at the top of the tab to view and search for the FormDefinition DataSets.
 7. Select the first of the FormDefinition DataSets, as listed above.
The target DataSet and column mappings should fill in appropriately in the card editor, but if you need to change anything, you can do it here.
7. Select the first of the FormDefinition DataSets, as listed above.
The target DataSet and column mappings should fill in appropriately in the card editor, but if you need to change anything, you can do it here.

 8. Select the DataSet list again and select the next FormDefinition DataSet. Repeat steps 6–7 to connect to all nine of the FormDefinition DataSets.
9. Select **Save & Finish** before navigating away from the card editor.
8. Select the DataSet list again and select the next FormDefinition DataSet. Repeat steps 6–7 to connect to all nine of the FormDefinition DataSets.
9. Select **Save & Finish** before navigating away from the card editor.
 ### Configuring Collections
In **Mapping**, the **Collections** tab allows you to view the four collections for Form Viewer, shown here:
* AppData
* UserSettings
* FormSessions
* StyleConfig
**Important:** You need to configure the collections before using Form Viewer. For a new app card, you can do this by toggling the switch to **Automatically create un-configured collections with app defaults** at the top of the **Collections** tab. If you don't see this option when creating a new app card, contact [Domo Support](http://domo-support.domo.com/s/).
When you are creating a new instance of Form Viewer, if you **Save As** from an existing version, the collections are already configured.
#### Fixing a Collections Error
If you see a red error indicator by the **Collections** tab, follow the steps below.
1. Select the collections list.
### Configuring Collections
In **Mapping**, the **Collections** tab allows you to view the four collections for Form Viewer, shown here:
* AppData
* UserSettings
* FormSessions
* StyleConfig
**Important:** You need to configure the collections before using Form Viewer. For a new app card, you can do this by toggling the switch to **Automatically create un-configured collections with app defaults** at the top of the **Collections** tab. If you don't see this option when creating a new app card, contact [Domo Support](http://domo-support.domo.com/s/).
When you are creating a new instance of Form Viewer, if you **Save As** from an existing version, the collections are already configured.
#### Fixing a Collections Error
If you see a red error indicator by the **Collections** tab, follow the steps below.
1. Select the collections list.
 2. Select the collection that you need to configure. Any collections that aren't connecting display a warning sign.
3. Select the button that displays the ***Collection Name***.
2. Select the collection that you need to configure. Any collections that aren't connecting display a warning sign.
3. Select the button that displays the ***Collection Name***.
 4. Make any needed changes.
5. Select **Save & Finish** before navigating away from the card editor.
4. Make any needed changes.
5. Select **Save & Finish** before navigating away from the card editor.
 If you cannot find the errored collection or need other assistance, contact [Domo Support](http://domo-support.domo.com/s/).
### Selecting a Form to Display
After you have configured your instance of Form Viewer and saved your changes, a list of available forms to display appears in Form Viewer.
If you cannot find the errored collection or need other assistance, contact [Domo Support](http://domo-support.domo.com/s/).
### Selecting a Form to Display
After you have configured your instance of Form Viewer and saved your changes, a list of available forms to display appears in Form Viewer.
 **Important:** Because only one form can display in an instance of Form Viewer, the form you choose is permanent in this instance. To view a different form, you must create a new instance of the Form Viewer app card or enter your responses via Form Builder.
Follow the steps below to set up the form to display.
1. Locate the form you want to display in the list and select it. A preview of the first page of the form displays.
2. Use the preview to verify that you have the correct form.
3. Click **Select Form**.
A dialog displays to confirm your form selection and ask if you want to enable Public Embed for the form. When you check the box and enable the form for Public Embed, a warning displays that the change is permanent.
To learn more about public embed, see the [Public Embed](#public_embed) heading later in this article, or our article on [Sharing Content Outside of Domo with Embed](http://domo-support.domo.com/s/article/360043437993?language=en_U).
**Important:** Because only one form can display in an instance of Form Viewer, the form you choose is permanent in this instance. To view a different form, you must create a new instance of the Form Viewer app card or enter your responses via Form Builder.
Follow the steps below to set up the form to display.
1. Locate the form you want to display in the list and select it. A preview of the first page of the form displays.
2. Use the preview to verify that you have the correct form.
3. Click **Select Form**.
A dialog displays to confirm your form selection and ask if you want to enable Public Embed for the form. When you check the box and enable the form for Public Embed, a warning displays that the change is permanent.
To learn more about public embed, see the [Public Embed](#public_embed) heading later in this article, or our article on [Sharing Content Outside of Domo with Embed](http://domo-support.domo.com/s/article/360043437993?language=en_U).
 4. Select **Confirm**.
## Customize Form Appearance
Admins can customize the following aspects of your instance of Form Viewer by adjusting the **Application Settings**:
* **Submission Notification —** Select whether the notification for a form submission displays as full screen, popup, or none.
* **New Submission Button —** Edit the text that displays on the **New Submission** button (up to 25 characters).
**Important:** Make sure to select **Save** to save your changes to these items before continuing.
4. Select **Confirm**.
## Customize Form Appearance
Admins can customize the following aspects of your instance of Form Viewer by adjusting the **Application Settings**:
* **Submission Notification —** Select whether the notification for a form submission displays as full screen, popup, or none.
* **New Submission Button —** Edit the text that displays on the **New Submission** button (up to 25 characters).
**Important:** Make sure to select **Save** to save your changes to these items before continuing.
 * **Form details —** Adjust the color and icon size for the header; the form background color; the size of field borders; and adjust color, font, size, and style for the various text, sections, and buttons in your form.
There is a **Preview** of your edited form available.
* **Form details —** Adjust the color and icon size for the header; the form background color; the size of field borders; and adjust color, font, size, and style for the various text, sections, and buttons in your form.
There is a **Preview** of your edited form available.
 Admins can follow the steps below to access and edit these settings.
1. From the default page of Form Viewer, hover over the app card until **Card options** displays.
2. Select **Card options** > **Edit Card**.
The card editor screen displays.
Make sure to select **Save & Finish** before navigating away from the card editor.
## Public Embed
Making your form available in a public space can be a powerful data collection tool. However, there are also a few steps you need to take to make sure it's done correctly.
### Enable Public Embed During Setup
Before you create the public embed URL, while [selecting the form to display](#selecting_a_form_to_display), you need to check the box to indicate that you want to embed the form publicly. When you check the box and enable the form for Public Embed, a warning displays that the change is permanent.
**Important:** Checking the box for Public Embed means the following:
* The collections for the form are write-only for all users
* You are restricted from selecting a multi-session form because you can't fetch the existing sessions.
* Anyone can submit a response if they're viewing the response from the public embed URL.
* You cannot resume an existing session with the form. If you navigate away, you lose your responses.
* You cannot resume a session started on a different device.
* You are restricted from using/viewing your previous responses.
* You have permissions for the form equal to those of the person who enabled Public Embed. Learn about
[Proper Ownership](#proper_ownership) below.
If you DON'T check the box, but still enable the card for Public Embed, the app displays an error and does not allow anyone to submit a response from the Public Embed URL.
### Proper Ownership
When preparing a publicly embedded form, the person who creates the public embed URL and the person who configures Form Viewer and chooses the form to display should be distinct from one another.
For example, Person A creates and configures the instance of Form Viewer and choose the form to display. A different individual, Person B, should create the public embed URL. Additionally, Person B in this situation should **not** be assigned a privileged role.
To learn more, please reference our article on [Sharing Content Outside of Domo with Embed](http://domo-support.domo.com/s/article/360043437993?language=en_US).
## Previous Submissions
If a form is set up to allow previous submissions to be viewed (you can do this in [Form Builder](http://domo-support.domo.com/s/article/360043438373?language=en_US) ), and there are previous submissions to the form, then the default screen for an instance of Form Viewer displaying that form is the **Previous submissions** page.
Under **Previous submissions**, you can see a list of previews of previous submissions to the form with the fields that were configured in Form Builder as part of the preview. Select the submission to view it.
Admins can follow the steps below to access and edit these settings.
1. From the default page of Form Viewer, hover over the app card until **Card options** displays.
2. Select **Card options** > **Edit Card**.
The card editor screen displays.
Make sure to select **Save & Finish** before navigating away from the card editor.
## Public Embed
Making your form available in a public space can be a powerful data collection tool. However, there are also a few steps you need to take to make sure it's done correctly.
### Enable Public Embed During Setup
Before you create the public embed URL, while [selecting the form to display](#selecting_a_form_to_display), you need to check the box to indicate that you want to embed the form publicly. When you check the box and enable the form for Public Embed, a warning displays that the change is permanent.
**Important:** Checking the box for Public Embed means the following:
* The collections for the form are write-only for all users
* You are restricted from selecting a multi-session form because you can't fetch the existing sessions.
* Anyone can submit a response if they're viewing the response from the public embed URL.
* You cannot resume an existing session with the form. If you navigate away, you lose your responses.
* You cannot resume a session started on a different device.
* You are restricted from using/viewing your previous responses.
* You have permissions for the form equal to those of the person who enabled Public Embed. Learn about
[Proper Ownership](#proper_ownership) below.
If you DON'T check the box, but still enable the card for Public Embed, the app displays an error and does not allow anyone to submit a response from the Public Embed URL.
### Proper Ownership
When preparing a publicly embedded form, the person who creates the public embed URL and the person who configures Form Viewer and chooses the form to display should be distinct from one another.
For example, Person A creates and configures the instance of Form Viewer and choose the form to display. A different individual, Person B, should create the public embed URL. Additionally, Person B in this situation should **not** be assigned a privileged role.
To learn more, please reference our article on [Sharing Content Outside of Domo with Embed](http://domo-support.domo.com/s/article/360043437993?language=en_US).
## Previous Submissions
If a form is set up to allow previous submissions to be viewed (you can do this in [Form Builder](http://domo-support.domo.com/s/article/360043438373?language=en_US) ), and there are previous submissions to the form, then the default screen for an instance of Form Viewer displaying that form is the **Previous submissions** page.
Under **Previous submissions**, you can see a list of previews of previous submissions to the form with the fields that were configured in Form Builder as part of the preview. Select the submission to view it.
 ### Editing and Deleting Submissions
These options are only available if a form is set up in [Form Builder](http://domo-support.domo.com/s/article/360043438373?language=en_US) to allow previous submissions to be edited and/or deleted.
* If the form is set up to allow previous submissions to be edited, a user can edit any of their previous submissions by selecting the submission and making any changes. After making any changes, select **Done** to be redirected back to the **Previous Submissions** page.
**Note:** Users are the only ones who can edit their own previous submissions. Form owners and admins may view all submissions, but can only edit their own submissions.
* If the form is set up to allow previous submissions to be deleted, you can delete any of the previous submissions by selecting
**Delete**.
## Response DataSets
You can use one form that you create in Form Builder to collect data, whether in one or more instances of Form Viewer, or in Form Builder itself. All responses from different instances of either app appear in different DataSets. If more than one user enters data into the form from the same instance of the app, that data appears in the same DataSet.
### Example
Person A and Person B each use a separate instance of Form Viewer to enter data into the same form.
Person C, who created the form, also enters data into the form from Form Builder.
Person D enters data into the form from the same instance of Form Viewer as Person A.
In this example, there would be three DataSets of responses:
1. Responses from Person A and Person D
2. Responses from Person B
3. Responses from Person C
By default, each of the response DataSets have the following naming convention:
\< *form name* > Responses - \< *GUID of form* >\_\< *GUID of instance of Form Builder or Viewer* > To learn more about the response data, see [Understanding Form Response Data](http://domo-support.domo.com/s/article/9485049422103?language=en_US).
### Editing and Deleting Submissions
These options are only available if a form is set up in [Form Builder](http://domo-support.domo.com/s/article/360043438373?language=en_US) to allow previous submissions to be edited and/or deleted.
* If the form is set up to allow previous submissions to be edited, a user can edit any of their previous submissions by selecting the submission and making any changes. After making any changes, select **Done** to be redirected back to the **Previous Submissions** page.
**Note:** Users are the only ones who can edit their own previous submissions. Form owners and admins may view all submissions, but can only edit their own submissions.
* If the form is set up to allow previous submissions to be deleted, you can delete any of the previous submissions by selecting
**Delete**.
## Response DataSets
You can use one form that you create in Form Builder to collect data, whether in one or more instances of Form Viewer, or in Form Builder itself. All responses from different instances of either app appear in different DataSets. If more than one user enters data into the form from the same instance of the app, that data appears in the same DataSet.
### Example
Person A and Person B each use a separate instance of Form Viewer to enter data into the same form.
Person C, who created the form, also enters data into the form from Form Builder.
Person D enters data into the form from the same instance of Form Viewer as Person A.
In this example, there would be three DataSets of responses:
1. Responses from Person A and Person D
2. Responses from Person B
3. Responses from Person C
By default, each of the response DataSets have the following naming convention:
\< *form name* > Responses - \< *GUID of form* >\_\< *GUID of instance of Form Builder or Viewer* > To learn more about the response data, see [Understanding Form Response Data](http://domo-support.domo.com/s/article/9485049422103?language=en_US).