> ## Documentation Index
> Fetch the complete documentation index at: https://domoinc-openapi-sync-dataflows.mintlify.site/llms.txt
> Use this file to discover all available pages before exploring further.
# Connect to Informatica Cloud in Domo
## Intro
You can create a source DataSet in Informatica Cloud
and map its fields to a new DataSet in Domo. This process allows you to efficiently transfer data from Informatica to Domo.
## Install the Informatica Cloud Secure Agent
1. Sign in to Informatica Cloud.
2. Select **Configure** > **Runtime Environments**.
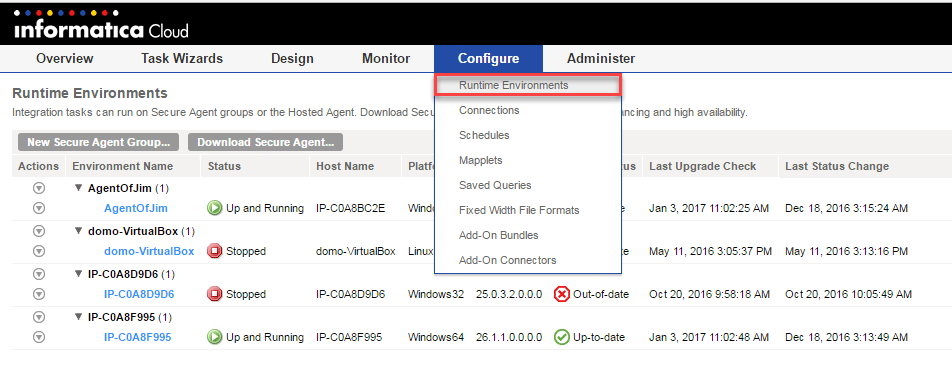 3. Click **Download Secure Agent**.
4. Select the platform for the Secure Agent, and then click **Download**.
5. After the download is complete, install the Secure Agent.
## Connect to Informatica Cloud Data in Domo
1. Sign in to Informatica Cloud.
2. Select **Configure** > **Connections**.
3. Click **New**.
The **New Connection** dialog opens.
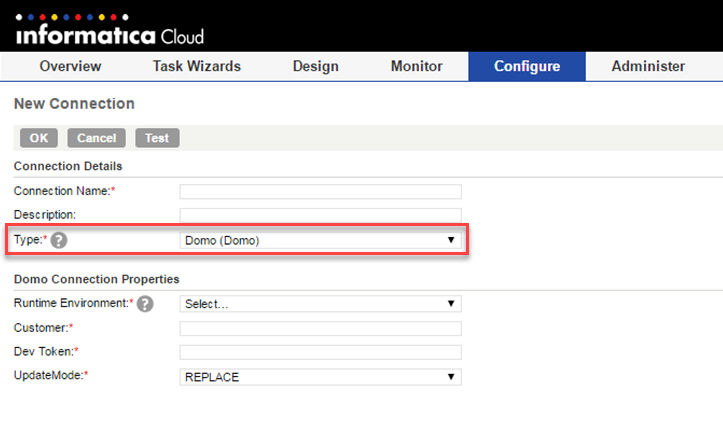
4. Complete the required fields, making sure to select
**Domo (Domo)** for the **Type**.
3. Click **Download Secure Agent**.
4. Select the platform for the Secure Agent, and then click **Download**.
5. After the download is complete, install the Secure Agent.
## Connect to Informatica Cloud Data in Domo
1. Sign in to Informatica Cloud.
2. Select **Configure** > **Connections**.
3. Click **New**.
The **New Connection** dialog opens.
4. Complete the required fields, making sure to select
**Domo (Domo)** for the **Type**.
 5. Click
**Test** to verify that the credentials are valid.
6. When you are ready to save, click
**OK**.
7. Select **Task Wizards** > **Data Synchronization**.
8. Click
**New**.
9. In the
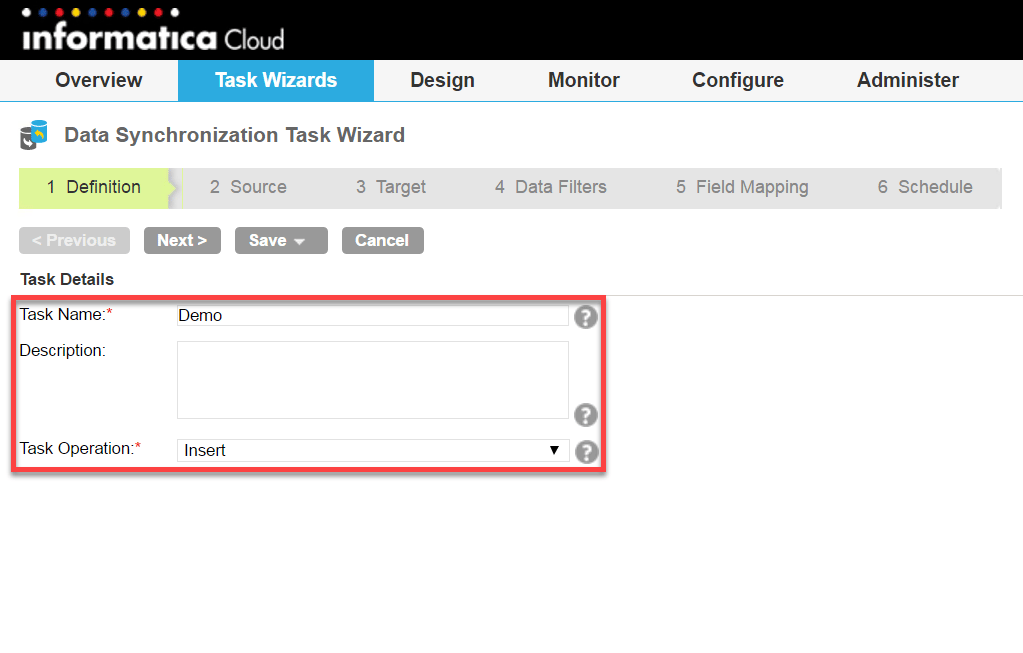
**Definition** tab of the Data Synchronization Task Wizard, complete the **Task Name**, **Description**, and **Task Operation** fields.
**Note:** Domo only supports the **Insert** operation for the task operation.
5. Click
**Test** to verify that the credentials are valid.
6. When you are ready to save, click
**OK**.
7. Select **Task Wizards** > **Data Synchronization**.
8. Click
**New**.
9. In the
**Definition** tab of the Data Synchronization Task Wizard, complete the **Task Name**, **Description**, and **Task Operation** fields.
**Note:** Domo only supports the **Insert** operation for the task operation.
 10. Select
**Next**.
11. In the
**Source** tab of the Data Synchronization Task Wizard, enter the following information:
1. In the
**Connection** field, select the connection you created in [step 4](#step_4).
2. For
**Source Type**, select **Single**.
3. For
**Source Object**, select one of the available DataSets.
When you select a DataSet, a preview of it displays.
10. Select
**Next**.
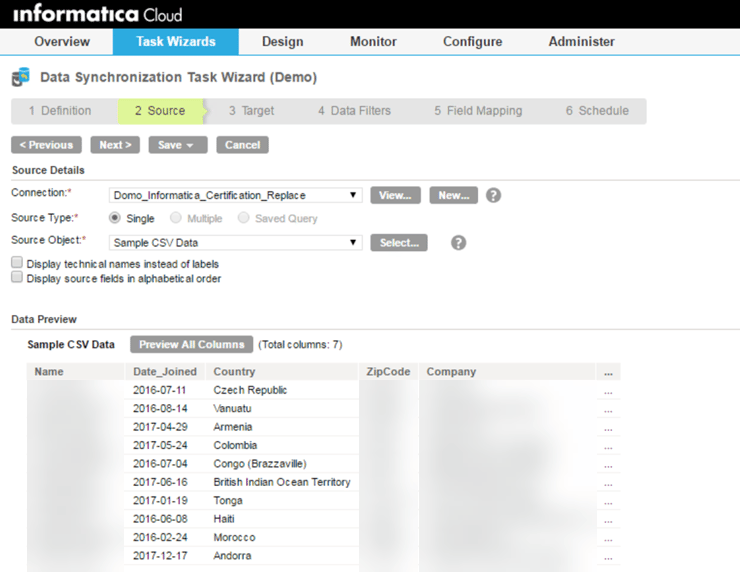
11. In the
**Source** tab of the Data Synchronization Task Wizard, enter the following information:
1. In the
**Connection** field, select the connection you created in [step 4](#step_4).
2. For
**Source Type**, select **Single**.
3. For
**Source Object**, select one of the available DataSets.
When you select a DataSet, a preview of it displays.
 12. Select
**Next**.
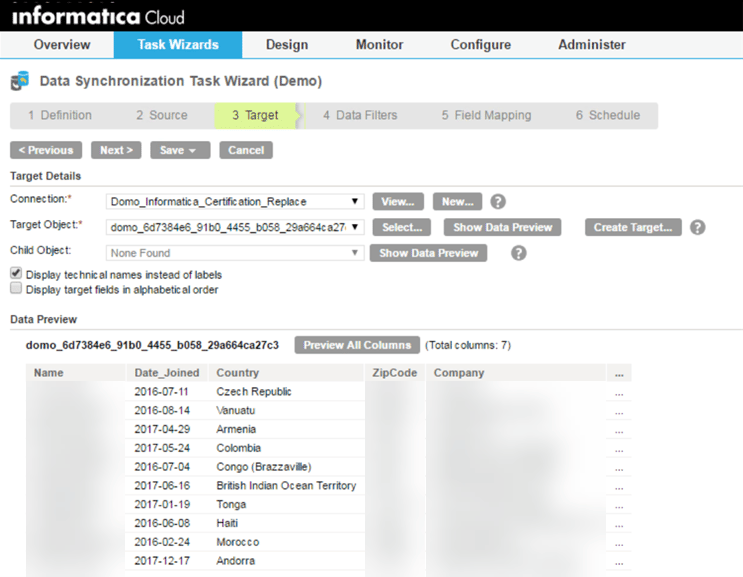
13. Navigate to the
**Target** tab of the Data Synchronization Task Wizard.
12. Select
**Next**.
13. Navigate to the
**Target** tab of the Data Synchronization Task Wizard.
 14. In the
**Target** tab, enter the following information:
1. For
**Connection**, select the connection you created in step four or create a new connection.
2. For
**Target Object**, do one of the following:
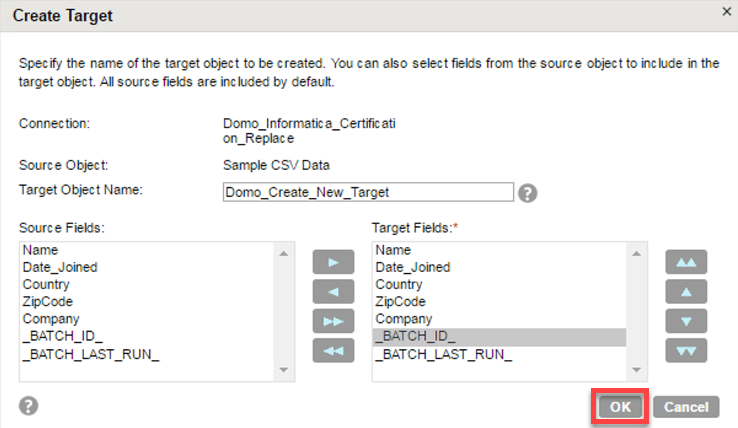
1. Create a new target object in the Domo environment by providing the target object name and selecting the target fields, then click
**OK**.
A new DataSet is created in Domo.
14. In the
**Target** tab, enter the following information:
1. For
**Connection**, select the connection you created in step four or create a new connection.
2. For
**Target Object**, do one of the following:
1. Create a new target object in the Domo environment by providing the target object name and selecting the target fields, then click
**OK**.
A new DataSet is created in Domo.
 2. Select an existing target object.
15. Select
**Next**.
16. In the
**Data Filters** tab of the Data Synchronization Task Wizard, select the row limit you want to process.
17. Select
**Next**.
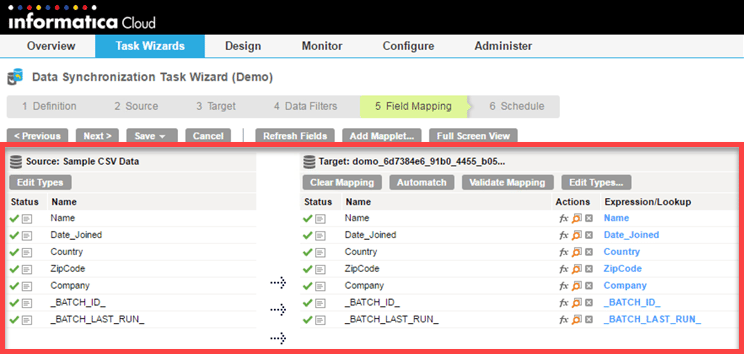
18. In the
**Field Mapping** tab of the Data Synchronization Task Wizard, map the primary fields of the source object to the target object.
2. Select an existing target object.
15. Select
**Next**.
16. In the
**Data Filters** tab of the Data Synchronization Task Wizard, select the row limit you want to process.
17. Select
**Next**.
18. In the
**Field Mapping** tab of the Data Synchronization Task Wizard, map the primary fields of the source object to the target object.
 19. Select
**Next**.
20. Select
**Save** **and Run**.
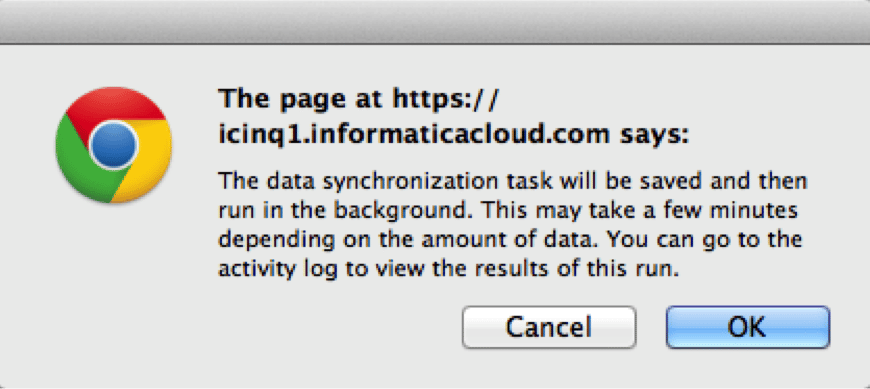
A dialog displays informing you that the data synchronization task will be saved and run in the background, which may take a few minutes depending on the amount of data.
19. Select
**Next**.
20. Select
**Save** **and Run**.
A dialog displays informing you that the data synchronization task will be saved and run in the background, which may take a few minutes depending on the amount of data.
 21. Select **OK**.
22. Navigate to **Monitor** > **Activity Log** to check the "Status" and "Success Rows" of the Data Synchronization Task.
**Important:** To complete the connection to Informatica, you must open an Informatica GCS case and, if required, include a member of your account team to sign off.
21. Select **OK**.
22. Navigate to **Monitor** > **Activity Log** to check the "Status" and "Success Rows" of the Data Synchronization Task.
**Important:** To complete the connection to Informatica, you must open an Informatica GCS case and, if required, include a member of your account team to sign off.