> ## Documentation Index
> Fetch the complete documentation index at: https://domoinc-openapi-sync-dataflows.mintlify.site/llms.txt
> Use this file to discover all available pages before exploring further.

# JSON Webhook Connector

### Intro

Domo's JSON Webhook connector allows you to connect to data sources that push JSON-formatted data, such as IFTTT, Github, and Fitbit. Using JSON Webhooks, you can get access to real-time data from weather devices, vending machines, wearables, and more. The Webhook link includes a long-living single use token so anyone with the link can publish data to your DataSet.

You set up your JSON Webhook connection by configuring options in the Data Center as well as in the third-party application, as described below.

### Configure a JSON Webhook Connection

This section explains how to set up a JSON Webhook connection in Domo and in the third-party application. After you have set up a successful connection, you can use the same account any time you go to create a new JSON Webhook DataSet. You can manage connector accounts in the **Accounts** tab in the Data Center. For more information about this tab, see [Managing User Accounts for Connectors](https://domo-support.domo.com/s/article/360042926054 "Managing User Accounts for Connectors").

Follow these steps to configure a JSON Webhook connection:

1. In the navigation header, select **Appstore** to open the Appstore.

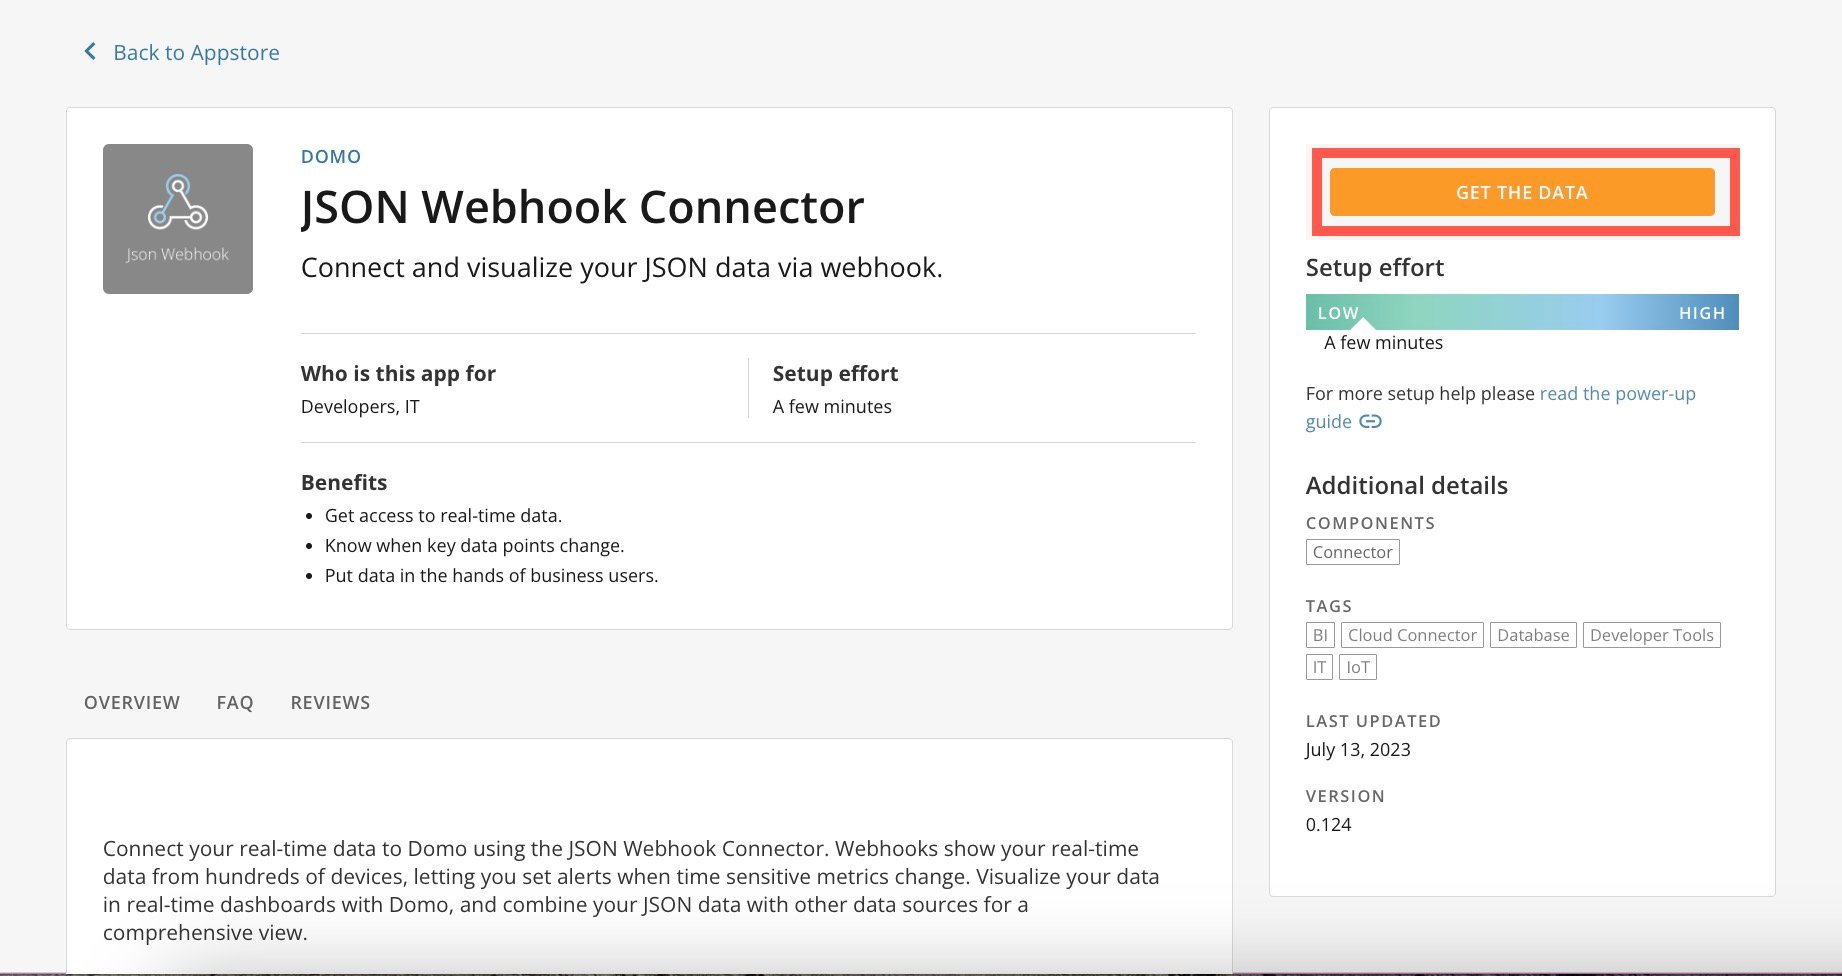
2. Search for and select the JSON Webhook connector to display its details page.

3. Select **Get the Data**.

   <Frame>
     <img alt="get the data.jpg" src="https://mintcdn.com/domoinc-openapi-sync-dataflows/gDOtiCXH_3EtosfI/images/kb/ka0Vq00000006LZ-00N5w00000Ri7BU-0EM5w000006wRKk.jpg?fit=max&auto=format&n=gDOtiCXH_3EtosfI&q=85&s=c5c6c918795c1102e988fdc6d1df98fa" style={{width: 900, height: 477}} width="1842" height="976" data-path="images/kb/ka0Vq00000006LZ-00N5w00000Ri7BU-0EM5w000006wRKk.jpg" />
   </Frame>

4. **Copy Link**.

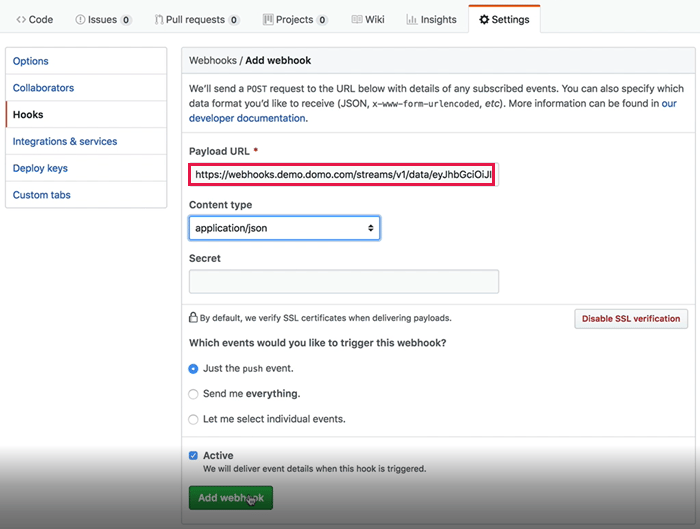
5. Paste the link you just copied into the appropriate location in your third-party application.

   The following screenshot comes from Github:
   <Frame>
     <img alt="json_webhook_3rd_party_url.png" src="https://mintcdn.com/domoinc-openapi-sync-dataflows/gDOtiCXH_3EtosfI/images/kb/ka0Vq00000006LZ-00N5w00000Ri7BU-0EM5w000005vO0I.png?fit=max&auto=format&n=gDOtiCXH_3EtosfI&q=85&s=7915d8d042fff6289c721039f9c46926" style={{width: 750, height: 567}} width="700" height="529" data-path="images/kb/ka0Vq00000006LZ-00N5w00000Ri7BU-0EM5w000005vO0I.png" />
   </Frame>

   This location will *usually* be a field with a name like "Payload URL," like in the above screenshot. However, there are exceptions. Please refer to the third-party application's documentation if you are not sure.

   Also, be sure to follow the third-party application's requirements for pasting the URL. In some applications, the token (the piece after the last backslash) must be pasted on a different line.

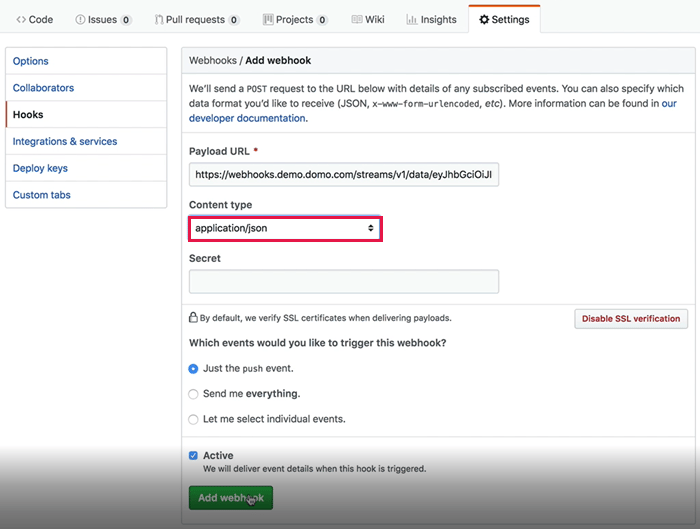
6. Also in the third-party application, be sure to set the content type to "application/json."
   <Frame>
     <img alt="json_webhook_3rd_party_content_type.png" src="https://mintcdn.com/domoinc-openapi-sync-dataflows/gDOtiCXH_3EtosfI/images/kb/ka0Vq00000006LZ-00N5w00000Ri7BU-0EM5w000005vO0J.png?fit=max&auto=format&n=gDOtiCXH_3EtosfI&q=85&s=11ba1ea5727a5963c1f4a63245d2de64" style={{width: 750, height: 567}} width="700" height="529" data-path="images/kb/ka0Vq00000006LZ-00N5w00000Ri7BU-0EM5w000005vO0J.png" />
   </Frame>

7. Configure other settings in the third-party application as necessary then save the webhook.

8. Return to the JSON Webhook connector interface in Domo.

9. (Optional) Enter a **Webhook Secret** if desired.

   If a Webhook Secret is specified, Domo will expect a X-Hub-Signature header with every post. The value of the X-Hub-Signature is the HMAC (hash-based message authentication code) of the request body using the Webhook Secret and either SHA1, SHA256 or SHA512 hash algorithms.

10. (Optional) If you want to include metadata in the DataSet, such as IP and timestamp, select **Yes** in the last menu in the **Details** view; otherwise leave this set to **No**.

11. (Optional) If you want to use "Replace" instead of "Append" when the DataSet is updated, click **Change update settings**, select **Replace** in the menu, then click **Save**.

12. Select **Next**.

13. Enter a DataSet name and description (optional) in the correct fields.

14. Select **Save**.

You should now have a functional connector that collects data continuously from the third-party application and updates to Domo every 15 minutes.

### Details Pane

This pane contains a primary menu, along with various other menus which may or may not appear depending on the report type you select.

<table border="1" cellpadding="1" cellspacing="1" data-aura-rendered-by="33:195;a"><thead><tr><th colspan="1" rowspan="1"><p> Menu </p></th><th colspan="1" rowspan="1"><p> Description </p></th></tr></thead><tbody><tr><td colspan="1" rowspan="1"><p> Webhook URL </p></td><td colspan="1" rowspan="1"><p> Copy the Webhook URL created from the above steps. </p></td></tr><tr><td colspan="1" rowspan="1"><p> Webhook Secret </p></td><td colspan="1" rowspan="1"> If your data provider supports secrets in the X-Hub signature, use sha1=(sha1 hashed payload, using secret as key). Create your own secret and enter it here. </td></tr><tr><td colspan="1" rowspan="1"><p> Webhook Signature Header </p></td><td colspan="1" rowspan="1"><p> Enter your webhook secret header. By default, <b> X-Hub Signature </b> is used. </p></td></tr><tr><td colspan="1" rowspan="1"><p> Include Metadata about the Request, including the IP and Timestamp </p></td><td colspan="1" rowspan="1"><p> Select the appropriate option to include or exclude Metadata about the Request including the IP and Timestamp. </p></td></tr><tr><td colspan="1" rowspan="1"><p> Enable Flattening </p></td><td colspan="1" rowspan="1"><p> Select this checkbox to expand the list in the response. </p></td></tr><tr><td colspan="1" rowspan="1"><p> Update Method </p></td><td colspan="1" rowspan="1"><p> When Domo retrieves your data from the source, you can determine how that new data is imported into the current DataSet. <br /><br /> Learn more about <a href="/s/article/360043430733" target="_self"> update methods </a>. </p></td></tr><tr><td colspan="1" rowspan="1"><p> Reset Schema </p></td><td colspan="1" rowspan="1"><p> Select this checkbox to reset the schema according to the current data. </p></td></tr></tbody></table>

### FAQ

<AccordionGroup>
  <Accordion title="What type of data do I need to push to this connector?">
    JSON-formatted data.
  </Accordion>

  <Accordion title="What does it mean if my data includes blank fields?">
    Because the connector creates a record for each row, if a row does not include data, that row appears blank in your DataSet.
  </Accordion>

  <Accordion title="Who can push data into my Webhook DataSet?">
    The Webhook link includes a long-living single-use token, so anyone with the link can publish data to your DataSet.
  </Accordion>

  <Accordion title="Can anyone with the Webhook link see the data in my DataSet?">
    The Webhook link pushes the data but does not show or expose any data.
  </Accordion>

  <Accordion title="What is the rate limit for this connector?">
    The default is 25 calls per second. If you need more than 25 calls per second, contact [Domo Support](https://domo-support.domo.com/s/).
  </Accordion>

  <Accordion title="Is there a size limit for a single call?">
    Yes, the Webhook accepts up to 100KB of data in a single call.
  </Accordion>

  <Accordion title="What volumes of data can the webhook solution cope with?">
    The connector currently supports packet sizes of 100Kb at a rate of 25 per second. That can be adjusted on a case-by-case basis.
  </Accordion>

  <Accordion title="Can Webhook connector handle the addition of new columns when the update method is set to append?">
    Yes, the connector should be able to handle the addition of new columns, however, there is a limit of 500 columns that will cause the connector to fail if it exceeds that limit.
  </Accordion>

  <Accordion title="What is the expected lag between pushes and it being able to be drawn into the Domo dataset?">
    The default schedule is every 15 minutes, which is the minimum for most of our connectors.
  </Accordion>

  <Accordion title="Can we configure the amount of lag experienced?">
    The update schedule/refresh rate can be decreased for individual datasets through an approval center request.
  </Accordion>

  <Accordion title="Since there is lag, how do we make sure there is no loss of data as there is no direct interface between Tibco (data source) and Webhook connector?">
    We will return 200 “OK” response after we store the JSON file.  If they get anything other than that, it indicates that we were not able to store the file.  On the connector side, you will see an execution error if it runs into problems ingesting the data.  During the next execution, it will attempt to process all the records since the last connector run.
  </Accordion>

  <Accordion title="Can the configuration of the connector be changed if there is a need to increase the amount of data it can hold in the queue/buffer? E.g., if there are excessive amounts of data being queued.">
    Ideally, we would want to consume all the data during each connector execution, to prevent the queue from getting backed up with no chance of getting caught up.  As mentioned, we can tweak the connector/dataset for packet size, rate, and scheduling to make sure that we are consistently pulling everything in the queue.
  </Accordion>

  <Accordion title="If data misses the last index run, is it included in the collection for the next run?">
    Yes, each JSON file is stored in a queue in the order that it is received. The next dataset execution will process the next JSON file in the queue.

    **Video - Creating a JSON Webhook DataSet**

    <iframe allowfullscreen="allowfullscreen" frameborder="1" height="315" src="//www.youtube-nocookie.com/embed/W9Xsoii26kQ" width="560" />
  </Accordion>
</AccordionGroup>
