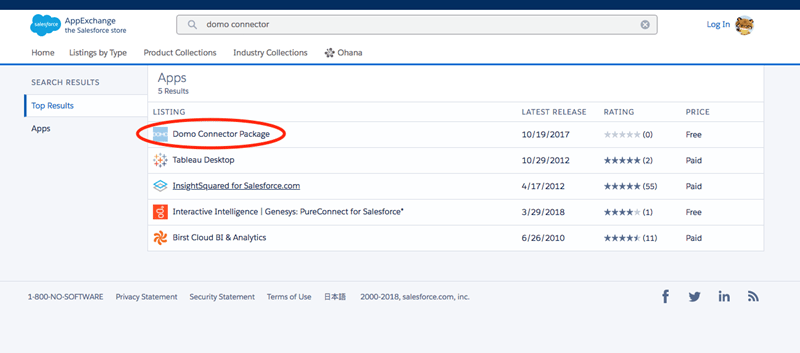
 Alternatively, you can go directly to [https://appexchange.salesforce.com/a...A00000EcrsyUAB](https://appexchange.salesforce.com/appxListingDetail?listingId=a0N3A00000EcrsyUAB "https://appexchange.salesforce.com/appxListingDetail?listingId=a0N3A00000EcrsyUAB").
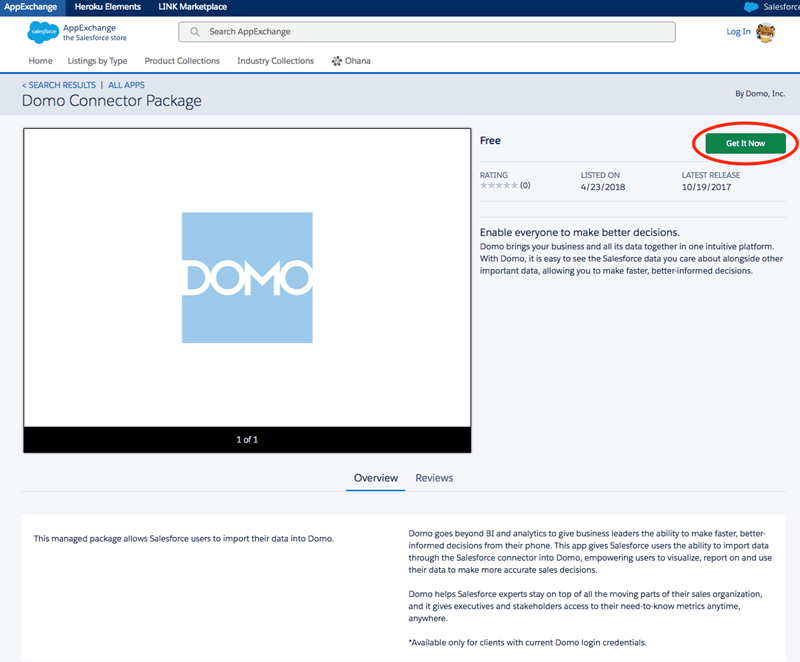
3. Click
**Get It Now**.
Alternatively, you can go directly to [https://appexchange.salesforce.com/a...A00000EcrsyUAB](https://appexchange.salesforce.com/appxListingDetail?listingId=a0N3A00000EcrsyUAB "https://appexchange.salesforce.com/appxListingDetail?listingId=a0N3A00000EcrsyUAB").
3. Click
**Get It Now**.
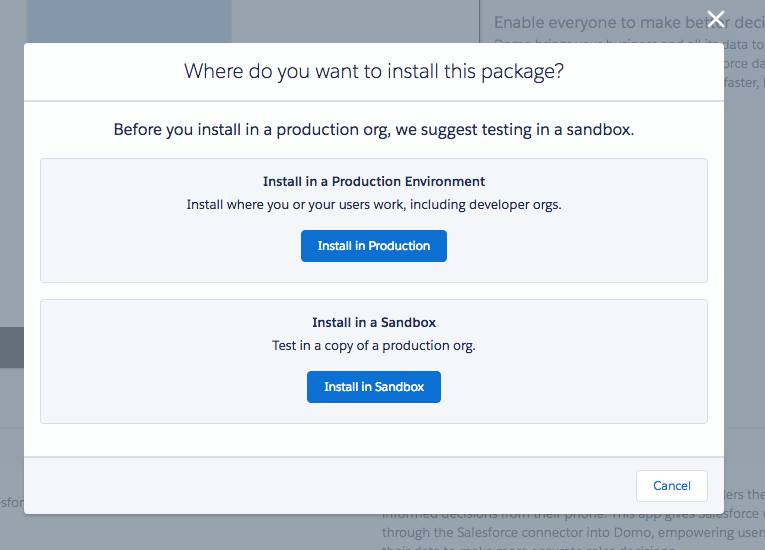
 4. Choose whether you want to install in a production environment or sandbox.
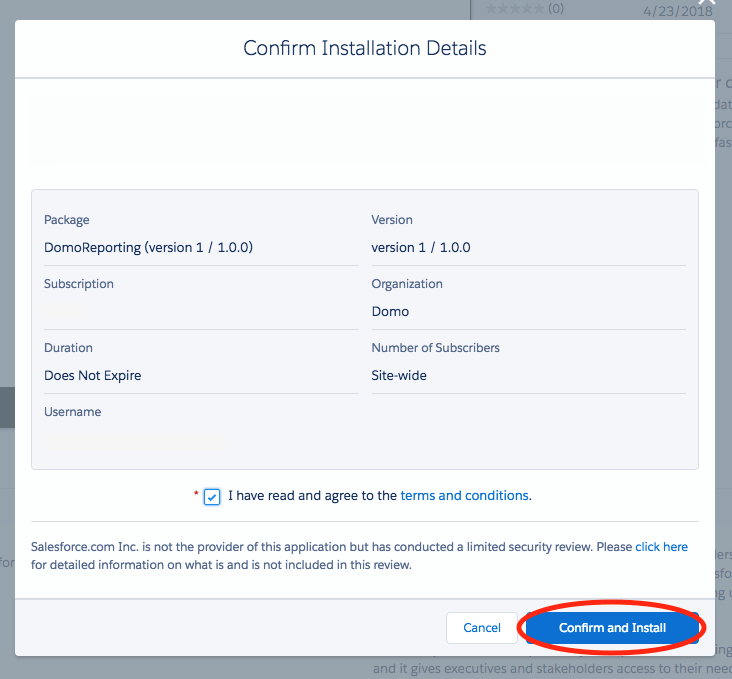
 5. Check the box reading "I have read and agree to the terms and conditions."
6. Click
**Confirm and Install**.
5. Check the box reading "I have read and agree to the terms and conditions."
6. Click
**Confirm and Install**.
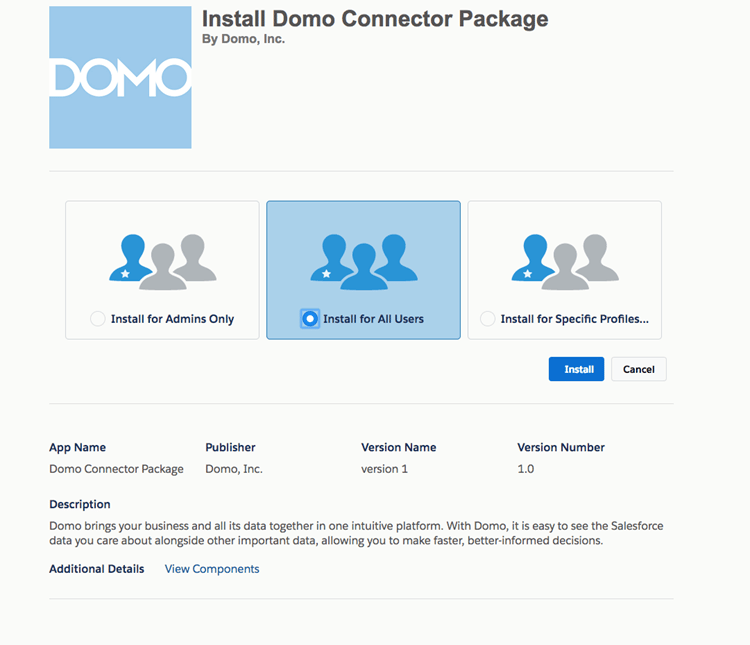
 7. Click the
**Install for All Users** tile.
7. Click the
**Install for All Users** tile.
 For more details, see Salesforce's documentation at [https://help.salesforce.com/articleV...ges.htm\&type=5](https://help.salesforce.com/articleView?id=distribution_installing_packages.htm\&type=5 "https://help.salesforce.com/articleView?id=distribution_installing_packages.htm\&type=5").
### Verifying your Installation
Use Domo's Salesforce Managed Package Validator to verify that your Salesforce Managed Package has been installed correctly.
**To verify your installation,**
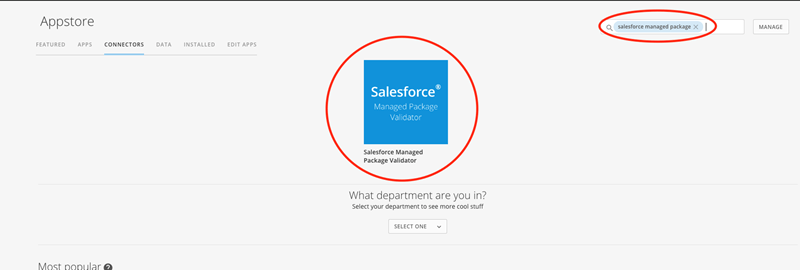
1. In the Connectors page in either the Data Center or Appstore in Domo, search for "Salesforce Managed Package" and double-click on on the icon.
For more details, see Salesforce's documentation at [https://help.salesforce.com/articleV...ges.htm\&type=5](https://help.salesforce.com/articleView?id=distribution_installing_packages.htm\&type=5 "https://help.salesforce.com/articleView?id=distribution_installing_packages.htm\&type=5").
### Verifying your Installation
Use Domo's Salesforce Managed Package Validator to verify that your Salesforce Managed Package has been installed correctly.
**To verify your installation,**
1. In the Connectors page in either the Data Center or Appstore in Domo, search for "Salesforce Managed Package" and double-click on on the icon.
 2. Click
**Get the Data**.
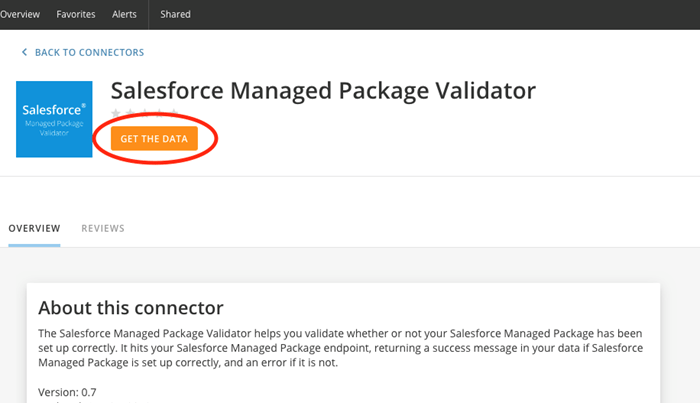
2. Click
**Get the Data**.
 3. Under
**Credentials**, select your Salesforce account name, then click **Next**.
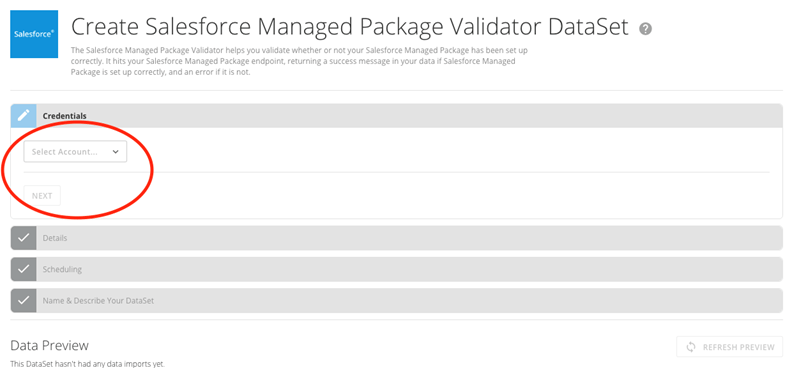
3. Under
**Credentials**, select your Salesforce account name, then click **Next**.
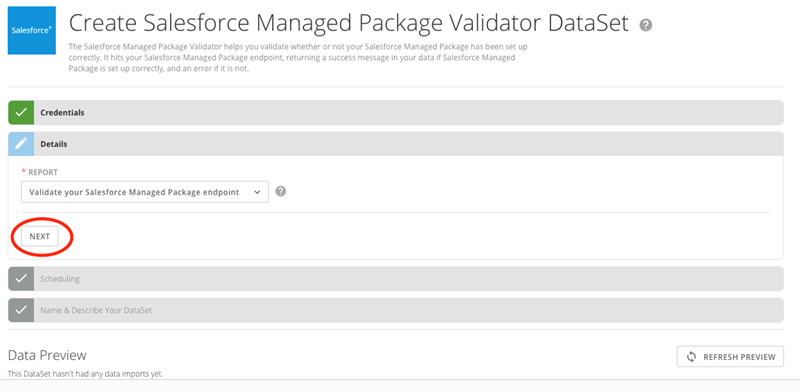
 4. Under
**Details**, click **Next**.
4. Under
**Details**, click **Next**.
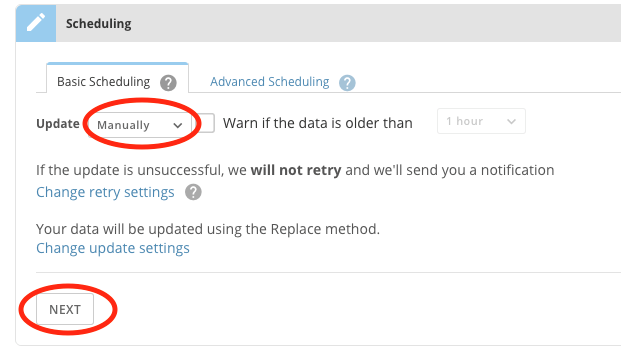
 5. In the
**Update** menu, select **Manually**, then click **Next**.
5. In the
**Update** menu, select **Manually**, then click **Next**.
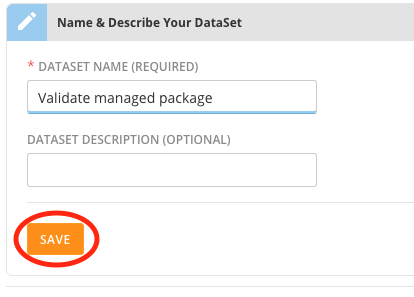
 6. Give your DataSet a name, then click
**Save**.
6. Give your DataSet a name, then click
**Save**.
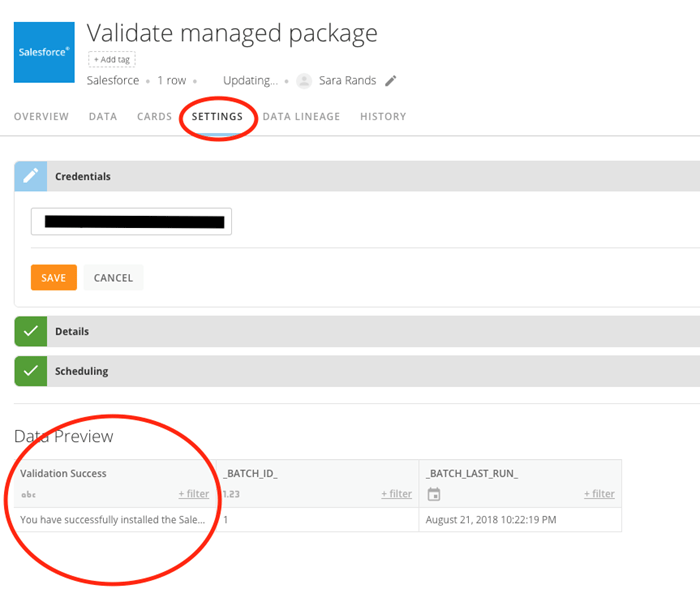
 The DataSet now runs. If everything has been set up correctly, the run will be successful, and a message will appear reading, "Validation Success: You have set up your Salesforce Managed Package correctly."
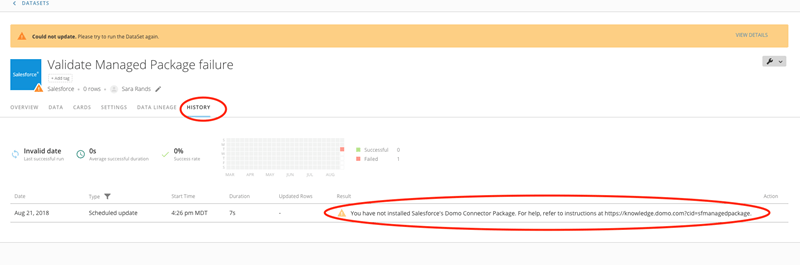
 If everything has *not* been set up correctly, the DataSet fails, and a message appears reading, "You have not installed Salesforce's Domo Connector Package," with a help link to this article.
 ## Connecting to Your Salesforce Account
This section enumerates the options in the Credentials and Data Selection panes in the Salesforce Chatter Connector page. The components of the other panes in this page, **Scheduling**, and **Name & Describe Your DataSet**, are universal across most connector types and are discussed in greater length in [Adding a DataSet Using a Data Connector](/s/article/360042926274 "Adding a DataSet Using a Data Connector").
### Credentials Pane
The Domo Salesforce Chatter connector uses OAuth to connect, so there is no need to enter credentials within Domo. Choose an environment in the Salesforce Environment menu then click Connect to open the Salesforce login screen. Here you can enter your Salesforce username and password. Once you have entered valid Salesforce credentials, you can use the same account any time you go to create a new Salesforce Chatter DataSet. You can manage connector accounts in the **Accounts** tab in the Data Center. For more information about this tab, see [Managing User Accounts for Connectors](/s/article/360042926054 "Managing User Accounts for Connectors").
### Data Selection Pane
This pane contains a primary **How Do You Want to Select Your Salesforce Data** menu, along with various other menus which may or may not appear depending on the report type you select.
## Connecting to Your Salesforce Account
This section enumerates the options in the Credentials and Data Selection panes in the Salesforce Chatter Connector page. The components of the other panes in this page, **Scheduling**, and **Name & Describe Your DataSet**, are universal across most connector types and are discussed in greater length in [Adding a DataSet Using a Data Connector](/s/article/360042926274 "Adding a DataSet Using a Data Connector").
### Credentials Pane
The Domo Salesforce Chatter connector uses OAuth to connect, so there is no need to enter credentials within Domo. Choose an environment in the Salesforce Environment menu then click Connect to open the Salesforce login screen. Here you can enter your Salesforce username and password. Once you have entered valid Salesforce credentials, you can use the same account any time you go to create a new Salesforce Chatter DataSet. You can manage connector accounts in the **Accounts** tab in the Data Center. For more information about this tab, see [Managing User Accounts for Connectors](/s/article/360042926054 "Managing User Accounts for Connectors").
### Data Selection Pane
This pane contains a primary **How Do You Want to Select Your Salesforce Data** menu, along with various other menus which may or may not appear depending on the report type you select.
Menu | Description |
|---|---|
How Do You Want to Select Your Salesforce Data? | Select the method you want to use to pull data from Salesforce. Methods are as follows:
|
Query Option | Select a predefined query ( Chatter Activity ) or create your own query ( Custom ). |
Query | Enter your Salesforce SOQL query here. For example: SELECT Account FROM Account For more information about writing SOQL queries, see [http://www.salesforce.com/us/developer/docs/officetoolkit/Content/sforce\_api\_calls\_soql.htm](http://www.salesforce.com/us/developer/docs/officetoolkit/Content/sforce_api_calls_soql.htm) . |
Report Name | Endpoint URL(s) |
|---|---|
Browse Objects and Fields | /query |
Query | /query |