> ## Documentation Index
> Fetch the complete documentation index at: https://domoinc-openapi-sync-dataflows.mintlify.site/llms.txt
> Use this file to discover all available pages before exploring further.
# Partner Upgrade Path (Beta)
export const InlineImage = ({src, alt = '', height = '1.6em'}) => {
return  ;
};
### Intro
With the Partner Upgrade Path solution, you can configure an upgrade path experience for your customers, allowing them the option to use more of Domo's full product library on a trial basis in a Domo Free instance. When a user selects the upgrade path button in their instance, a modal displays your configured content, giving them the option to sign up for a 30-day trial version of Domo with many premium features enabled.
**Tip:** Learn more about [Domo Free](https://domo-support.domo.com/s/article/000005309?language=en_US).
The Upgrade Path is part of the Domo Partnership program, which includes partner incentives. If you are interested in joining this program, please contact your account team or visit the [partner page](https://www.domo.com/partners/overview) and use the **Become a Partner** option.
This article outlines how to customize the upgrade path experience using the button configuration, modal content builder, and embed and publish experiences. You can also configure an upgrade path when setting up instance templates to manage custom templates in your instance.
**Managed instances and Instance Templates**
A managed instance is a Domo instance that you, or others in your organization, manage using the Instance Management or Instance Template configuration settings available with Domo Everywhere.
Learn more about [Instance Templates](https://domo.lightning.force.com/s/article/000005786) and [Domo Everywhere](https://domo-support.domo.com/s/topic/0TO5w000000ZanbGAC/domo-everywhere?language=en_US) in the Knowledge Base.
;
};
### Intro
With the Partner Upgrade Path solution, you can configure an upgrade path experience for your customers, allowing them the option to use more of Domo's full product library on a trial basis in a Domo Free instance. When a user selects the upgrade path button in their instance, a modal displays your configured content, giving them the option to sign up for a 30-day trial version of Domo with many premium features enabled.
**Tip:** Learn more about [Domo Free](https://domo-support.domo.com/s/article/000005309?language=en_US).
The Upgrade Path is part of the Domo Partnership program, which includes partner incentives. If you are interested in joining this program, please contact your account team or visit the [partner page](https://www.domo.com/partners/overview) and use the **Become a Partner** option.
This article outlines how to customize the upgrade path experience using the button configuration, modal content builder, and embed and publish experiences. You can also configure an upgrade path when setting up instance templates to manage custom templates in your instance.
**Managed instances and Instance Templates**
A managed instance is a Domo instance that you, or others in your organization, manage using the Instance Management or Instance Template configuration settings available with Domo Everywhere.
Learn more about [Instance Templates](https://domo.lightning.force.com/s/article/000005786) and [Domo Everywhere](https://domo-support.domo.com/s/topic/0TO5w000000ZanbGAC/domo-everywhere?language=en_US) in the Knowledge Base.
 ***
### Enable the Upgrade Path
Contact your Domo account team to enable the Upgrade Path in your instance.
### Access the Upgrade Path Settings
You can access the Upgrade Path settings by navigating to **Admin** > **Domo Everywhere** > **Upgrade Path**.
### Configure the Upgrade Path Button
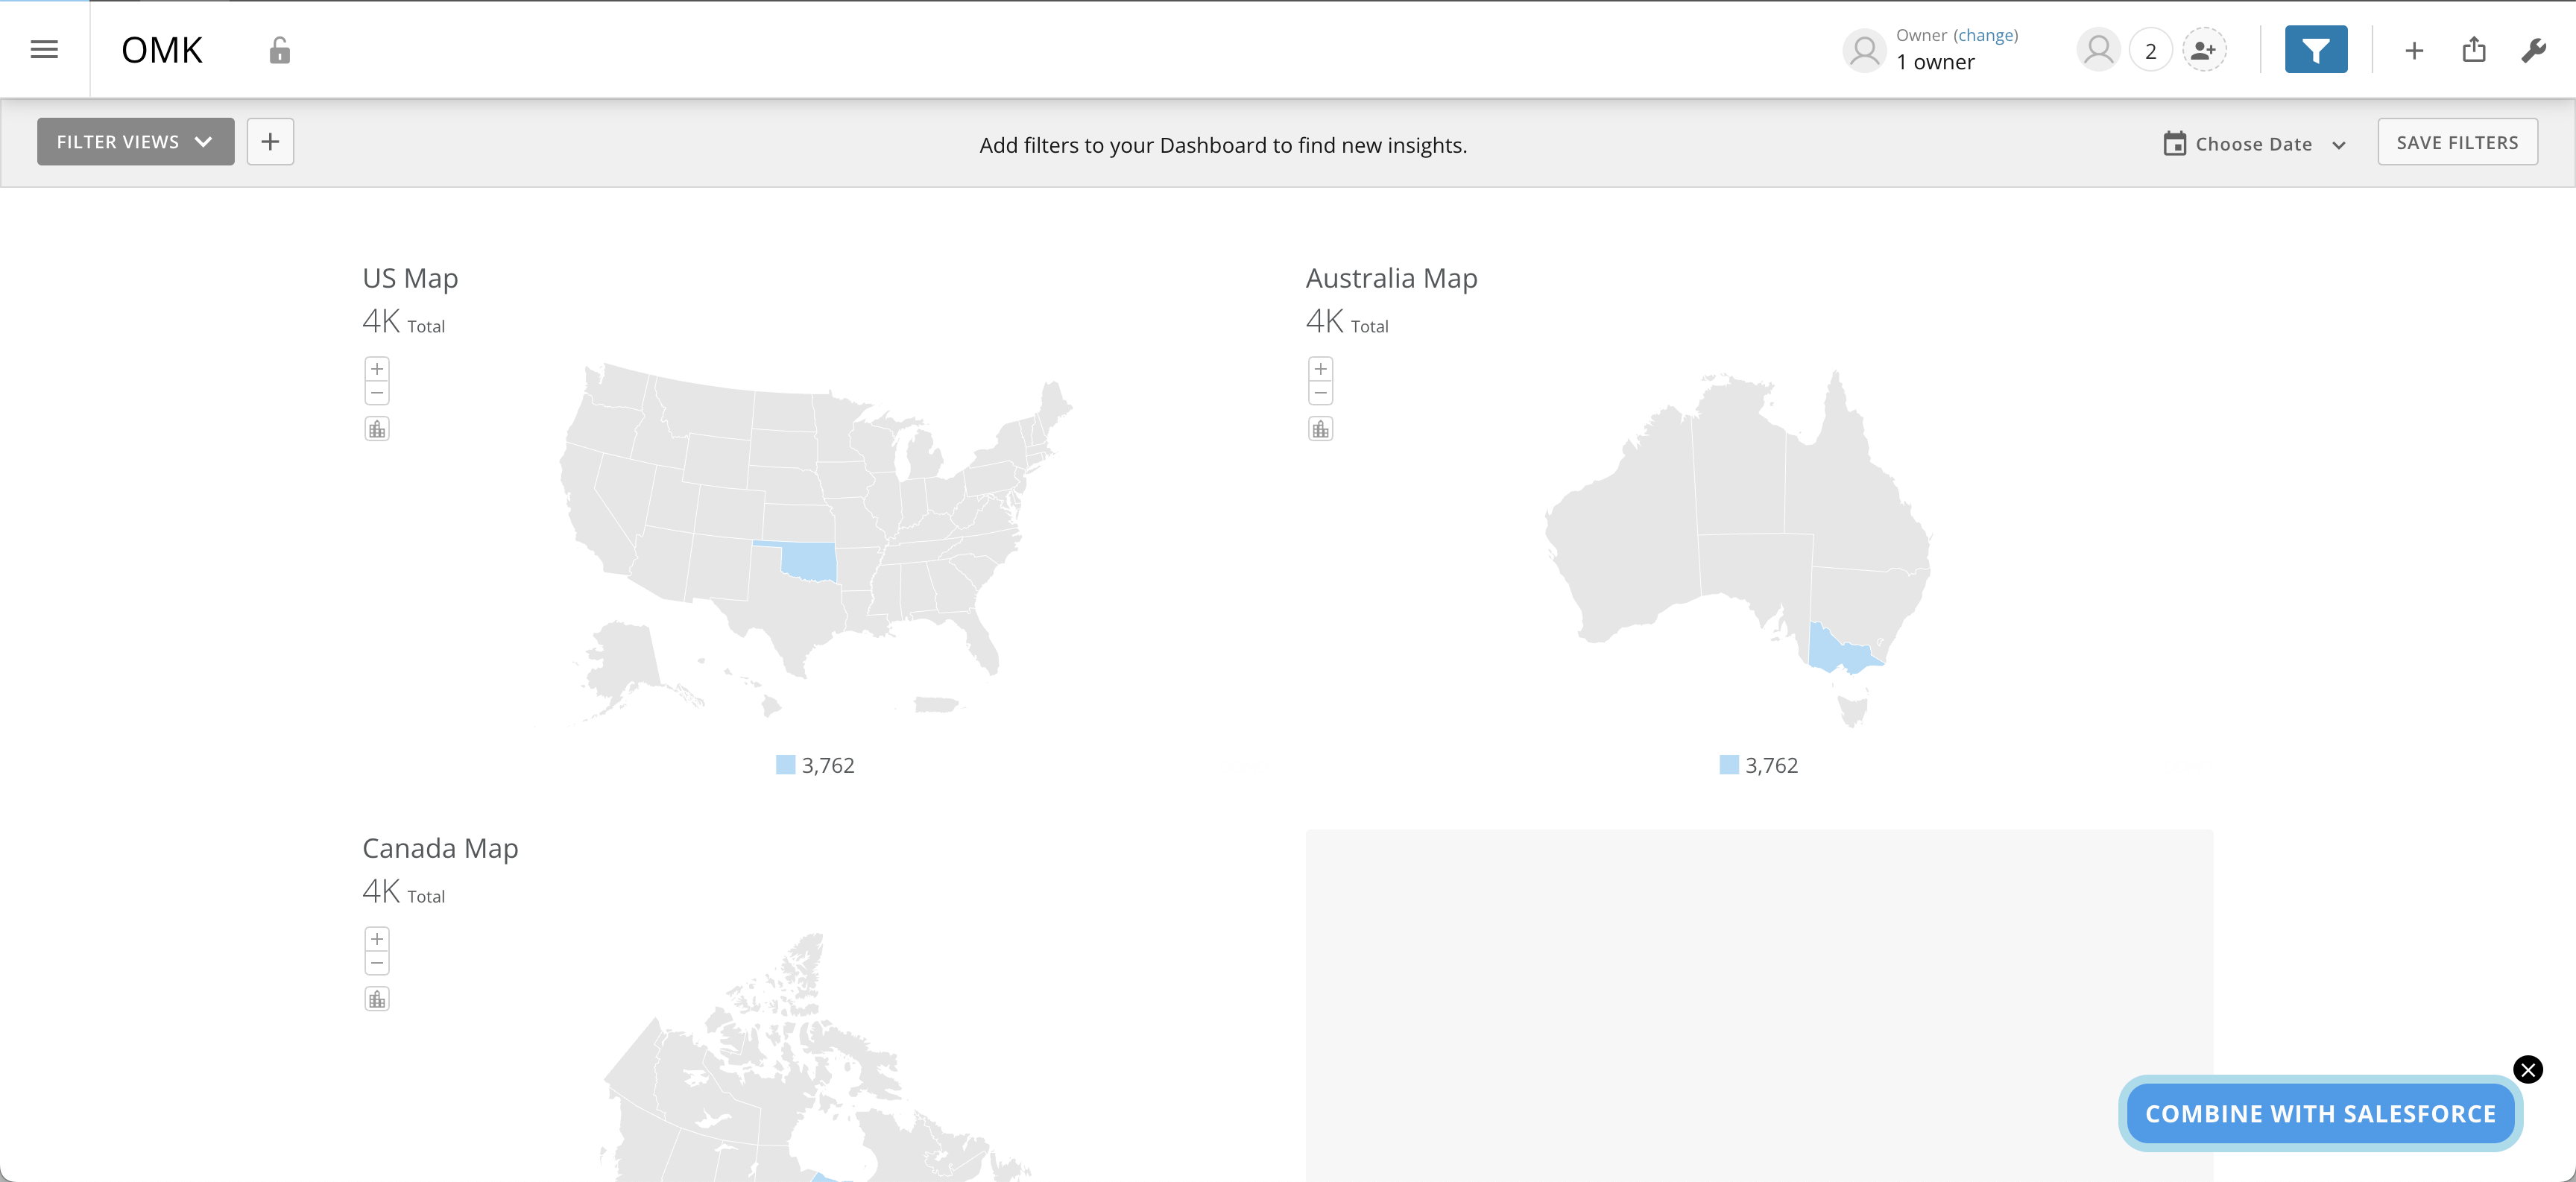
The first step on the Upgrade Path is the upgrade path button. When an end user selects the button, they begin moving through the Upgrade Path experience, including the [card/element](#modal_content) you set up and any [embedded](#embedded_experience) or [published](#publish_experience) content you include. You can customize the look and feel of your upgrade path button to stay consistent with your company's brand/standards.
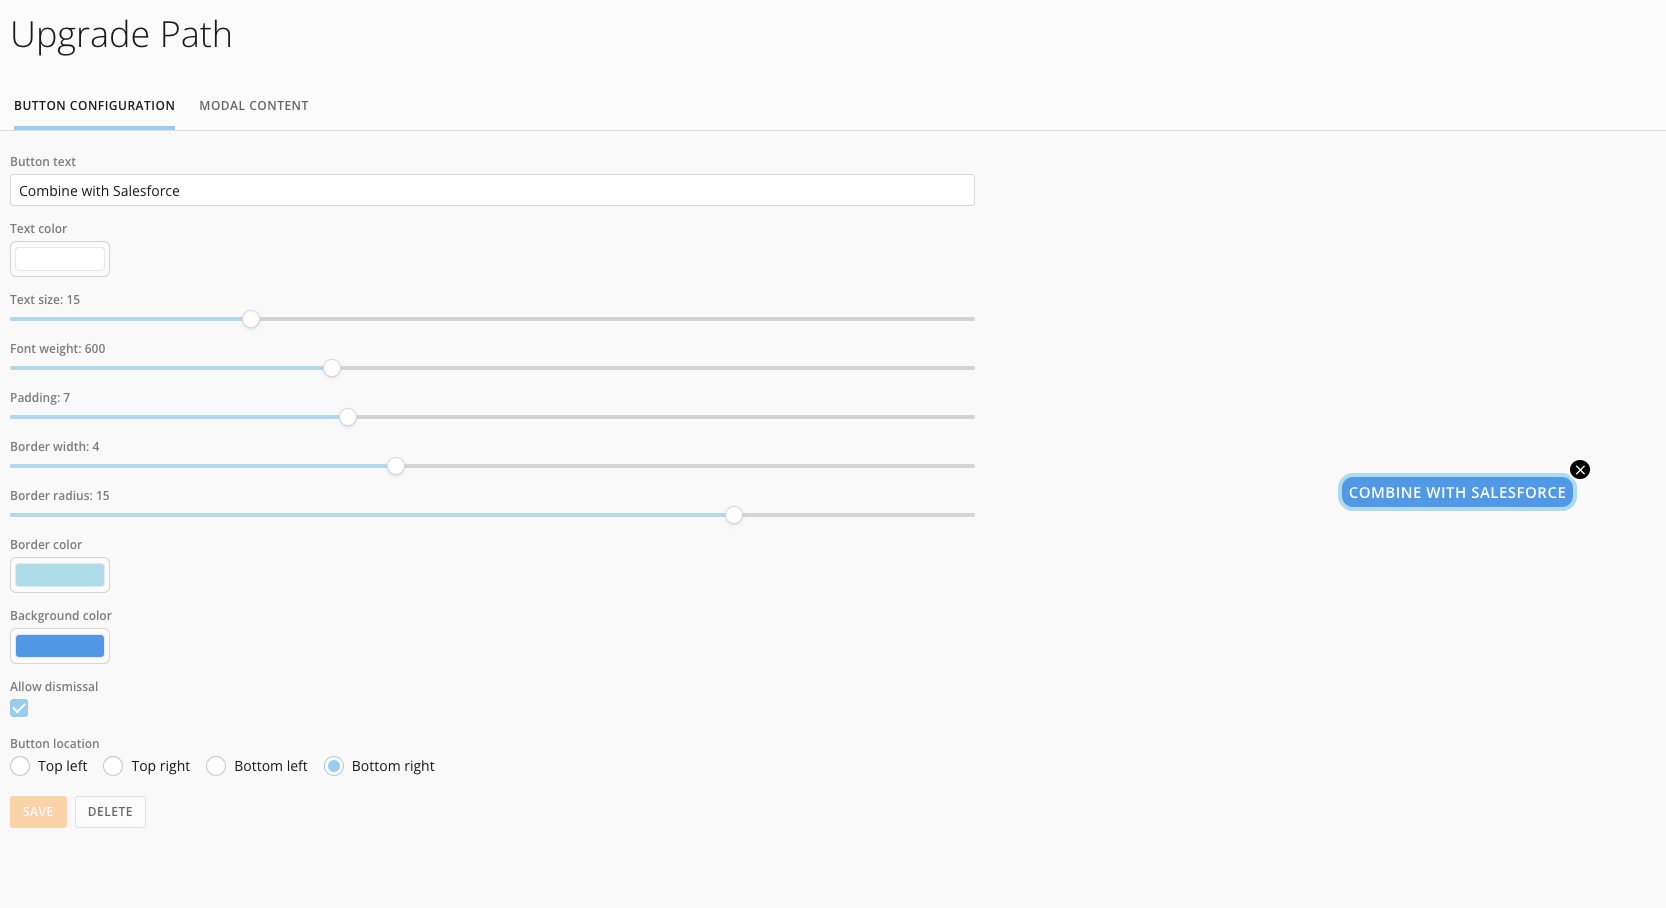
After navigating to the Upgrade Path settings, described [above](#access_upgrade_path), you can design your upgrade path button using the configuration controls in the **Button Configuration** tab.
A live preview of your button displays to the right of the controls as you edit.
The following button configuration options are available:
* **Button text —** Input your button text.
* **Text color —** Use the color picker to select your button text.
* **Text size —** Use the slider to select the button text size.
* **Font weight —** Use the slider to select the text font weight.
* **Padding —** Use the slider to select the padding size for the text.
* **Border width —** Use the slider to select the button border width.
* **Border radius —** Use the slider to select the button border-radius.
* **Border color —** Use the color picker to select the button border color.
* **Background color —** Use the color picker to select the button background color.
* **Allow dismissal —** You can include the option for your end users to dismiss the button.
* **Button location —** Select the placement of your button. Options include top left, top right, bottom left, or bottom right.
***
### Enable the Upgrade Path
Contact your Domo account team to enable the Upgrade Path in your instance.
### Access the Upgrade Path Settings
You can access the Upgrade Path settings by navigating to **Admin** > **Domo Everywhere** > **Upgrade Path**.
### Configure the Upgrade Path Button
The first step on the Upgrade Path is the upgrade path button. When an end user selects the button, they begin moving through the Upgrade Path experience, including the [card/element](#modal_content) you set up and any [embedded](#embedded_experience) or [published](#publish_experience) content you include. You can customize the look and feel of your upgrade path button to stay consistent with your company's brand/standards.
After navigating to the Upgrade Path settings, described [above](#access_upgrade_path), you can design your upgrade path button using the configuration controls in the **Button Configuration** tab.
A live preview of your button displays to the right of the controls as you edit.
The following button configuration options are available:
* **Button text —** Input your button text.
* **Text color —** Use the color picker to select your button text.
* **Text size —** Use the slider to select the button text size.
* **Font weight —** Use the slider to select the text font weight.
* **Padding —** Use the slider to select the padding size for the text.
* **Border width —** Use the slider to select the button border width.
* **Border radius —** Use the slider to select the button border-radius.
* **Border color —** Use the color picker to select the button border color.
* **Background color —** Use the color picker to select the button background color.
* **Allow dismissal —** You can include the option for your end users to dismiss the button.
* **Button location —** Select the placement of your button. Options include top left, top right, bottom left, or bottom right.
 **Required Grant:** To see and interact with the upgrade path button, you must have the Use Upgrade Path grant in the managed instance. Learn more about [grants](/s/article/360043438973).
### Modal Content
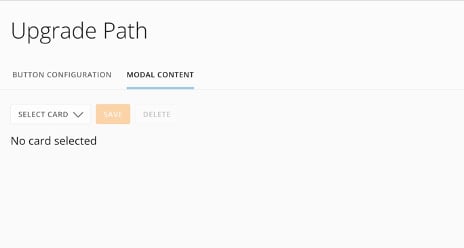
After configuring how the button displays, you can customize the content displayed in the Upgrade Path modal. The modal content displays after users select the Upgrade Path button in their instance.
In the **Modal Content** tab, you can select a card, custom app, Domo Brick, or a Domo Pro-code app to display in the modal.
**Required Grant:** To see and interact with the upgrade path button, you must have the Use Upgrade Path grant in the managed instance. Learn more about [grants](/s/article/360043438973).
### Modal Content
After configuring how the button displays, you can customize the content displayed in the Upgrade Path modal. The modal content displays after users select the Upgrade Path button in their instance.
In the **Modal Content** tab, you can select a card, custom app, Domo Brick, or a Domo Pro-code app to display in the modal.
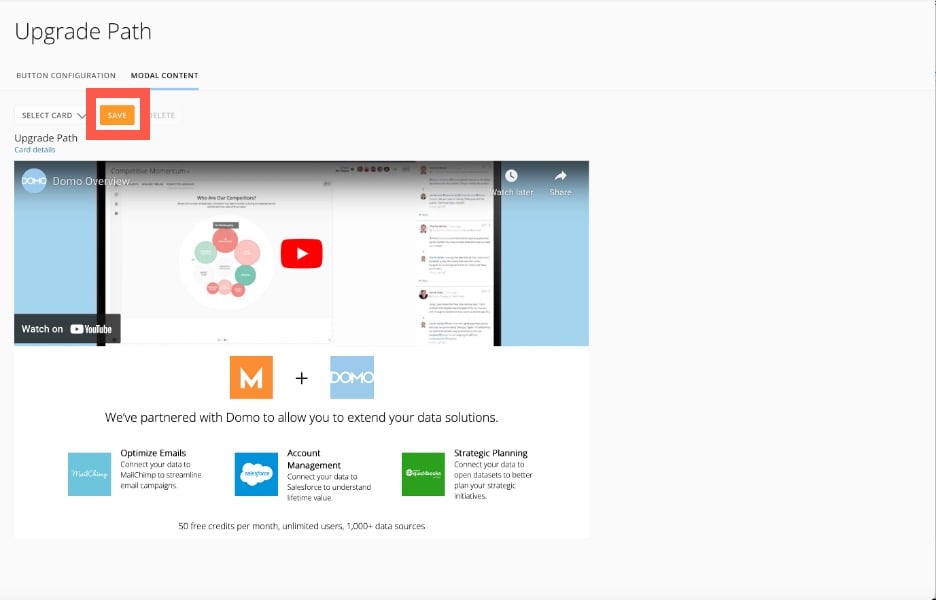
 After adding your card/element, a preview of your content displays. Select **Save** to keep the selected item.
 ### Embedded Experience
After you design the [button](#button_configuration) and save your chosen [modal content](#modal_content), end users can see and interact with the Upgrade Path in all dashboards embedded in their managed instances.
The configured button displays every time the page loads. If you have configured the button to be dismissable, the end user can choose to dismiss it.
The live Upgrade Path experience is as follows:
1. Selecting the button opens the modal to display your selected content.
2. Selecting **Create a Free Account** in the modal redirects the end user to the [Domo Free signup page](https://www.domo.com/start/domo-everywhere?utm_partner=\&upgid=1765736a-49f4-4d85-8f6a-20a9bb5a95bb) .
### Embedded Experience
After you design the [button](#button_configuration) and save your chosen [modal content](#modal_content), end users can see and interact with the Upgrade Path in all dashboards embedded in their managed instances.
The configured button displays every time the page loads. If you have configured the button to be dismissable, the end user can choose to dismiss it.
The live Upgrade Path experience is as follows:
1. Selecting the button opens the modal to display your selected content.
2. Selecting **Create a Free Account** in the modal redirects the end user to the [Domo Free signup page](https://www.domo.com/start/domo-everywhere?utm_partner=\&upgid=1765736a-49f4-4d85-8f6a-20a9bb5a95bb) .
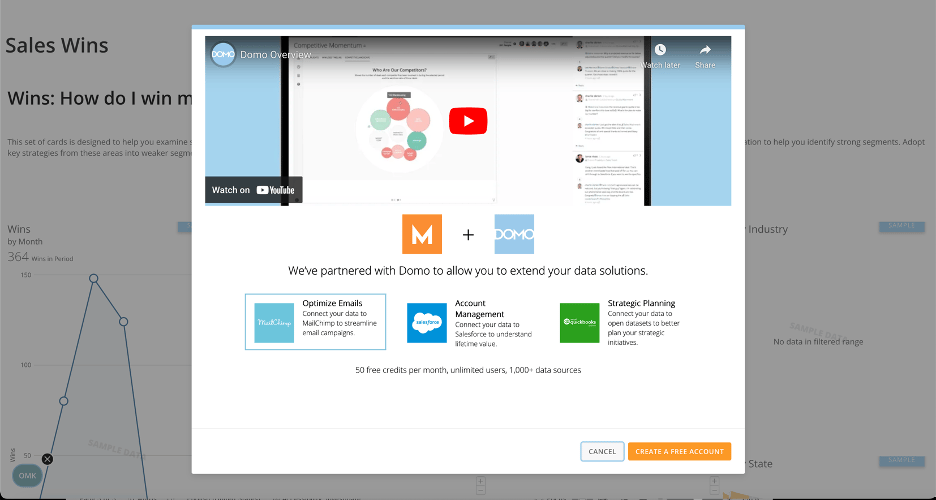 When a user creates a free account with Domo Free, they gain access to additional Domo features, and you can receive partner incentives if you are part of the [partner program](https://www.domo.com/partners/overview) .
### Publish Experience
You can also enable the Upgrade Path experience for your managed instances within an Instance Template. Users in the managed instances can see the Upgrade Path button on all pages in the instance, including App Studio pages, but not on embedded dashboards.
Learn more about [Instance Templates](/s/article/000005786).
When a user creates a free account with Domo Free, they gain access to additional Domo features, and you can receive partner incentives if you are part of the [partner program](https://www.domo.com/partners/overview) .
### Publish Experience
You can also enable the Upgrade Path experience for your managed instances within an Instance Template. Users in the managed instances can see the Upgrade Path button on all pages in the instance, including App Studio pages, but not on embedded dashboards.
Learn more about [Instance Templates](/s/article/000005786).
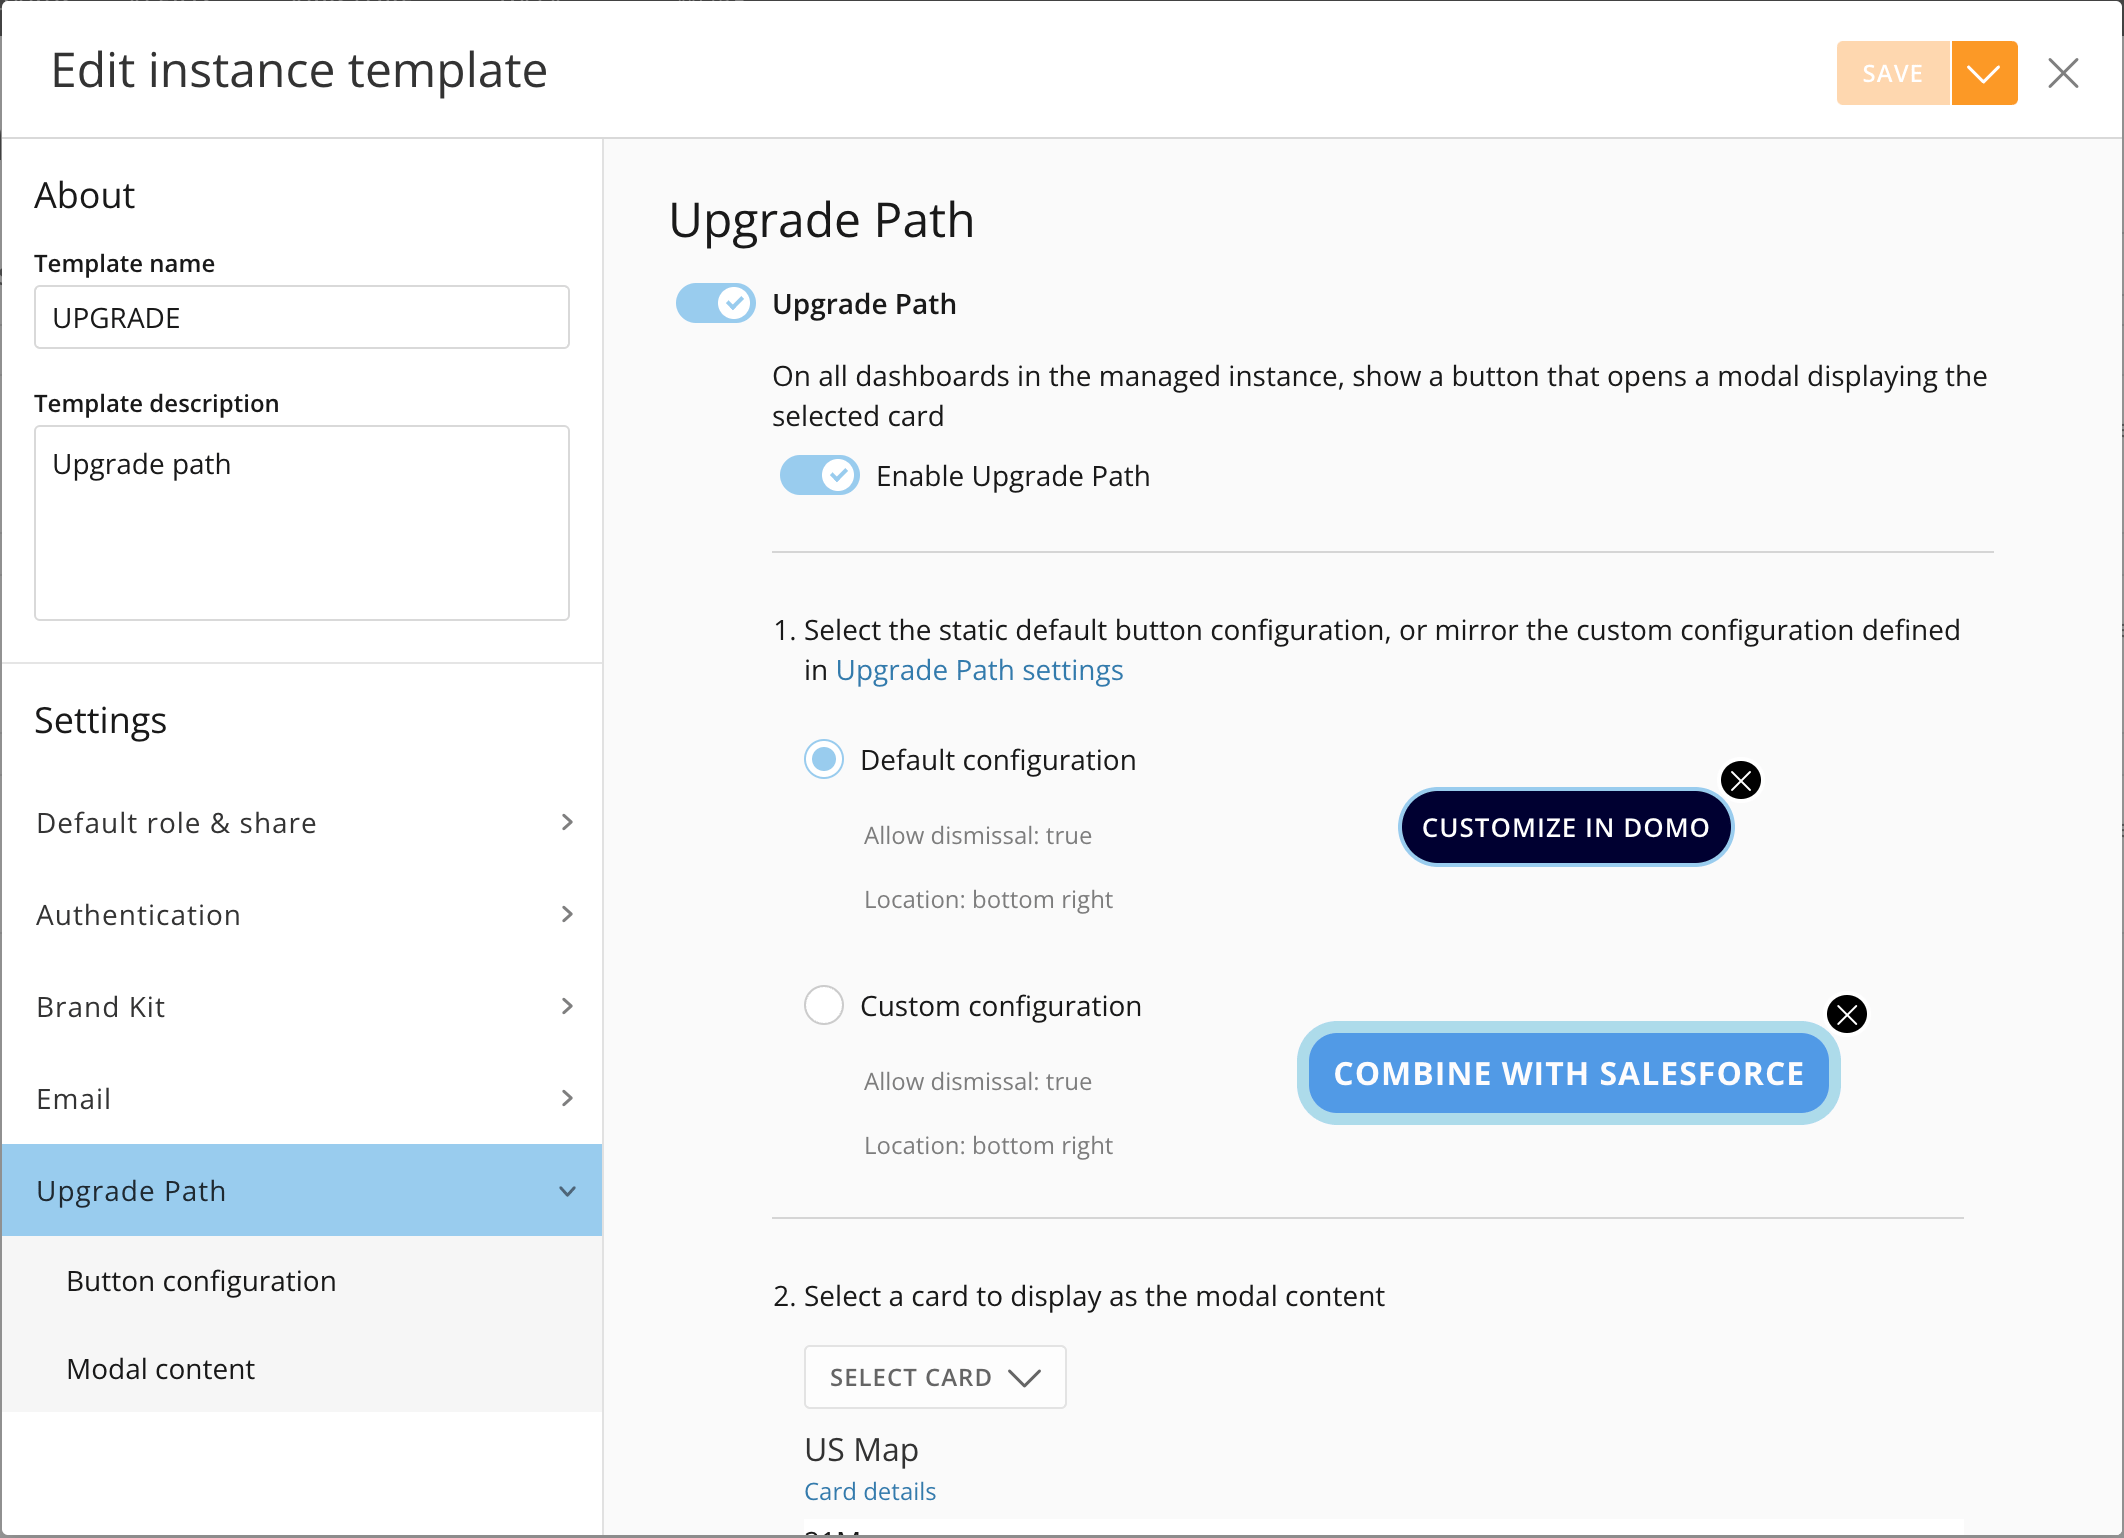 Follow these steps to configure the Upgrade Path in an instance template:
1. Open the
[instance template](https://domo-support.domo.com/s/article/000005786?language=en_US#create_instance_template) configuration modal.
2. Go to the **Upgrade Path** section of the template.
3. Enable the **Upgrade Path** and **Enable Upgrade Path** toggles.
Follow these steps to configure the Upgrade Path in an instance template:
1. Open the
[instance template](https://domo-support.domo.com/s/article/000005786?language=en_US#create_instance_template) configuration modal.
2. Go to the **Upgrade Path** section of the template.
3. Enable the **Upgrade Path** and **Enable Upgrade Path** toggles.
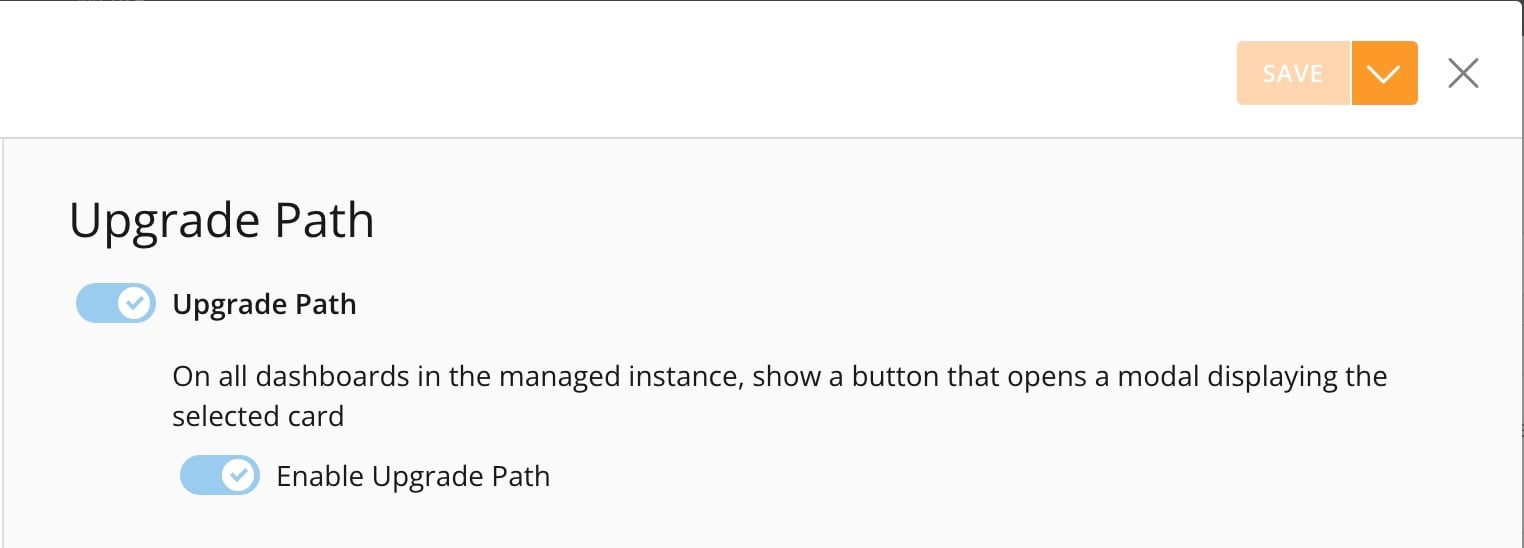 3. In step 1 of the template, select either the default or custom button configuration.
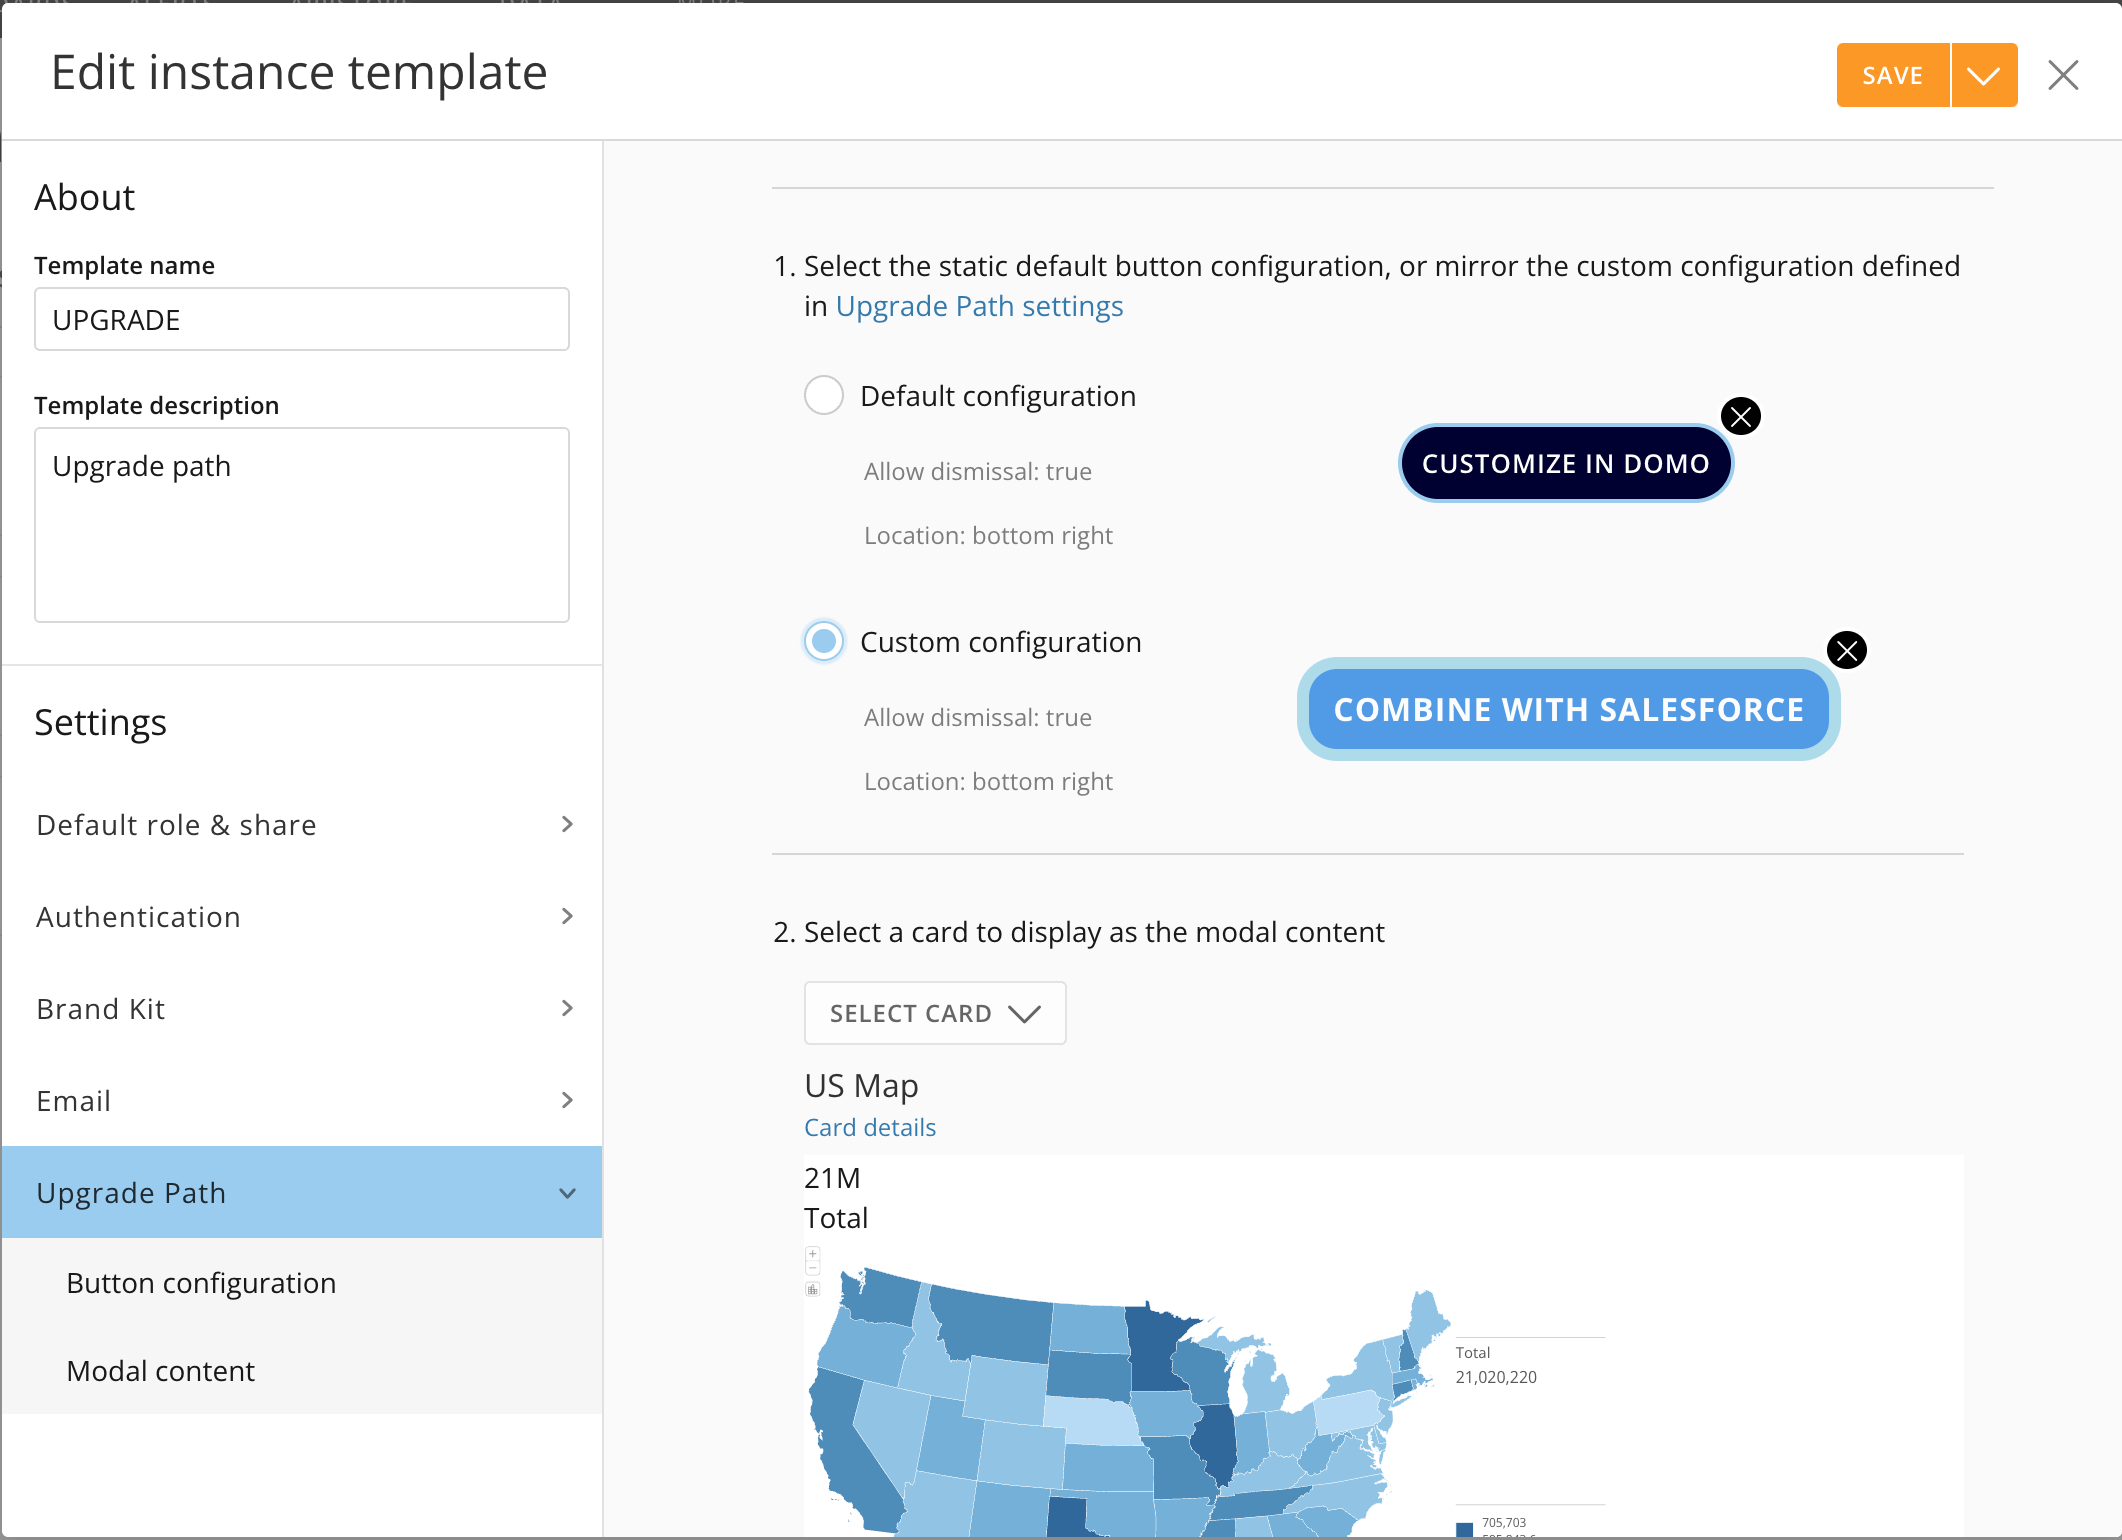 4. In step 2 of the template, select a card or other element to display in the modal.
5. Save your changes before closing the template.
After configuring your upgrade path, you must apply it to the instances where you want it to appear. To do this, follow these steps:
1. Go to **Instance management** > **Templates** (tab) and locate the template that includes your upgrade path.
2. Select
**Options** (wrench icon) > **Apply** to open the apply template modal.
4. In step 2 of the template, select a card or other element to display in the modal.
5. Save your changes before closing the template.
After configuring your upgrade path, you must apply it to the instances where you want it to appear. To do this, follow these steps:
1. Go to **Instance management** > **Templates** (tab) and locate the template that includes your upgrade path.
2. Select
**Options** (wrench icon) > **Apply** to open the apply template modal.
 3. Choose which instance(s) and select **Apply**.
# Use an Upgrade Path Template in a Managed Instance
When editing or creating a new managed instance, choose the template that includes your configured upgrade path, as described below:
1. Go to **Domo Everywhere** > **Instance management** > **Instances** (tab).
2. Choose **More** (horizontal three dots icon) > **Edit instance**.
3. Choose which instance(s) and select **Apply**.
# Use an Upgrade Path Template in a Managed Instance
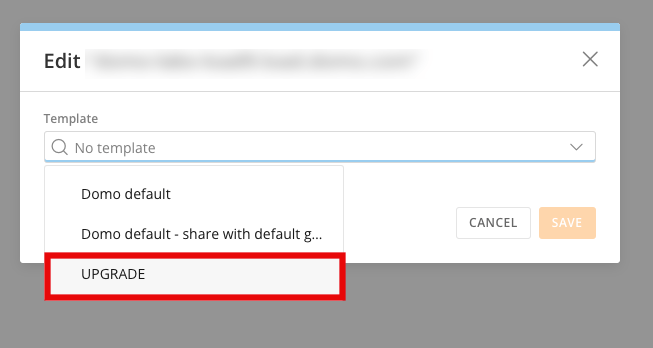
When editing or creating a new managed instance, choose the template that includes your configured upgrade path, as described below:
1. Go to **Domo Everywhere** > **Instance management** > **Instances** (tab).
2. Choose **More** (horizontal three dots icon) > **Edit instance**.
 3. Choose the template that includes the upgrade path and save your changes.
 In the managed instance(s) where you've applied the template, the upgrade path button displays on the page. If you have configured the button to be dismissable, users can dismiss it (it reappears when the page reloads).