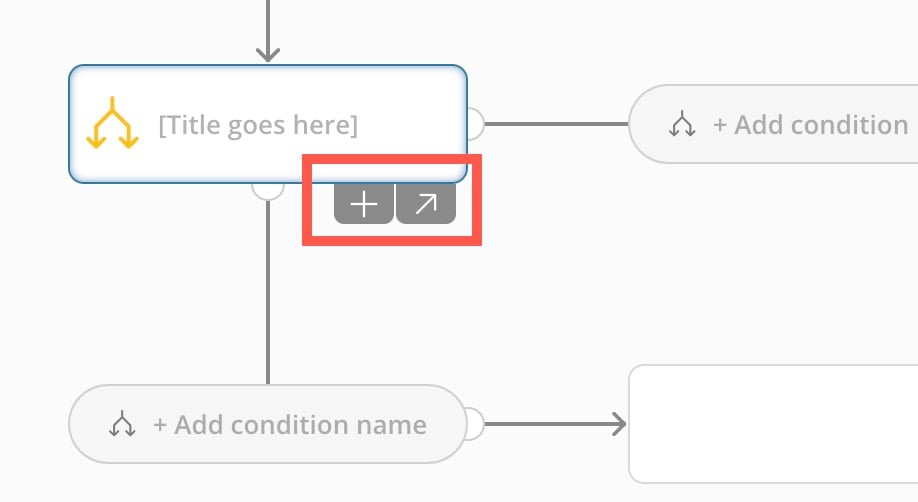
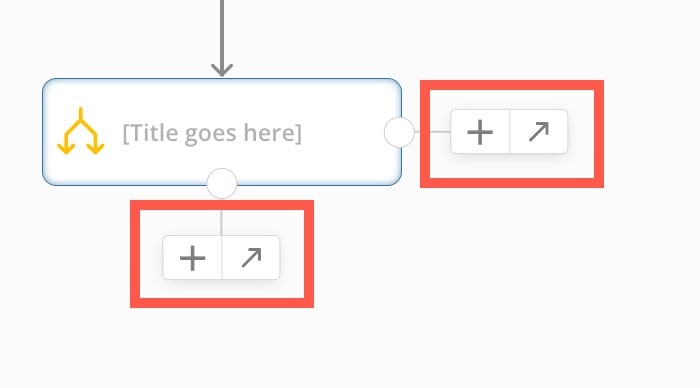
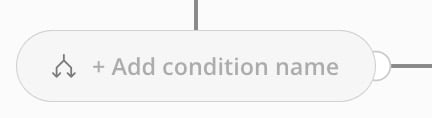
 In the configuration panel, you can enter a name and description for the condition and choose a configuration type: [Default](#default_condition_configuration), [Basic](#basic_configuration), or [Advanced](#advanced_configuration). These are described below:
#### Default
A default condition only activates if no other condition evaluates as True. There are no additional configuration fields to complete for a default condition.
In the configuration panel, you can enter a name and description for the condition and choose a configuration type: [Default](#default_condition_configuration), [Basic](#basic_configuration), or [Advanced](#advanced_configuration). These are described below:
#### Default
A default condition only activates if no other condition evaluates as True. There are no additional configuration fields to complete for a default condition.
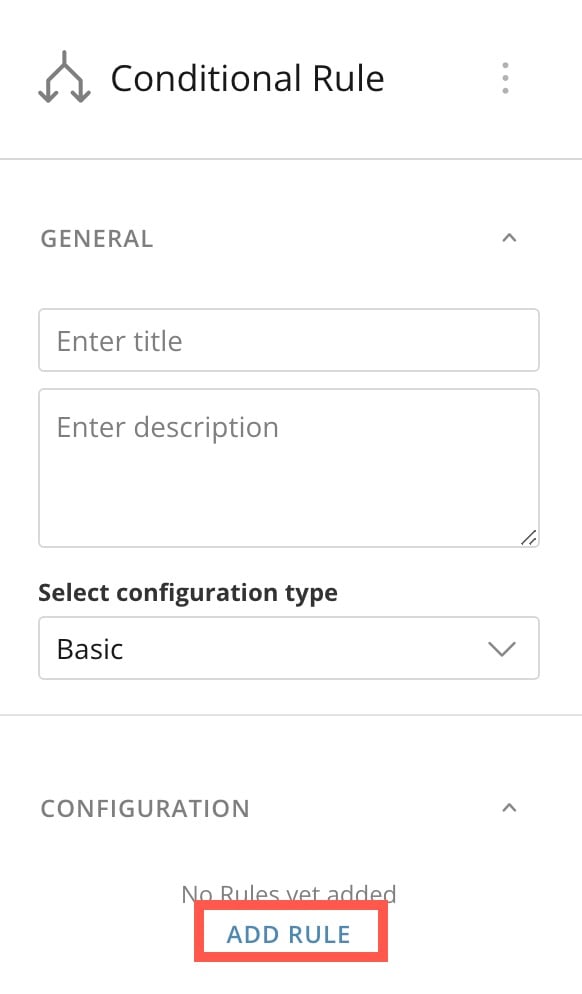 2. In the modal, use the **Datalist variable** dropdown to choose a variable that you want to evaluate in the condition.
Choosing a variable expands the expression editor.
3. (Conditional) If this is not your first rule, use the radio buttons to choose AND or OR logic for the rule. The rules stack.
2. In the modal, use the **Datalist variable** dropdown to choose a variable that you want to evaluate in the condition.
Choosing a variable expands the expression editor.
3. (Conditional) If this is not your first rule, use the radio buttons to choose AND or OR logic for the rule. The rules stack.
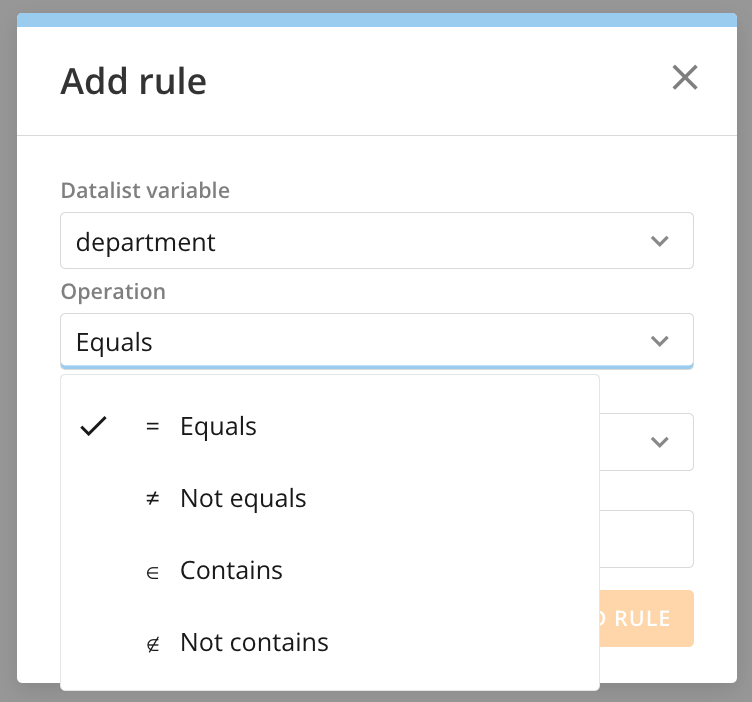 4. Fill out the fields to define your rule. The operation options vary based on your variable.
* The **Comparison value type** allows you to choose a custom value, a null value, or another variable to evaluate against the selected DataSet variable.
5. After populating all the fields, select **Add Rule**.
Your rule displays in the configuration panel. You can edit and delete rules.
#### Advanced Configuration
Advanced configuration allows you to create rules with expression syntax. Use an advanced expression if you need to reference an Open or Defined Object variable at the parent level, or if you need an operation that isn't available in the basic configuration.
You can enter FEEL syntax to create an advanced rule. Learn about [FEEL
4. Fill out the fields to define your rule. The operation options vary based on your variable.
* The **Comparison value type** allows you to choose a custom value, a null value, or another variable to evaluate against the selected DataSet variable.
5. After populating all the fields, select **Add Rule**.
Your rule displays in the configuration panel. You can edit and delete rules.
#### Advanced Configuration
Advanced configuration allows you to create rules with expression syntax. Use an advanced expression if you need to reference an Open or Defined Object variable at the parent level, or if you need an operation that isn't available in the basic configuration.
You can enter FEEL syntax to create an advanced rule. Learn about [FEEL 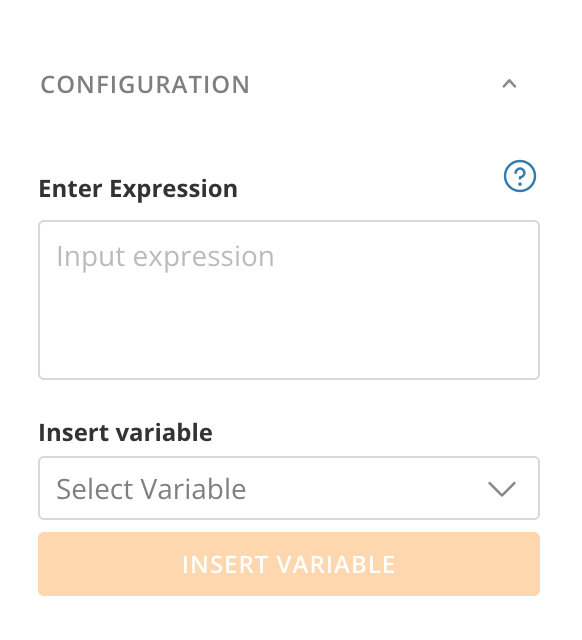 # Parallel Logic
Adding parallel logic forces your workflow to branch into multiple flows that are all active at the same time. Use parallel logic when you want your workflow to perform multiple tasks at the same time.
1. Add a shape and choose
# Parallel Logic
Adding parallel logic forces your workflow to branch into multiple flows that are all active at the same time. Use parallel logic when you want your workflow to perform multiple tasks at the same time.
1. Add a shape and choose
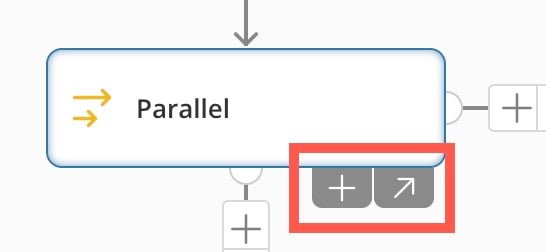 Shapes with parallel logic don't require any more configuration. When a workflow reaches one of these shapes, each outgoing flow automatically begins to complete.
#### Combine Multiple Incoming Flows
Shapes with parallel logic can accept multiple incoming flows. You can use a shape to combine multiple flows into a single flow. When the workflow reaches a shape with parallel logic, it waits for all incoming flows to reach that shape before moving forward.
# Email
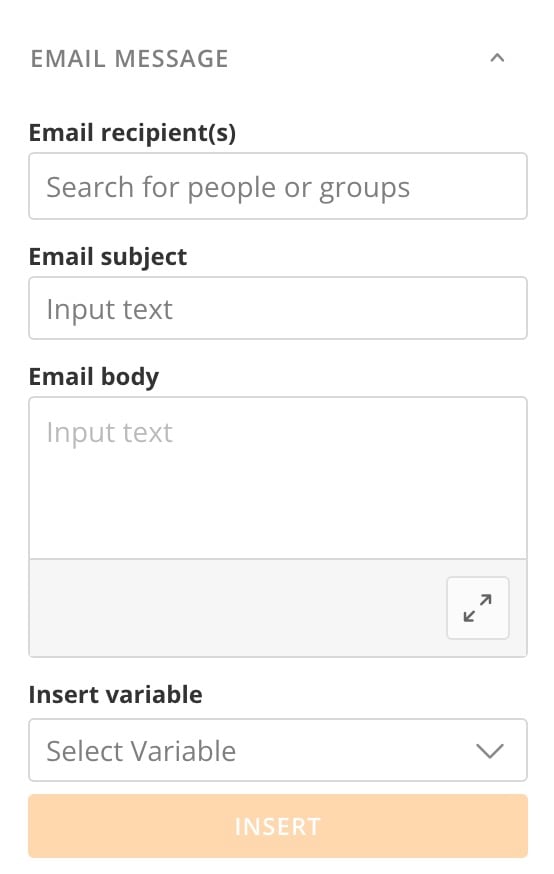
Adding an email User Task enables the workflow to automatically send an email to configured recipients. Recipients can respond to the email by using the options embedded in the email body, which display as buttons.
Move through the configuration panel, filling in each section.
Shapes with parallel logic don't require any more configuration. When a workflow reaches one of these shapes, each outgoing flow automatically begins to complete.
#### Combine Multiple Incoming Flows
Shapes with parallel logic can accept multiple incoming flows. You can use a shape to combine multiple flows into a single flow. When the workflow reaches a shape with parallel logic, it waits for all incoming flows to reach that shape before moving forward.
# Email
Adding an email User Task enables the workflow to automatically send an email to configured recipients. Recipients can respond to the email by using the options embedded in the email body, which display as buttons.
Move through the configuration panel, filling in each section.
 #### Configure Response Options
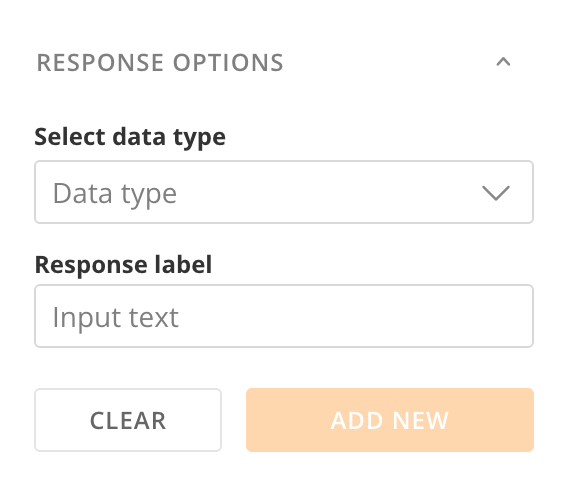
Under **Response Options**, choose a [data type](#data_types) for the response (**Select data** **type**), the text that displays on the button in the email **(Response** **label**), and the value that returns to the workflow if the button is selected (**Response value** —this field has different options based on the data type you select).
#### Configure Response Options
Under **Response Options**, choose a [data type](#data_types) for the response (**Select data** **type**), the text that displays on the button in the email **(Response** **label**), and the value that returns to the workflow if the button is selected (**Response value** —this field has different options based on the data type you select).
 #### Use String Builder
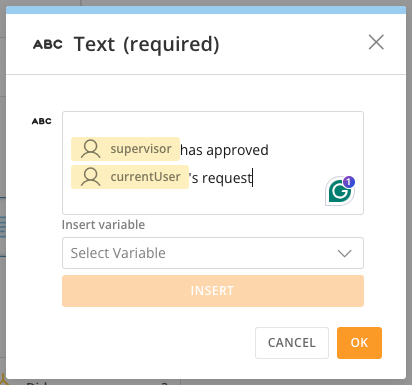
The String Builder feature allows you to combine custom text with variables from the Workflow variables list. Anywhere you can add a custom value, you can use String Builder.
As you map your parameters for email and form User Tasks or any Code Function, you can choose a **Custom** value for your variable and then insert variables and text to create complex expressions. Select **OK** to save your custom mapping. At workflow runtime, the current value of the variable is passed as the parameter.
#### Use String Builder
The String Builder feature allows you to combine custom text with variables from the Workflow variables list. Anywhere you can add a custom value, you can use String Builder.
As you map your parameters for email and form User Tasks or any Code Function, you can choose a **Custom** value for your variable and then insert variables and text to create complex expressions. Select **OK** to save your custom mapping. At workflow runtime, the current value of the variable is passed as the parameter.
 # General Task
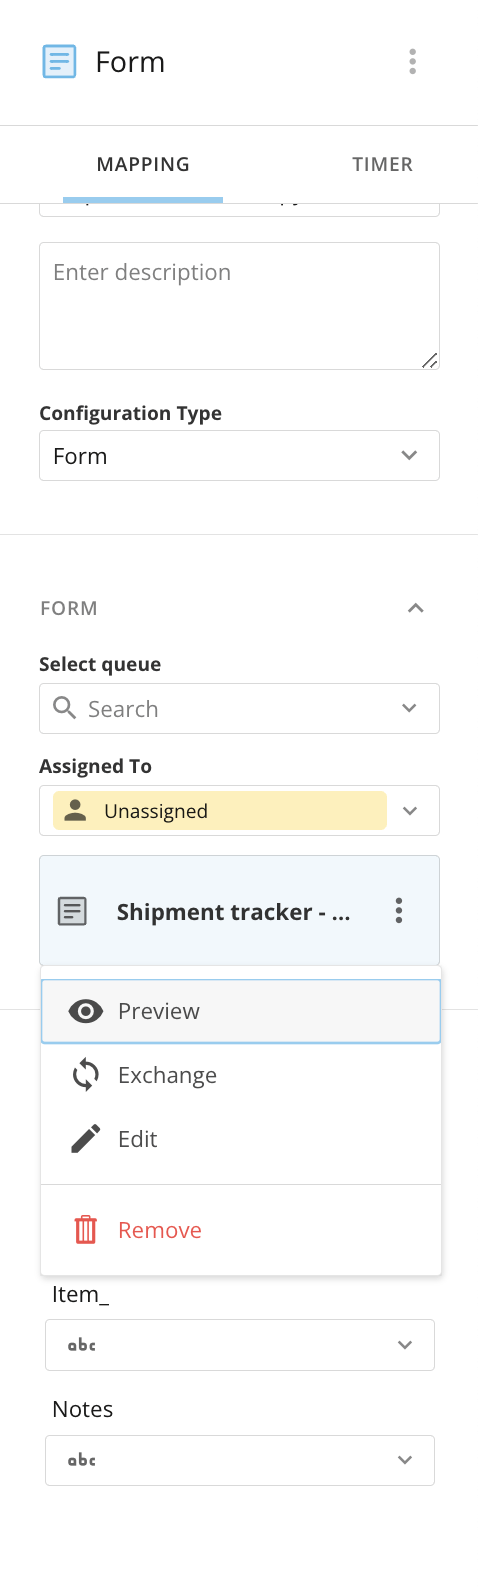
When you choose a general task, you can choose a queue, assign the form to a user, and use the **Select a Form** option to create or add a new form. Learn more in the [Forms](https://domo-support.domo.com/s/article/000005171?language=en_US#forms_in_workflows) documentation.
Variables from any form you add are automatically added as parameters to the configuration panel for your User Task.
# General Task
When you choose a general task, you can choose a queue, assign the form to a user, and use the **Select a Form** option to create or add a new form. Learn more in the [Forms](https://domo-support.domo.com/s/article/000005171?language=en_US#forms_in_workflows) documentation.
Variables from any form you add are automatically added as parameters to the configuration panel for your User Task.
 #### Timer Event
In the configuration panel for a user task or custom function, the second tab is labeled **Timer** and allows you to add up to four timer events to your task or function. You can have one outgoing flow from a timer. If there are fewer than four timers for a shape, you can move a timer to a different corner.
#### Timer Event
In the configuration panel for a user task or custom function, the second tab is labeled **Timer** and allows you to add up to four timer events to your task or function. You can have one outgoing flow from a timer. If there are fewer than four timers for a shape, you can move a timer to a different corner.
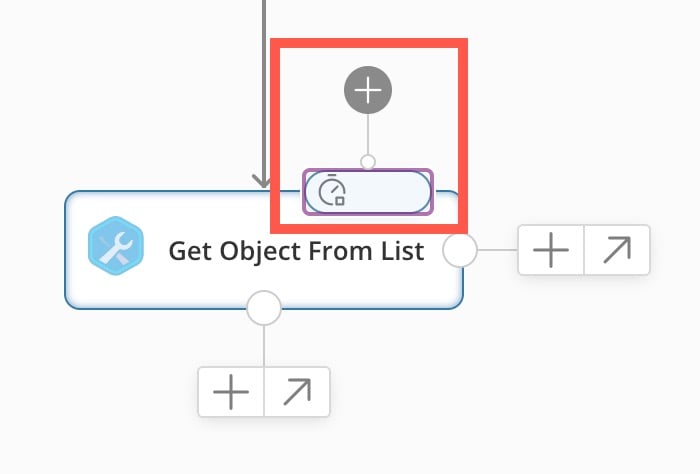 Timers listen to the event and activate an alternate flow if the event doesn't complete within the specified time.
To add a new timer, go to the **Timer** tab in the configuration panel and select **+** **New** **Timer**. Timer 1 displays on the canvas at the shape boundary and in the configuration panel, where you can set the details. In the **Timer** tab, select **+** **New** **Timer** to add up to four timers for that task or function.
Timers listen to the event and activate an alternate flow if the event doesn't complete within the specified time.
To add a new timer, go to the **Timer** tab in the configuration panel and select **+** **New** **Timer**. Timer 1 displays on the canvas at the shape boundary and in the configuration panel, where you can set the details. In the **Timer** tab, select **+** **New** **Timer** to add up to four timers for that task or function.
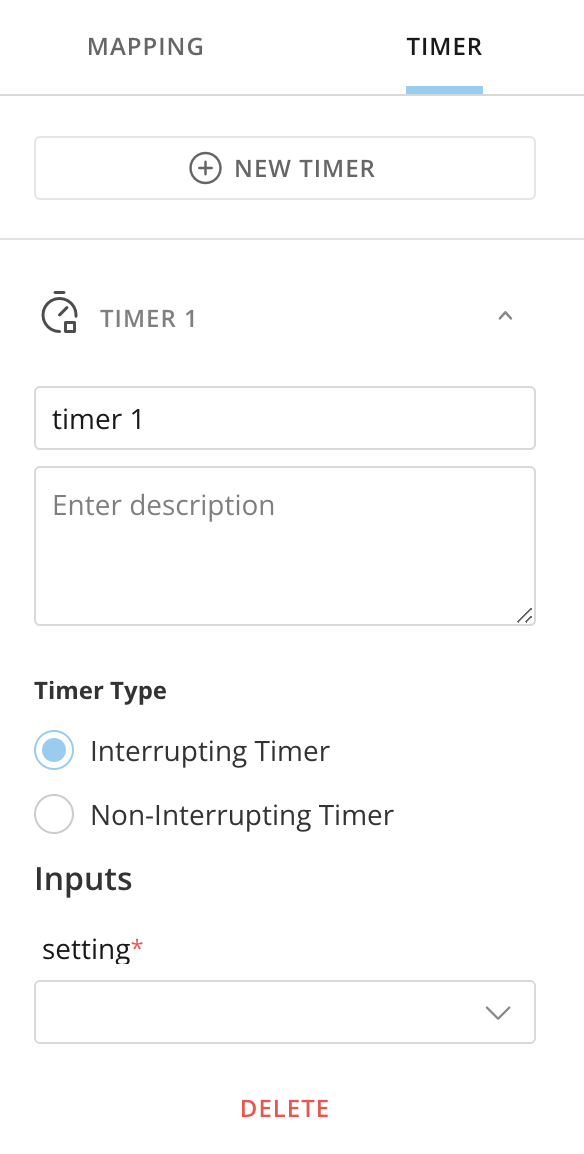 There are two kinds of timers:
* **Interrupting Timer —** This cancels the task when the timer's configured duration is met and activates the outgoing flow. To configure the timer's duration, map a value to the required **setting** parameter. You can select a duration variable or enter a custom value.
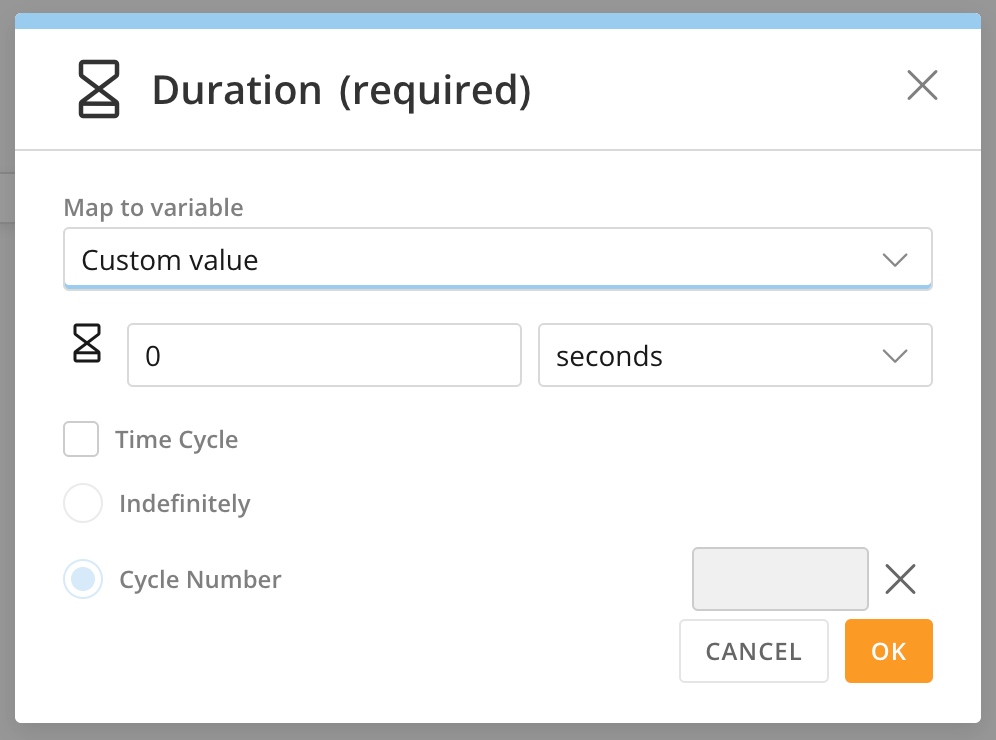
* **Non-Interrupting Timer** **—** This does not cancel the task when the timer's configured duration is met. The task remains active until it is completed, but the timer's outgoing flow is activated. The same mapping options are available for a non-interrupting timer, with one exception: If you want to configure the duration with a custom value, you have the option to add a Time Cycle.
Adding a Time Cycle means that every time the configured duration is met, the outgoing flow is activated. Add a Time Cycle by checking the box, then choose whether the Time Cycle should continue indefinitely or be limited to a cycle number.
* Choosing an indefinite Time Cycle means the non-interrupting timer continues to trigger the outgoing flow each time the duration is met until the task is completed.
* Choosing a Cycle Number triggers the outgoing flow only for the number of iterations defined in the configuration.
There are two kinds of timers:
* **Interrupting Timer —** This cancels the task when the timer's configured duration is met and activates the outgoing flow. To configure the timer's duration, map a value to the required **setting** parameter. You can select a duration variable or enter a custom value.
* **Non-Interrupting Timer** **—** This does not cancel the task when the timer's configured duration is met. The task remains active until it is completed, but the timer's outgoing flow is activated. The same mapping options are available for a non-interrupting timer, with one exception: If you want to configure the duration with a custom value, you have the option to add a Time Cycle.
Adding a Time Cycle means that every time the configured duration is met, the outgoing flow is activated. Add a Time Cycle by checking the box, then choose whether the Time Cycle should continue indefinitely or be limited to a cycle number.
* Choosing an indefinite Time Cycle means the non-interrupting timer continues to trigger the outgoing flow each time the duration is met until the task is completed.
* Choosing a Cycle Number triggers the outgoing flow only for the number of iterations defined in the configuration.
 # Custom Function
There are a number of different available custom functions. When you select
# Custom Function
There are a number of different available custom functions. When you select 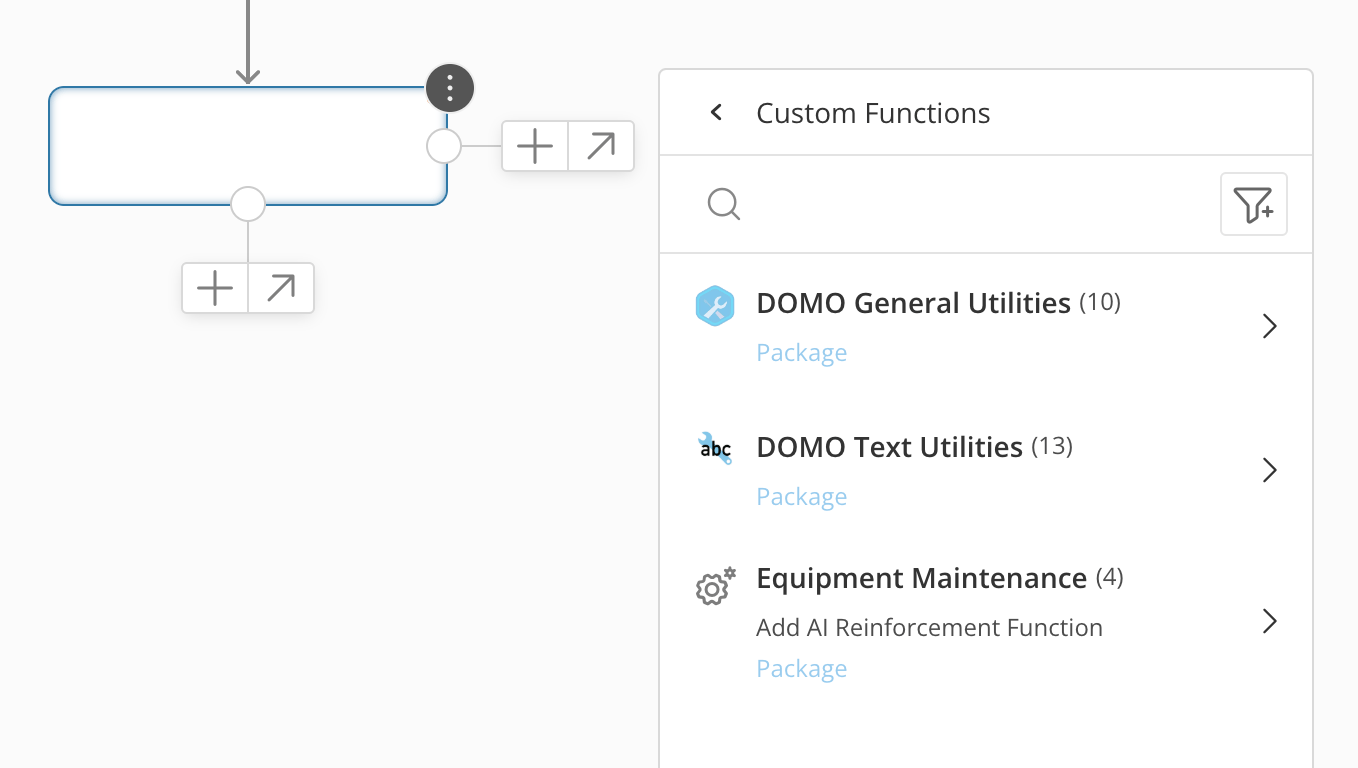 Choose the category and the function package, then select **Add Automation**.
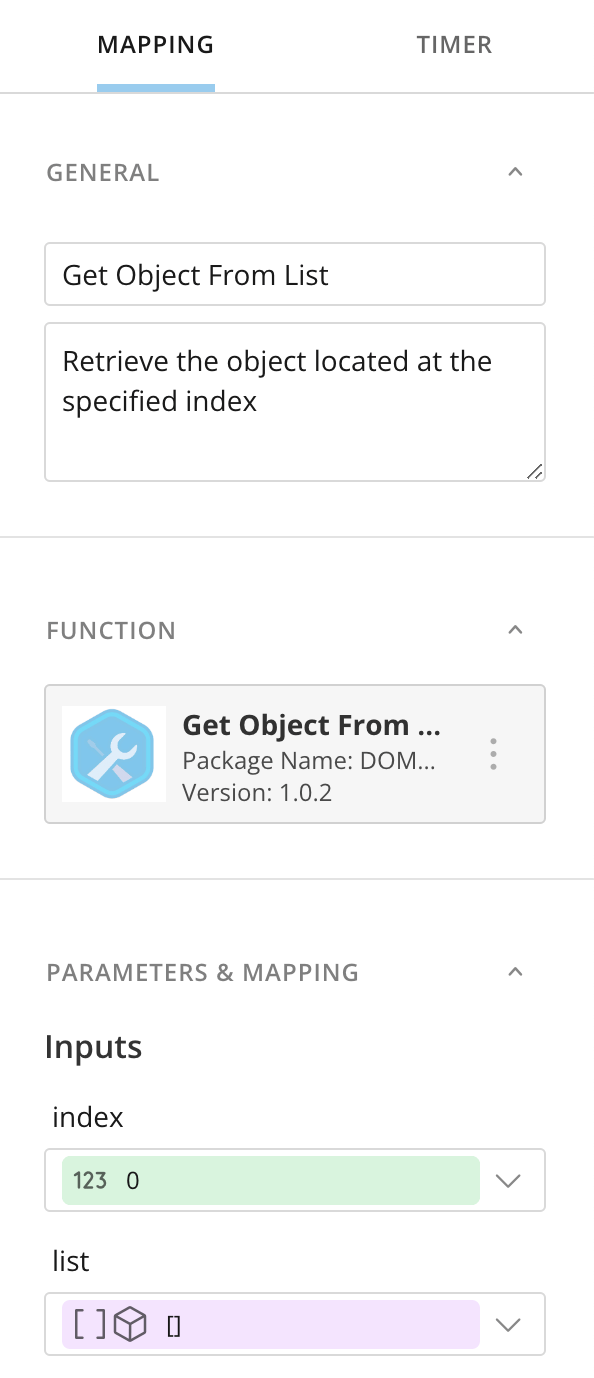
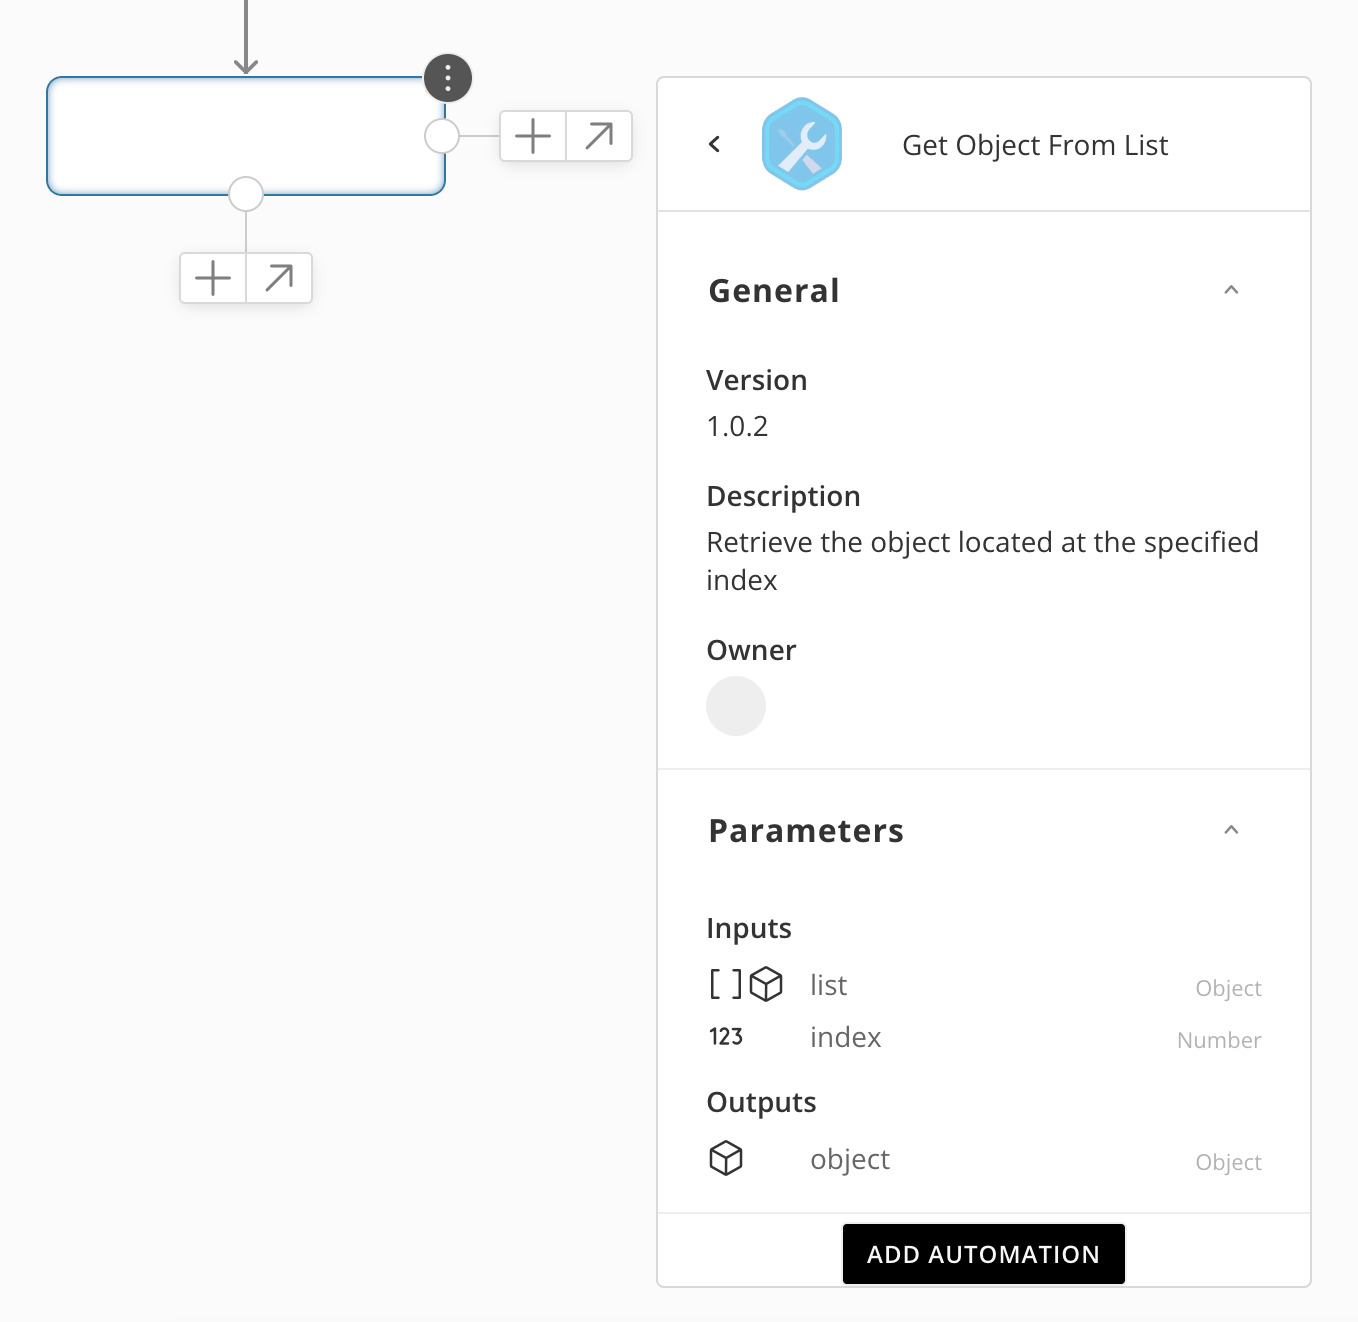 The functions opens in the configuration panel. There are two tabs in the panel: **Mapping** and **Timer**. Learn how to [add a timer](#timer_event) above.
In the **Mapping** tab, the function details display, including the package and included parameters.
The functions opens in the configuration panel. There are two tabs in the panel: **Mapping** and **Timer**. Learn how to [add a timer](#timer_event) above.
In the **Mapping** tab, the function details display, including the package and included parameters.
 #### Map the Input Parameters
You must map all of the input parameters to variables in the workflow.
When you expand the dropdown for an input parameter, all variables of the same [data type](#data_types) from the **Workflow variables** list display as options.
Selecting a variable for an input means that during workflow runtime, the value stored in that variable is passed to the code function and used by the function.
If a variable of the same name and type as the parameter exists in the **Workflows variables** list, it maps to that input automatically.
##### Use a Custom Value
If you do not have or do not want to map a variable for the input, select the **Custom** option from the **Mapping** list.
#### Map the Input Parameters
You must map all of the input parameters to variables in the workflow.
When you expand the dropdown for an input parameter, all variables of the same [data type](#data_types) from the **Workflow variables** list display as options.
Selecting a variable for an input means that during workflow runtime, the value stored in that variable is passed to the code function and used by the function.
If a variable of the same name and type as the parameter exists in the **Workflows variables** list, it maps to that input automatically.
##### Use a Custom Value
If you do not have or do not want to map a variable for the input, select the **Custom** option from the **Mapping** list.
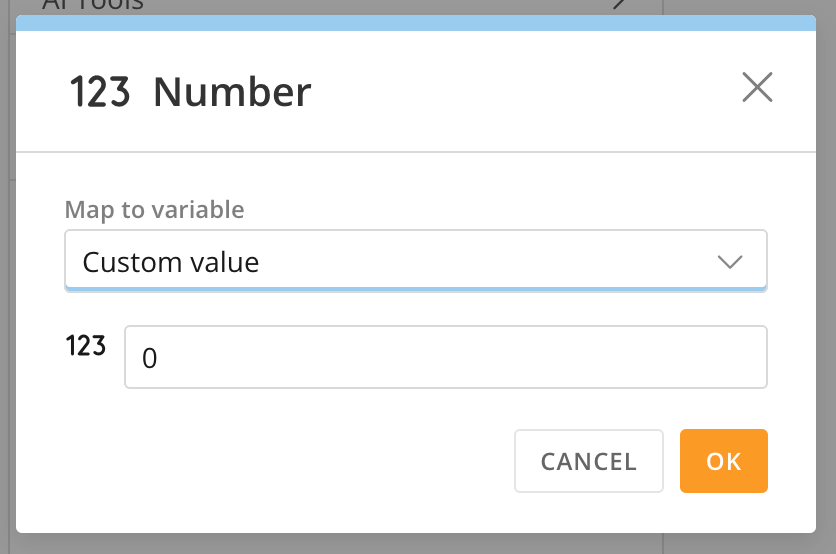
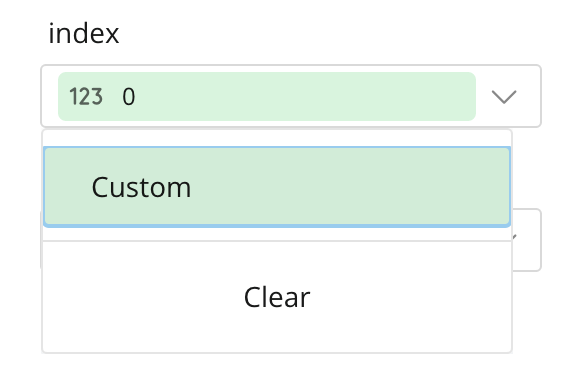 The **Custom** option opens a central modal where you can enter a specific value for that input. The custom value must follow the formatting of the parameter data type.
 #### Map the Output Parameters
Use the dropdowns from each parameter to map the output parameters.
When you expand a dropdown, all variables of the same [data type](#data_types) from the **Workflow variables** list display as options.
Selecting a variable for an output means that during workflow runtime, the value produced by the function stores that variable and replaces any prior value that the variable contained.
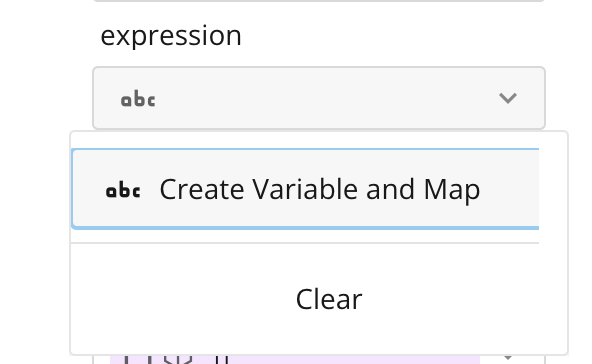
If the variable you need to map has not been created, use the **Create Variable and Map** option in the dropdown to automatically create a variable and map it to the parameter.
#### Map the Output Parameters
Use the dropdowns from each parameter to map the output parameters.
When you expand a dropdown, all variables of the same [data type](#data_types) from the **Workflow variables** list display as options.
Selecting a variable for an output means that during workflow runtime, the value produced by the function stores that variable and replaces any prior value that the variable contained.
If the variable you need to map has not been created, use the **Create Variable and Map** option in the dropdown to automatically create a variable and map it to the parameter.
 #### Edit, Exchange, or Remove a Function
In the configuration panel under **Function**, select the
#### Edit, Exchange, or Remove a Function
In the configuration panel under **Function**, select the 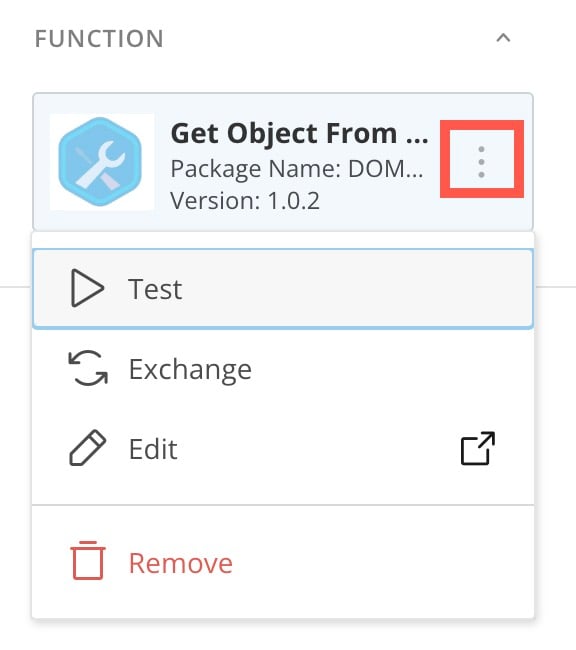 #### Test a Function
We recommend testing included functions before deploying your workflow. Follow the steps below.
1. In the configuration panel under **Function**, select
#### Test a Function
We recommend testing included functions before deploying your workflow. Follow the steps below.
1. In the configuration panel under **Function**, select 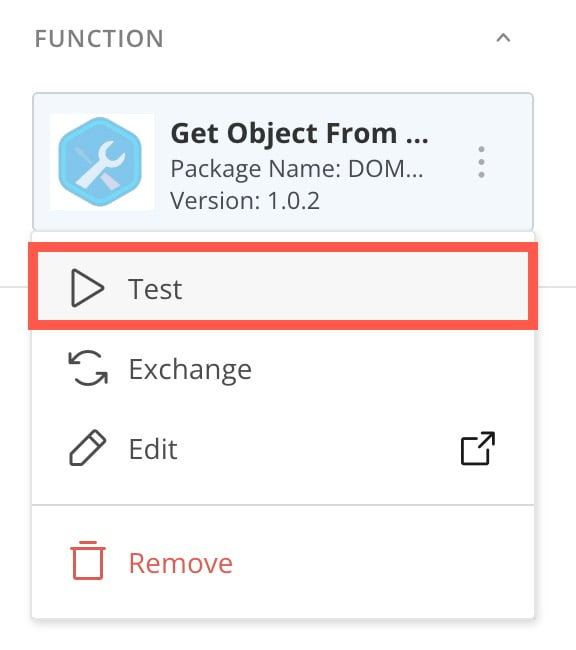 2. In the **Test** tab of the modal, populate the **Inputs** fields with values that follow the formatting for the data type, then select **Test**.
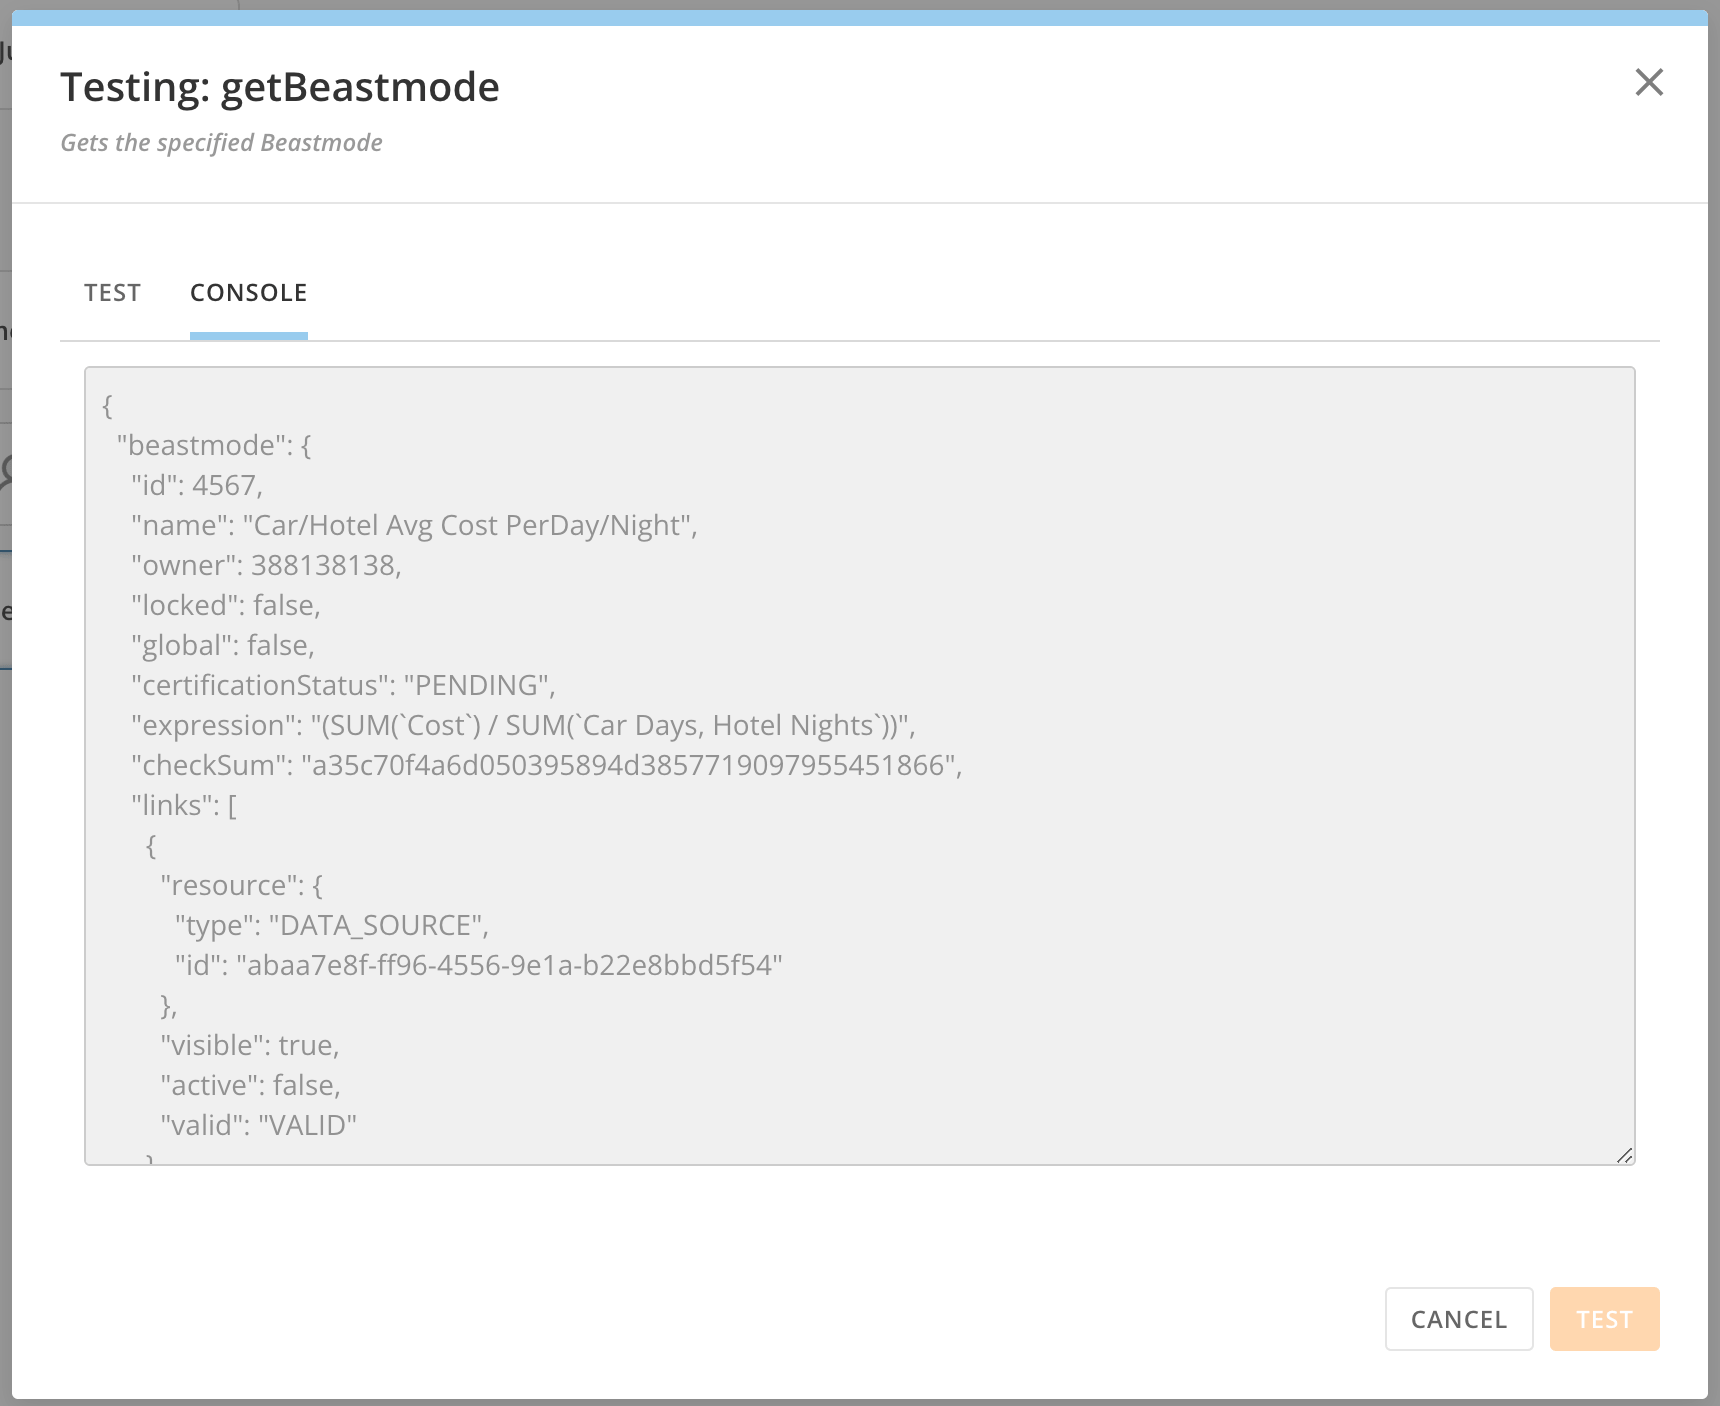
The results display in the **Console** tab.
2. In the **Test** tab of the modal, populate the **Inputs** fields with values that follow the formatting for the data type, then select **Test**.
The results display in the **Console** tab.
 # Query Table
The Query Table action allows you to query and retrieve data from a Domo DataSet in your workflow. You can include variables in your query and preview it before sending. Follow these steps to add a Query Table action to a shape.
1. Select a shape on your canvas and select
# Query Table
The Query Table action allows you to query and retrieve data from a Domo DataSet in your workflow. You can include variables in your query and preview it before sending. Follow these steps to add a Query Table action to a shape.
1. Select a shape on your canvas and select
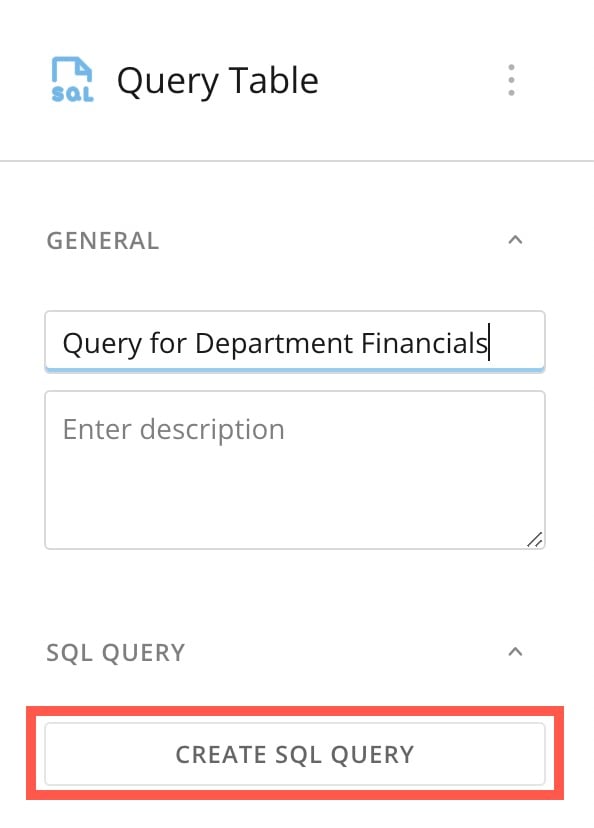
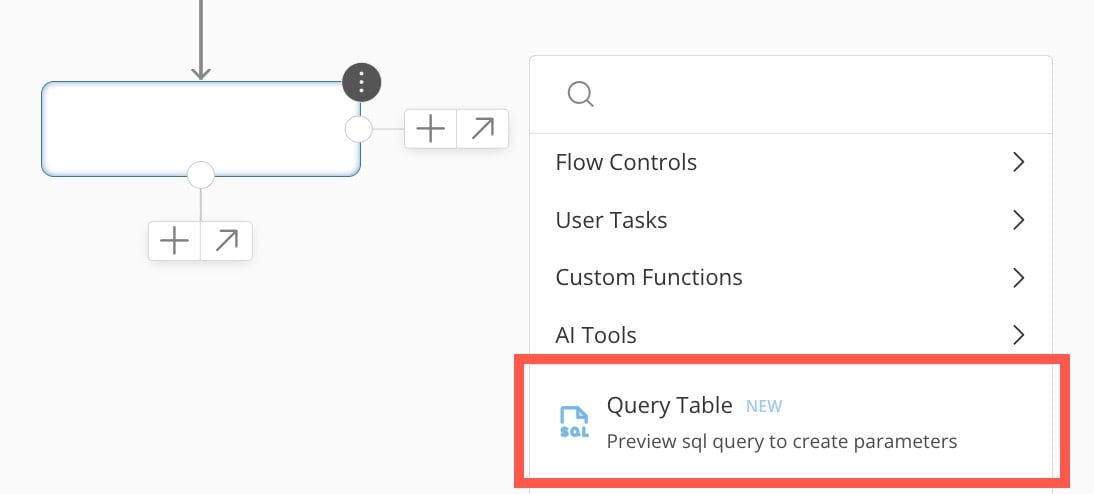 2. In the configuration panel, name your query and then select **Create SQL Query** to open the query modal.
 3. In the modal, choose the DataSet to query. Write your query, inserting variables as needed. You can choose to define your output types.

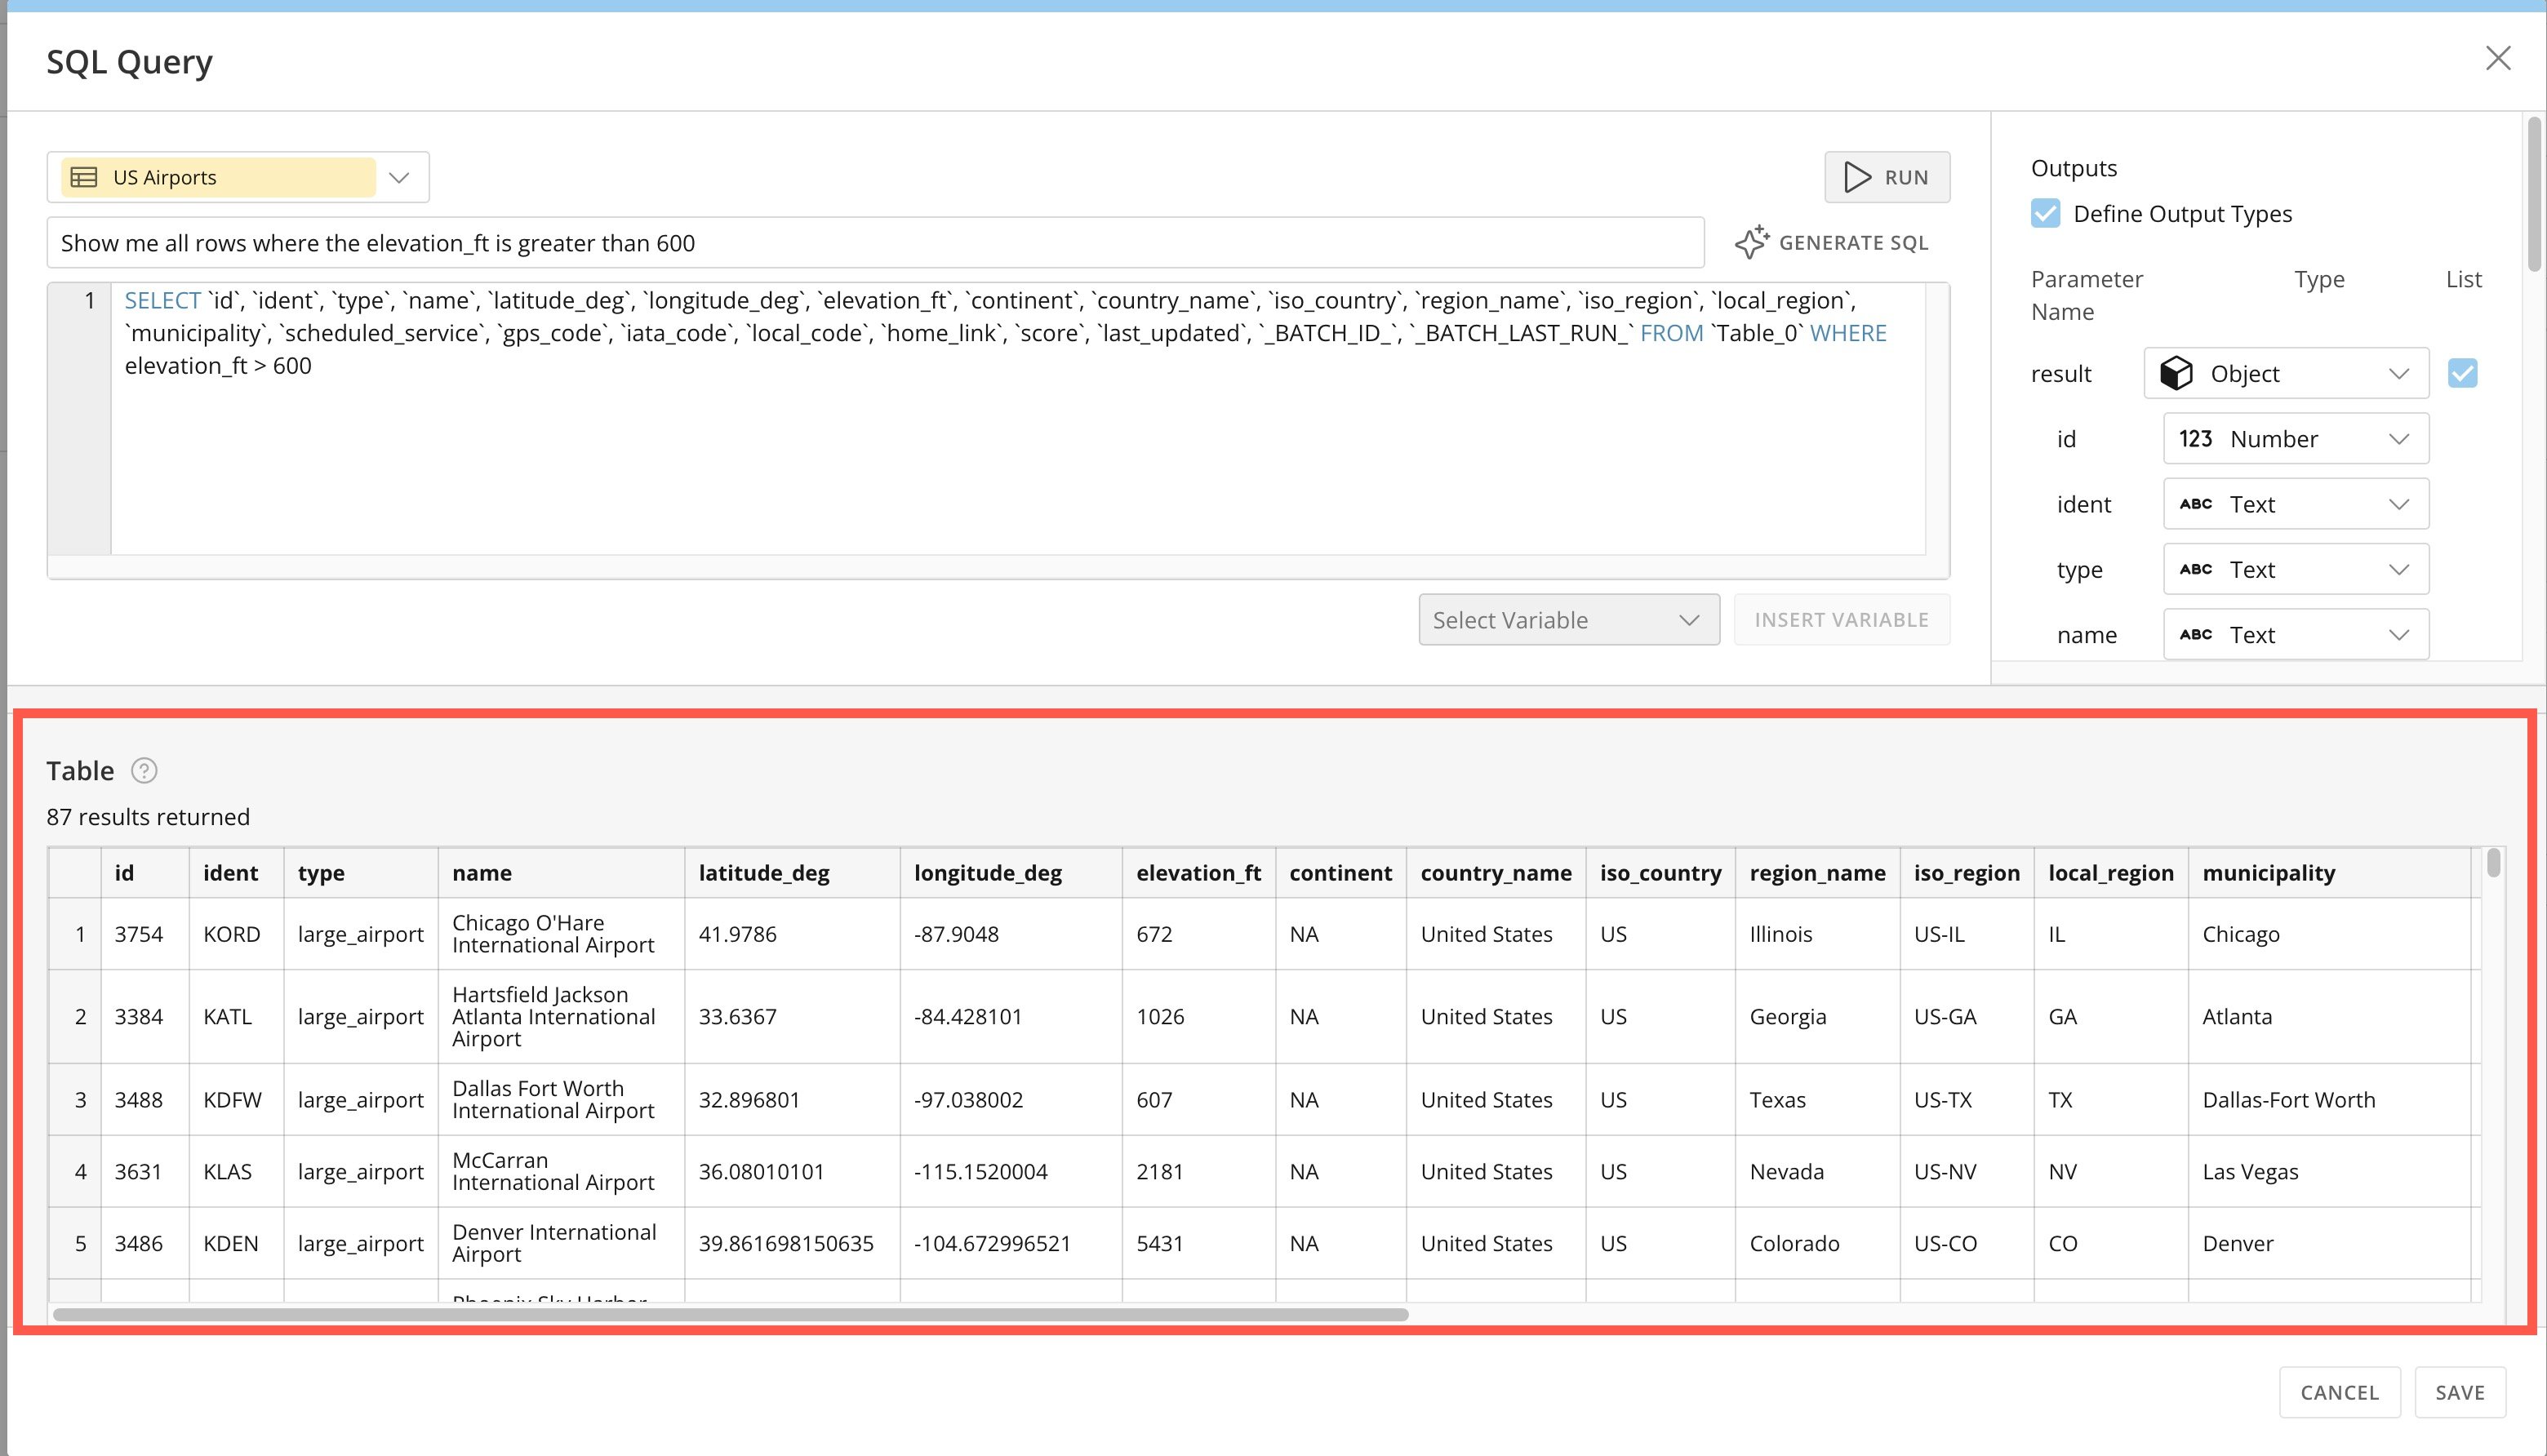 5. Save your query in the modal to return to the configuration panel.
In the configuration panel, you can edit or clear your query and update the output parameters.
### Data Types
Each variable in the **Workflow variables** list must have a data type that designates what kind of value it can store. This also helps with mapping the variables to the [contract](https://domo-support.domo.com/s/article/000005171?language=en_US#inputs_outputs_catalog) (inputs and outputs) of a form in a User Task.
Each data type has a corresponding icon to help you identify the kind of data required/being used, and data types are color-coded. The data types are described below.
5. Save your query in the modal to return to the configuration panel.
In the configuration panel, you can edit or clear your query and update the output parameters.
### Data Types
Each variable in the **Workflow variables** list must have a data type that designates what kind of value it can store. This also helps with mapping the variables to the [contract](https://domo-support.domo.com/s/article/000005171?language=en_US#inputs_outputs_catalog) (inputs and outputs) of a form in a User Task.
Each data type has a corresponding icon to help you identify the kind of data required/being used, and data types are color-coded. The data types are described below.
Icon | Data Type | Description |
|---|---|---|
Text | A text (string) variable contains values for alpha, numeric, special, or international characters. | |
Number | A number (integer) variable contains values for numeric characters only. | |
Decimal | A decimal (float) variable contains values for numeric characters only. | |
Boolean | A Boolean variable stores only the binary options of true or false. | |
Date | A date variable contains a single date value. | |
Time | A time variable contains a single time-of-day value. | |
Date-Time | A date-time variable contains a value that includes both a date and time of day value. | |
Duration | A duration variable contains a value for a unit of time, such as five minutes. | |
Person | A person variable contains a value for a person ID. | |
Dataset | A dataset variable contains a value for a DataSet ID. | |
Group | A group variable contains a value for a group ID. | |
Account | An account variable passes an ID that references account credentials. No account credentials are stored in Workflows. Learn more about the account data type . | |
| Files | A files variable contains the ID and path to the chosen file. This is available only in instances where the FileSets feature (currently in beta) is enabled. |
| Fileset | A fileset variable contains the ID and path to the chosen fileset directory. This is available only in instances where the FileSets feature (currently in beta) is enabled. |
List | A list variable contains one or more values in a list form. Values are stored starting at index 0 and increment by one for every value including in the mapping. You must configure a list variable with a subtype that specifies what type of list values are stored. The values in the list are subject to the character/format restrictions of the subtype. | |
Object | An object variable can have multiple child properties and store their corresponding data values. You can configure an object as defined or open, as described below. Object variables are convenient for keeping related data in one variable, such as an address with a city, state, and zip code. |
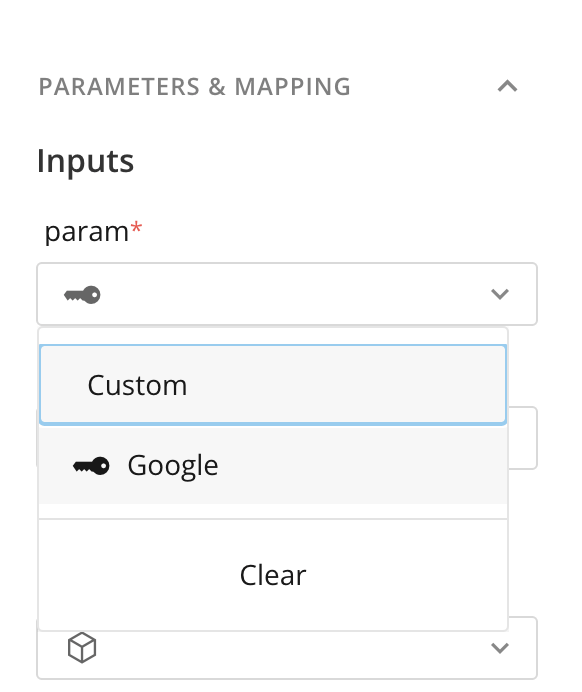
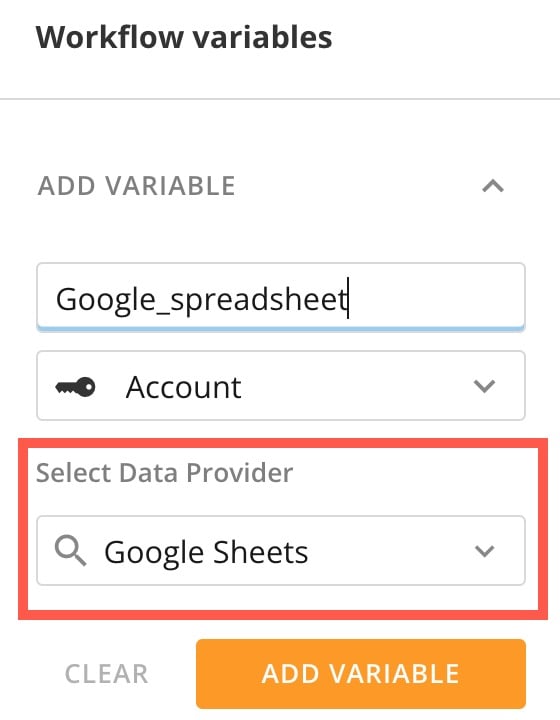 Choosing a data provider means that when you map a parameter to that variable in the configuration panel, shown below, you can only map an applicable account. In this example, a Google Sheets data provider means that only Google accounts will populate the options for the parameter.
Applicable accounts include ones you have created or that have been shared with you. Learn about [managing accounts](/s/article/360042926054).
Choosing a data provider means that when you map a parameter to that variable in the configuration panel, shown below, you can only map an applicable account. In this example, a Google Sheets data provider means that only Google accounts will populate the options for the parameter.
Applicable accounts include ones you have created or that have been shared with you. Learn about [managing accounts](/s/article/360042926054).
 # Defined Object
Defined object variables can have child variables. Each child variable stores an individual value of any data type *except* `object.` Workflows don't currently support nesting in defined objects.
To create your child variable, select **Add Child** when creating your object variable and enter a name and data type for it. Repeat to add as many child variables as needed.
# Defined Object
Defined object variables can have child variables. Each child variable stores an individual value of any data type *except* `object.` Workflows don't currently support nesting in defined objects.
To create your child variable, select **Add Child** when creating your object variable and enter a name and data type for it. Repeat to add as many child variables as needed.
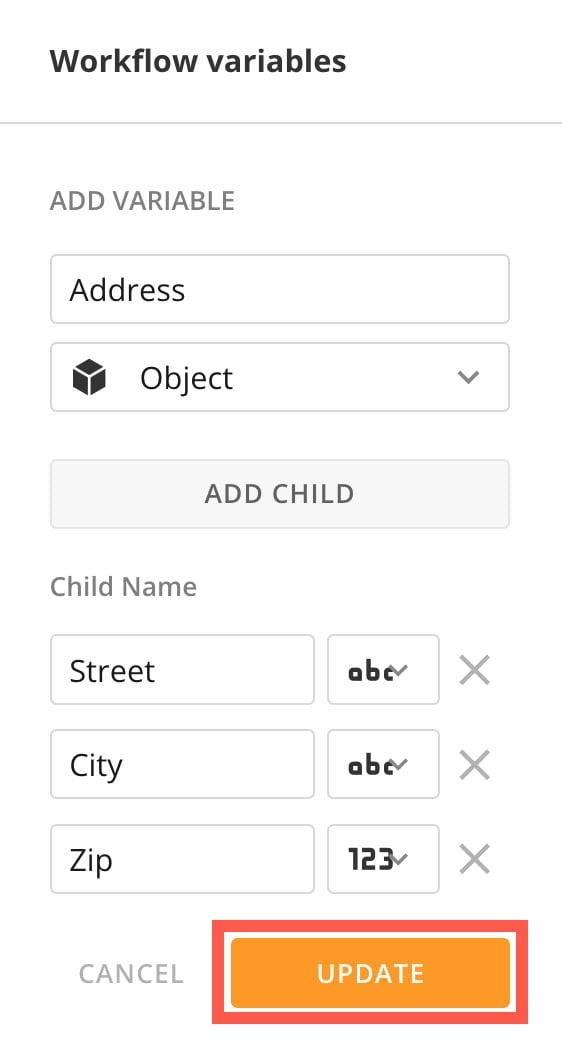
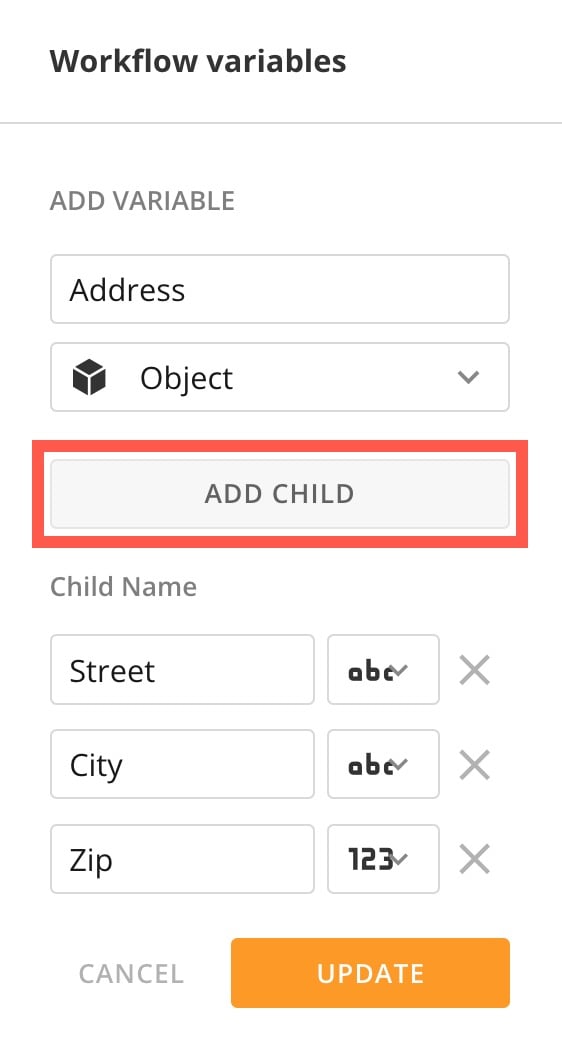 After adding all child variables, select **Add Variable** or **Update** to add the defined object variable to the **Workflow variables** list.
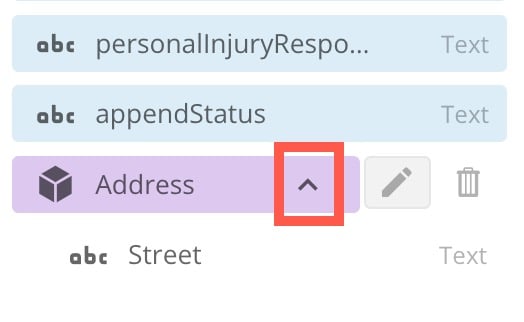
 In the **Workflow variables** list, you can expand a defined object to view its child variables. Hover over the defined object to view and select the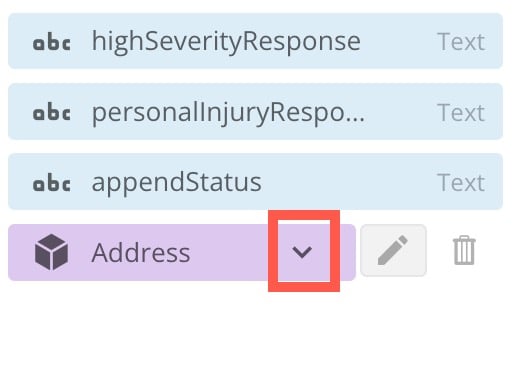
 #### Edit and Delete a Child Variable
You can edit a child variable by hovering over its defined object in the Variables List and selecting
#### Edit and Delete a Child Variable
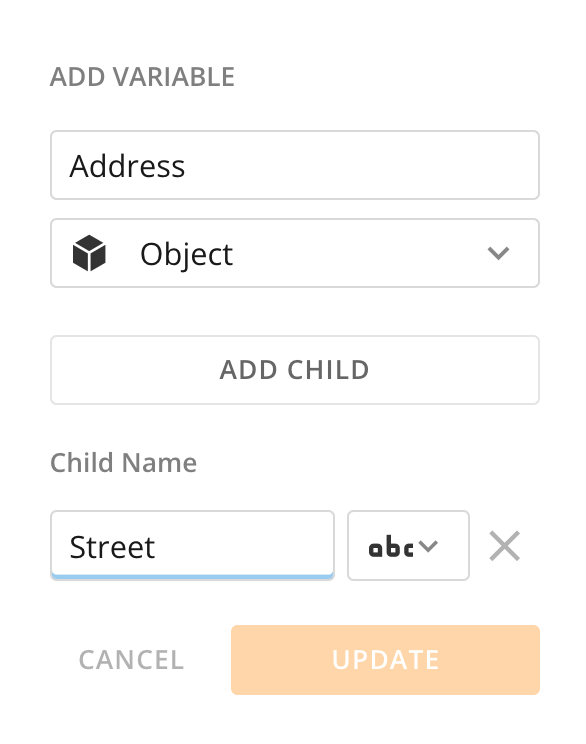
You can edit a child variable by hovering over its defined object in the Variables List and selecting 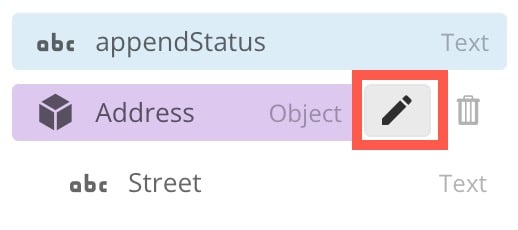 The defined object appears above in the panel, and you can change any of the child variables. Select **Update** to save your changes.
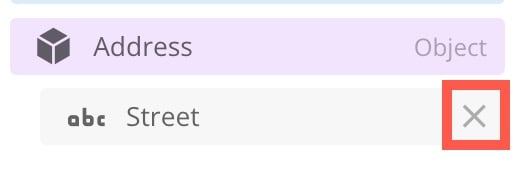
 You can delete a child variable by expanding the defined object in the **Workflow variables** list. Hover over the child variable and select **Delete**.
 # Open Object
An open object is configured with no defined child variables. The object is added to the **Workflow variables** list and can store a JSON payload without limits to its structure or nesting. Open objects are convenient when the workflow calls an API in a Code Function, and the response is contained in a single parameter.
# Open Object
An open object is configured with no defined child variables. The object is added to the **Workflow variables** list and can store a JSON payload without limits to its structure or nesting. Open objects are convenient when the workflow calls an API in a Code Function, and the response is contained in a single parameter.

