> ## Documentation Index
> Fetch the complete documentation index at: https://domoinc-openapi-sync-dataflows.mintlify.site/llms.txt
> Use this file to discover all available pages before exploring further.

# Domo on Amazon Athena

export const InlineImage = ({src, alt = '', height = '1.6em'}) => {
  return <img noZoom src={src} alt={alt} style={{
    display: 'inline',
    verticalAlign: 'start',
    height: height,
    margin: '0'
  }} />;
};

### Intro

Athena users can connect their data to Domo through Cloud Amplifier native integrations. Integrating Athena into Domo is as simple as providing connection parameters and selecting the tables you want to see as Domo DataSets.

### Prerequisites

Before you set up an Athena integration, you must have an IAM role (ARN) with access to the information that you need to connect to Domo.

### Create an Athena Integration

Follow the steps below to create a read-only Athena integration:

1. In Domo, go to the
   <InlineImage src="/images/kb/ka0Vq000000BENp-00N5w00000Ri7BU-0EMVq000004mhMv.jpg" /> **Data Warehouse** and select <InlineImage src="/images/kb/ka0Vq000000BCNd-00N5w00000Ri7BU-0EMVq000000uSeO.jpg" /> **Add New Cloud Account**.

2. In the
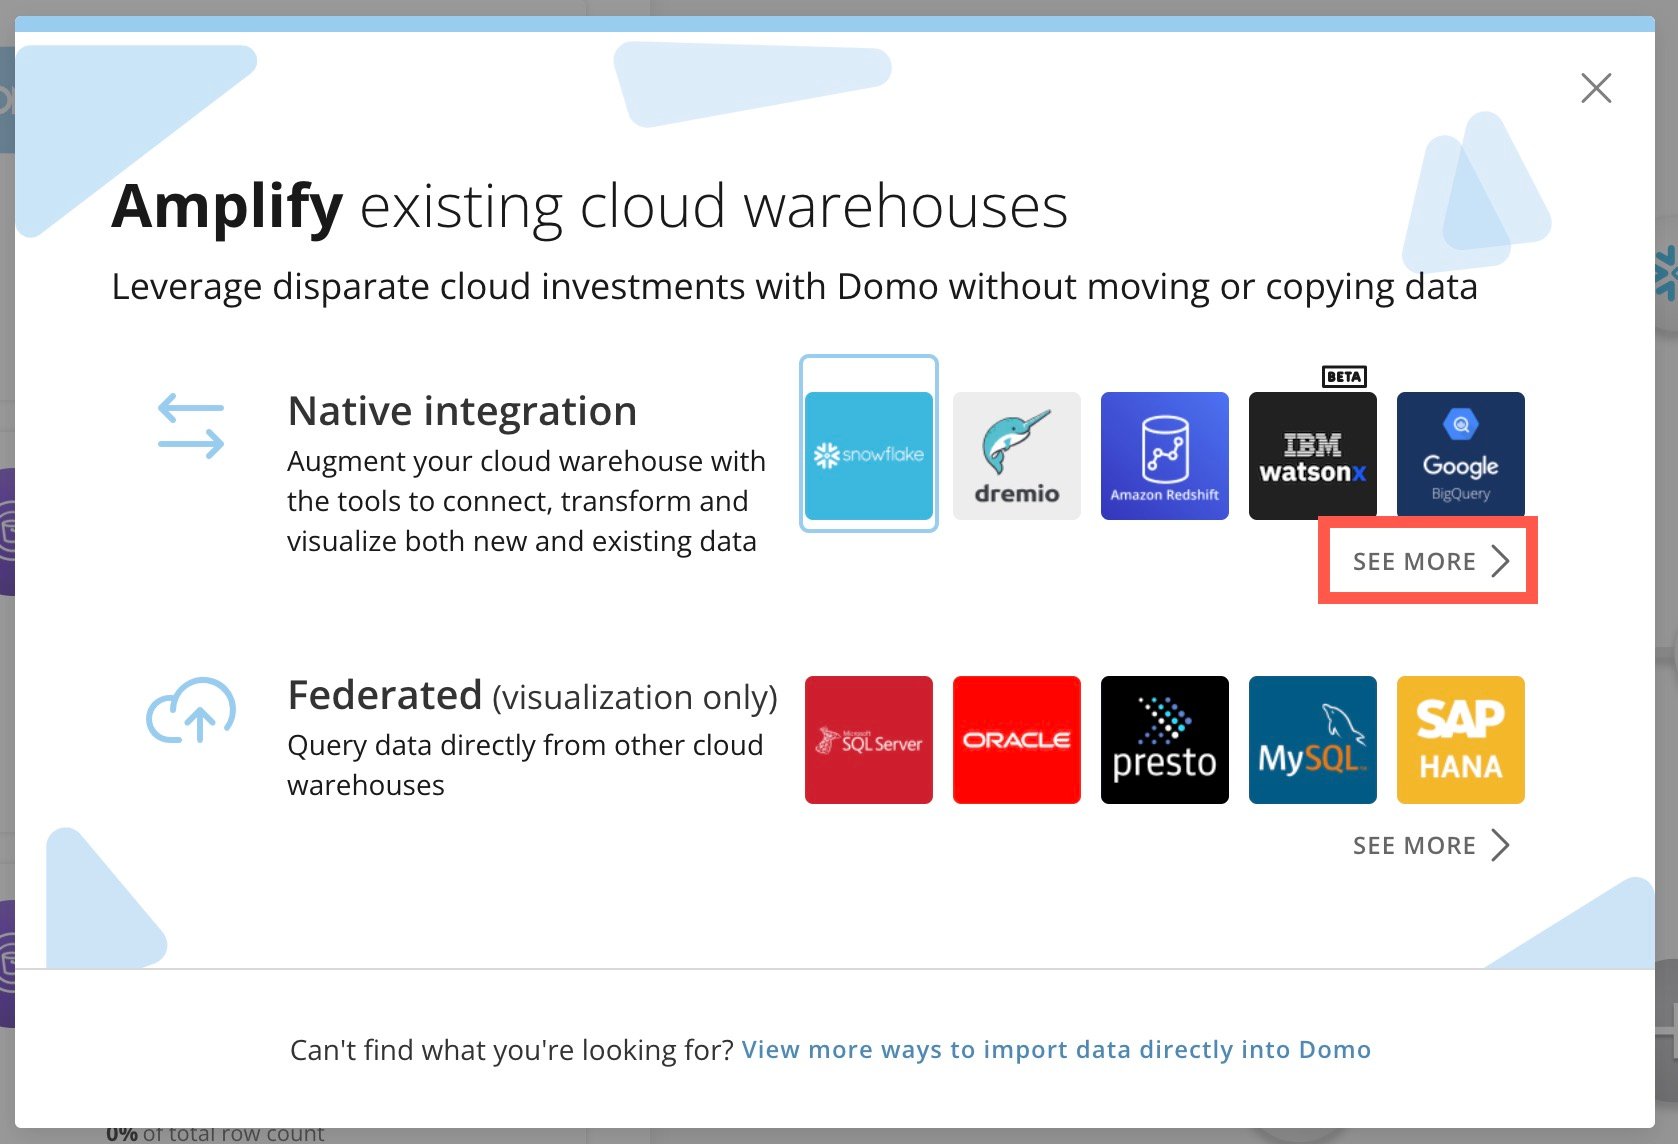
   **Amplify existing cloud warehouses** modal, under **Native integration**, choose **See More**.

   <Frame>
     <img alt="see more athena.jpg" src="https://mintcdn.com/domoinc-openapi-sync-dataflows/-nfdSCiV_P1xrFhN/images/kb/ka0Vq000000G1ub-00N5w00000Ri7BU-0EMVq000004NTjl.jpg?fit=max&auto=format&n=-nfdSCiV_P1xrFhN&q=85&s=08d6454541a40282ea0637f693dc6212" style={{width: 597, height: 407}} width="1678" height="1144" data-path="images/kb/ka0Vq000000G1ub-00N5w00000Ri7BU-0EMVq000004NTjl.jpg" />
   </Frame>

3. Choose the
   **Athena** tile.

4. Select
   **+** **Add New Integration**. If there are existing integrations, this option displays at the bottom of the list.

5. Enter the information listed in the table below and select
   **Next**.

   <table cellspacing="1" cellpadding="1" border="1"><thead><tr><th rowspan="1" colspan="1"><p>Parameter</p></th><th rowspan="1" colspan="1"><p>Description</p></th></tr></thead><tbody><tr><td rowspan="1" colspan="1"><p>Integration name</p></td><td rowspan="1" colspan="1"><p>This is how you can find your integration in the Athena integrations list for future updates.</p></td></tr><tr><td rowspan="1" colspan="1">(Optional) Description</td><td rowspan="1" colspan="1"><p>Any additional information about the integration.</p></td></tr><tr><td rowspan="1" colspan="1"><p>Athena connection URL</p></td><td rowspan="1" colspan="1"><p>The Athena JDBC connection URL.</p></td></tr><tr><td rowspan="1" colspan="1"><p>IAM Role (ARN)</p></td><td rowspan="1" colspan="1">The Identity and Access Management (IAM) role that you've previously configured for your Athena instance.</td></tr></tbody></table>

6. Configure the caching options and select
   **Next**. Learn about [caching rules](https://domo-support.domo.com/s/article/4412849158167?language=en_US#caching_rules) with Cloud Amplifier.

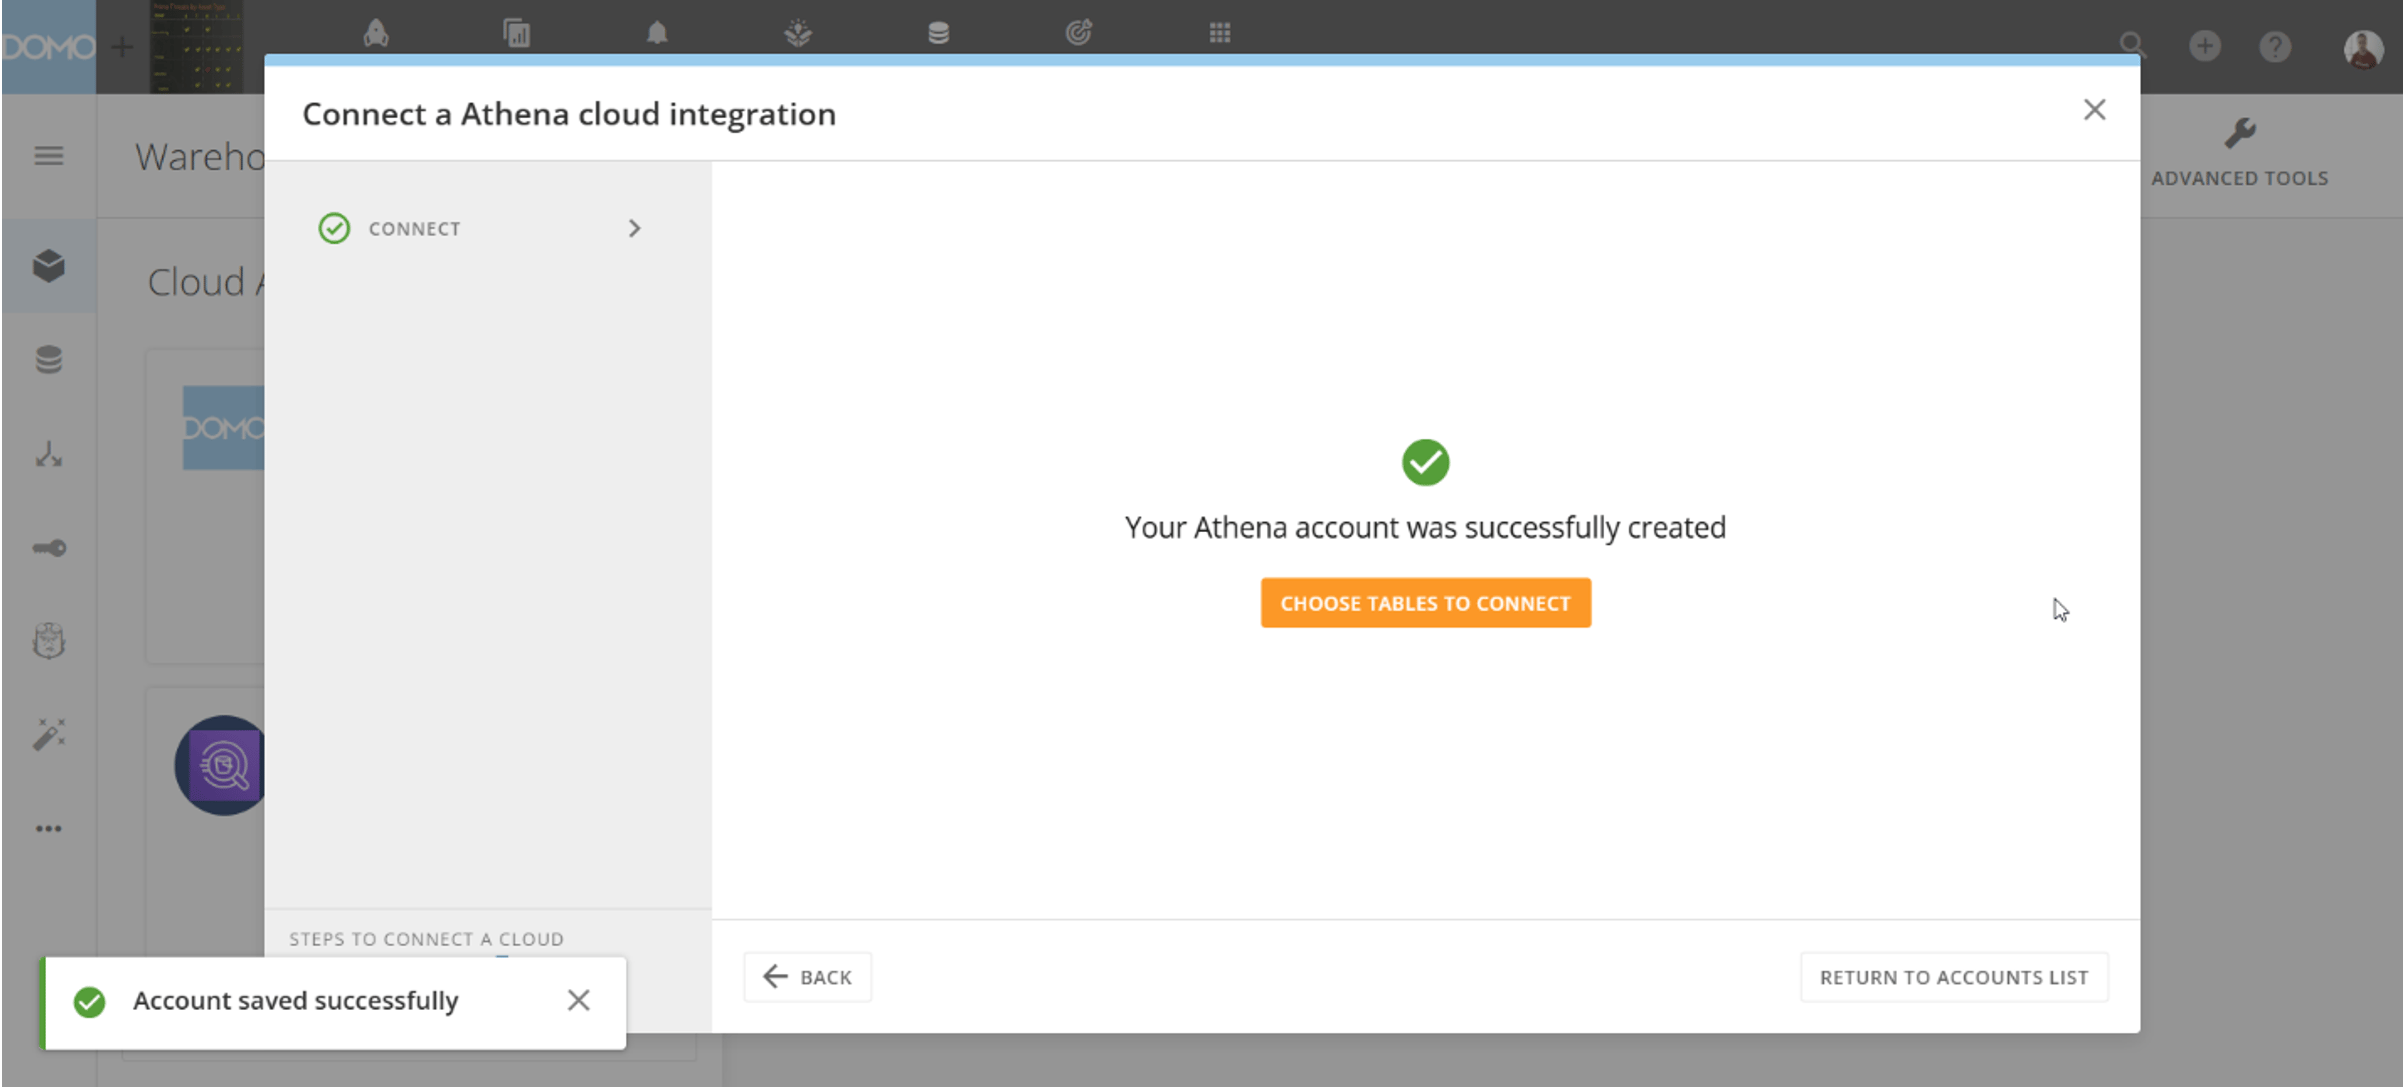
   A success message displays.

   <Frame>
     <img alt="Screenshot 2024-12-17 at 11.02.22 AM.png" src="https://mintcdn.com/domoinc-openapi-sync-dataflows/-nfdSCiV_P1xrFhN/images/kb/ka0Vq000000G1ub-00N5w00000Ri7BU-0EMVq000004OVbR.jpg?fit=max&auto=format&n=-nfdSCiV_P1xrFhN&q=85&s=4214b6d1938f02920e21fb70802d2f42" style={{width: 900, height: 407}} width="2406" height="1088" data-path="images/kb/ka0Vq000000G1ub-00N5w00000Ri7BU-0EMVq000004OVbR.jpg" />
   </Frame>

7. Select
   **Choose Data Tables to Connect**.

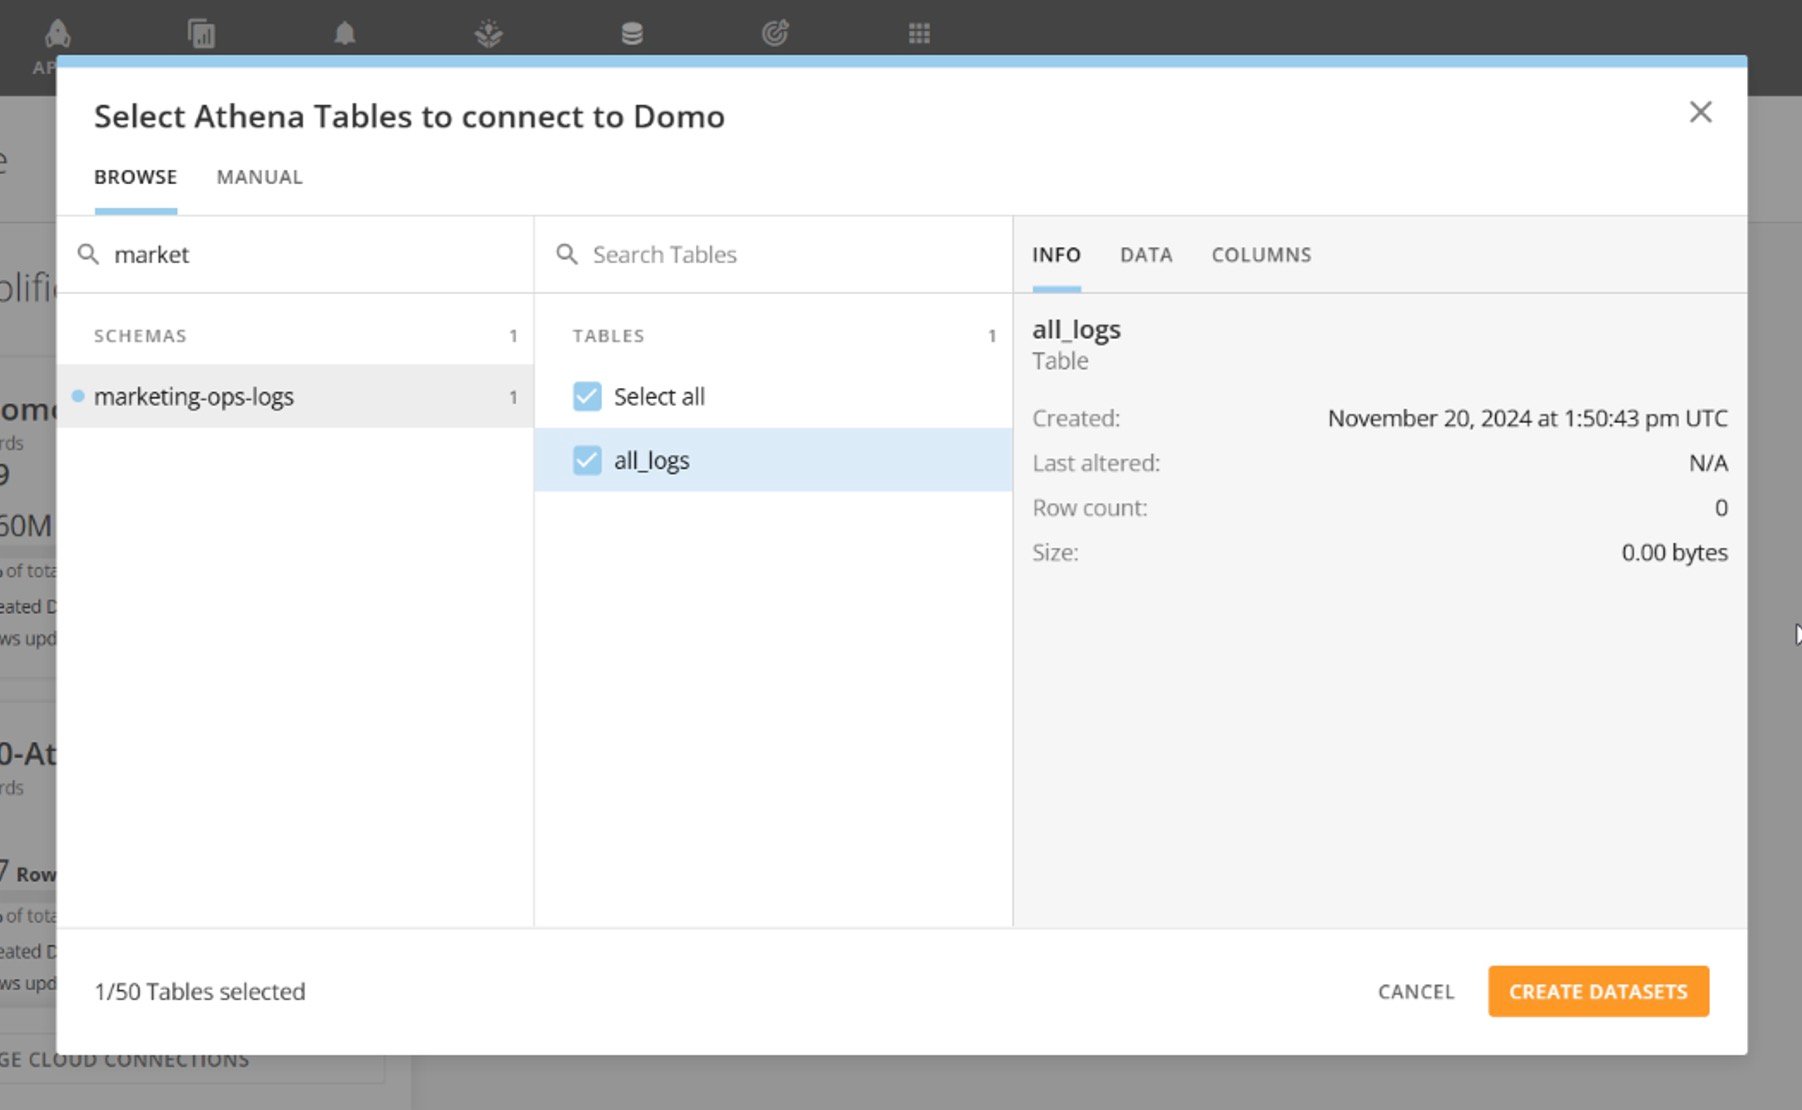
8. Use the table picker to choose the Athena schemas and tables to connect to Domo.
   <Frame>
     <img alt="athena table picker.jpg" src="https://mintcdn.com/domoinc-openapi-sync-dataflows/-nfdSCiV_P1xrFhN/images/kb/ka0Vq000000G1ub-00N5w00000Ri7BU-0EMVq000004OWSf.jpg?fit=max&auto=format&n=-nfdSCiV_P1xrFhN&q=85&s=447921e97455bbb074de46360c1aa0c1" style={{width: 899, height: 554}} width="1802" height="1110" data-path="images/kb/ka0Vq000000G1ub-00N5w00000Ri7BU-0EMVq000004OWSf.jpg" />
   </Frame>

9. Select
   **Create DataSets** to open the sharing modal. Here you have the option to share the data with individuals and groups and choose their access level.

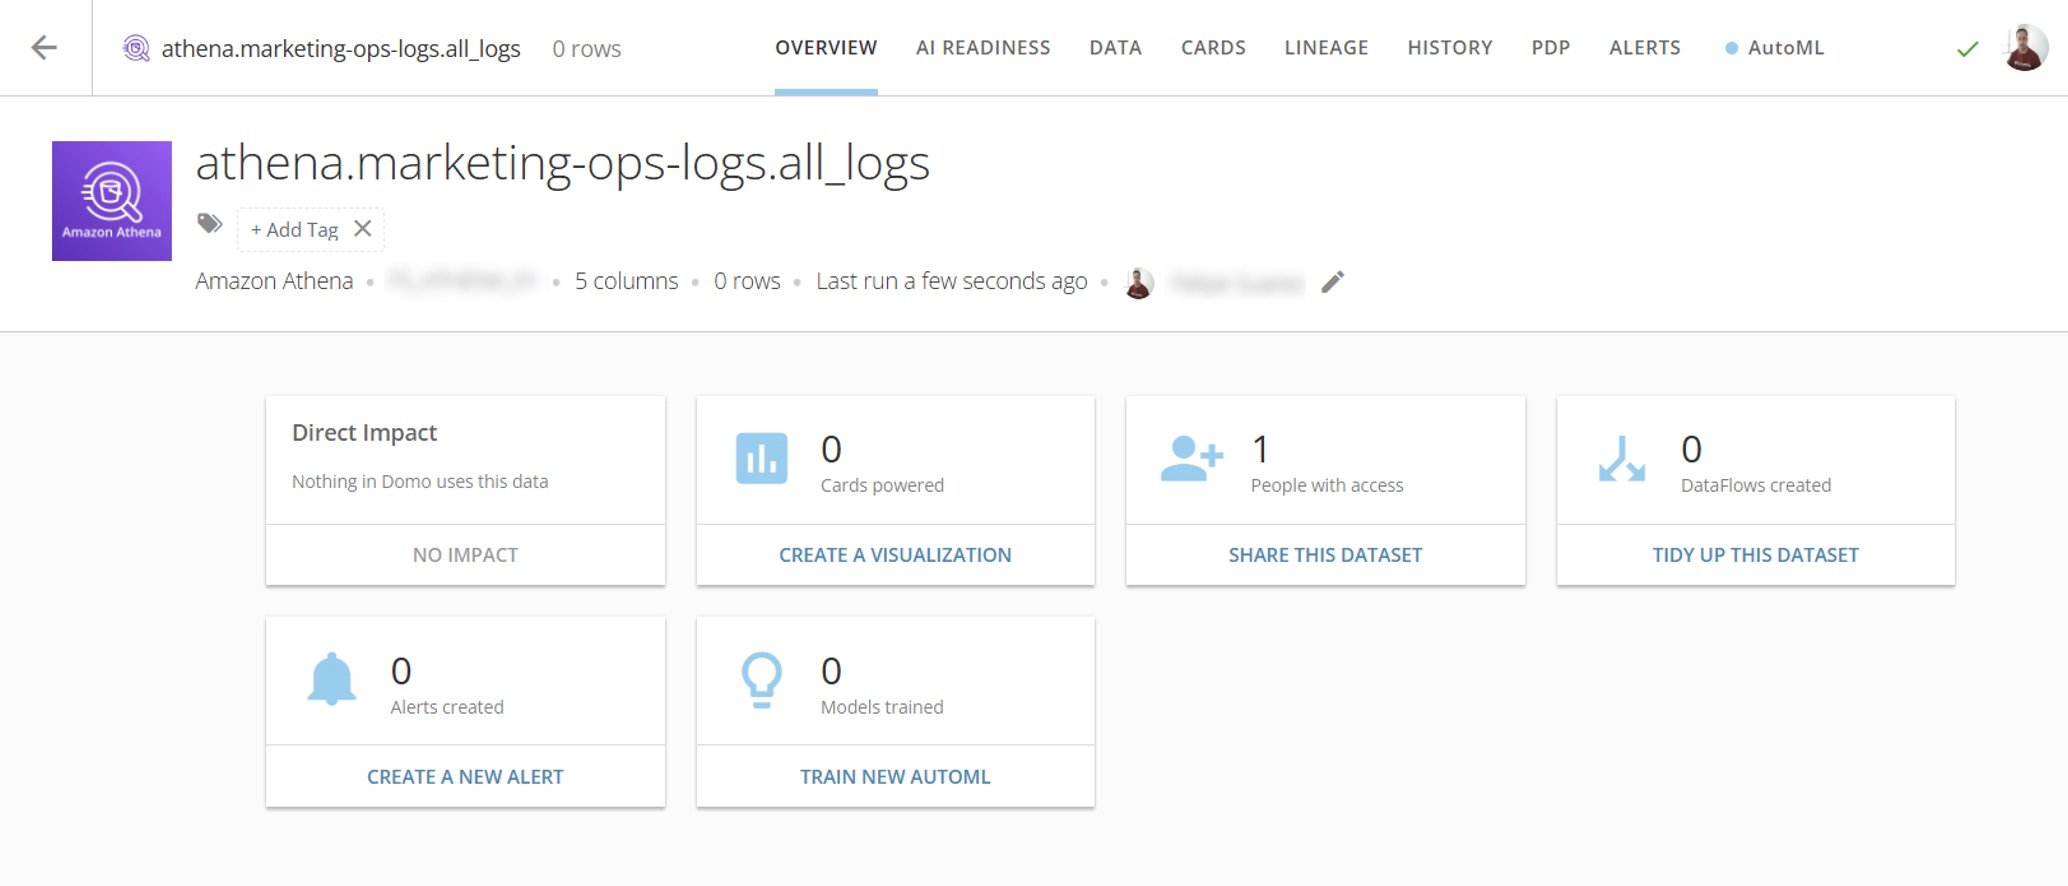
Your Athena DataSets now display in the Domo **DataSets** feature.
<Frame>
  <img alt="athena datasets.jpg" src="https://mintcdn.com/domoinc-openapi-sync-dataflows/-nfdSCiV_P1xrFhN/images/kb/ka0Vq000000G1ub-00N5w00000Ri7BU-0EMVq000004ONSf.jpg?fit=max&auto=format&n=-nfdSCiV_P1xrFhN&q=85&s=f6fab99ce0943759dee480c4eafe69f6" style={{width: 899, height: 385}} width="2068" height="886" data-path="images/kb/ka0Vq000000G1ub-00N5w00000Ri7BU-0EMVq000004ONSf.jpg" />
</Frame>