> ## Documentation Index
> Fetch the complete documentation index at: https://domoinc-openapi-sync-dataflows.mintlify.site/llms.txt
> Use this file to discover all available pages before exploring further.
# Deploy, Request, and Remove Apps
export const InlineImage = ({src, alt = '', height = '1.6em'}) => {
return ;
};
## Intro
This article contains instructions for deploying, requesting access to, and removing an app from your Domo instance.
***
## Deploy an App
In the Appstore, you can deploy an app to your organization's Domo instance. If any installations of the app are already deployed to your Domo instance, you have the option to request access to an existing version or to deploy a new version.
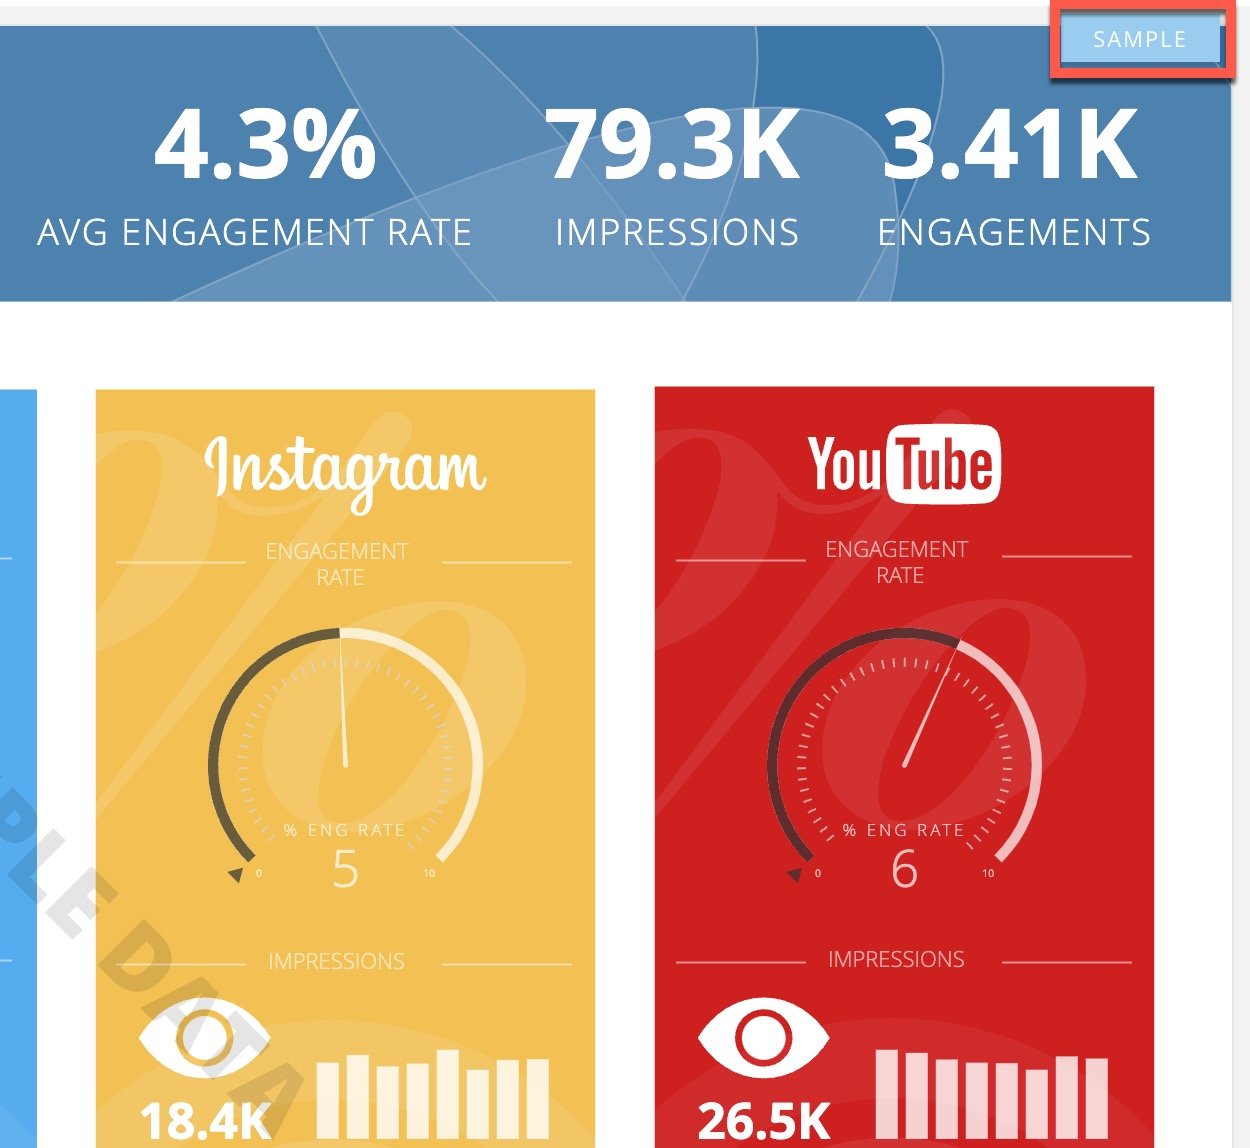
When you deploy an app, Domo first installs the app card(s) with sample data. Cards with sample data display with a label reading **Sample** to indicate they are not yet live.
After you deploy an app, look over the app card(s) to make sure this app is what you need. When you are ready, you can power up the cards in the app with live data by connecting to a third-party connector account (Dashboard apps) or DataSet with matching columns (all other apps). You can also assign another user to power up the app.
Follow these steps to deploy an app to Domo:
1. In the navigation header, select **Appstore**.
2. In the Appstore, search for and find the app you want to add. To learn more about searching in the Appstore, see
[Appstore Overview](/s/article/360043438013).
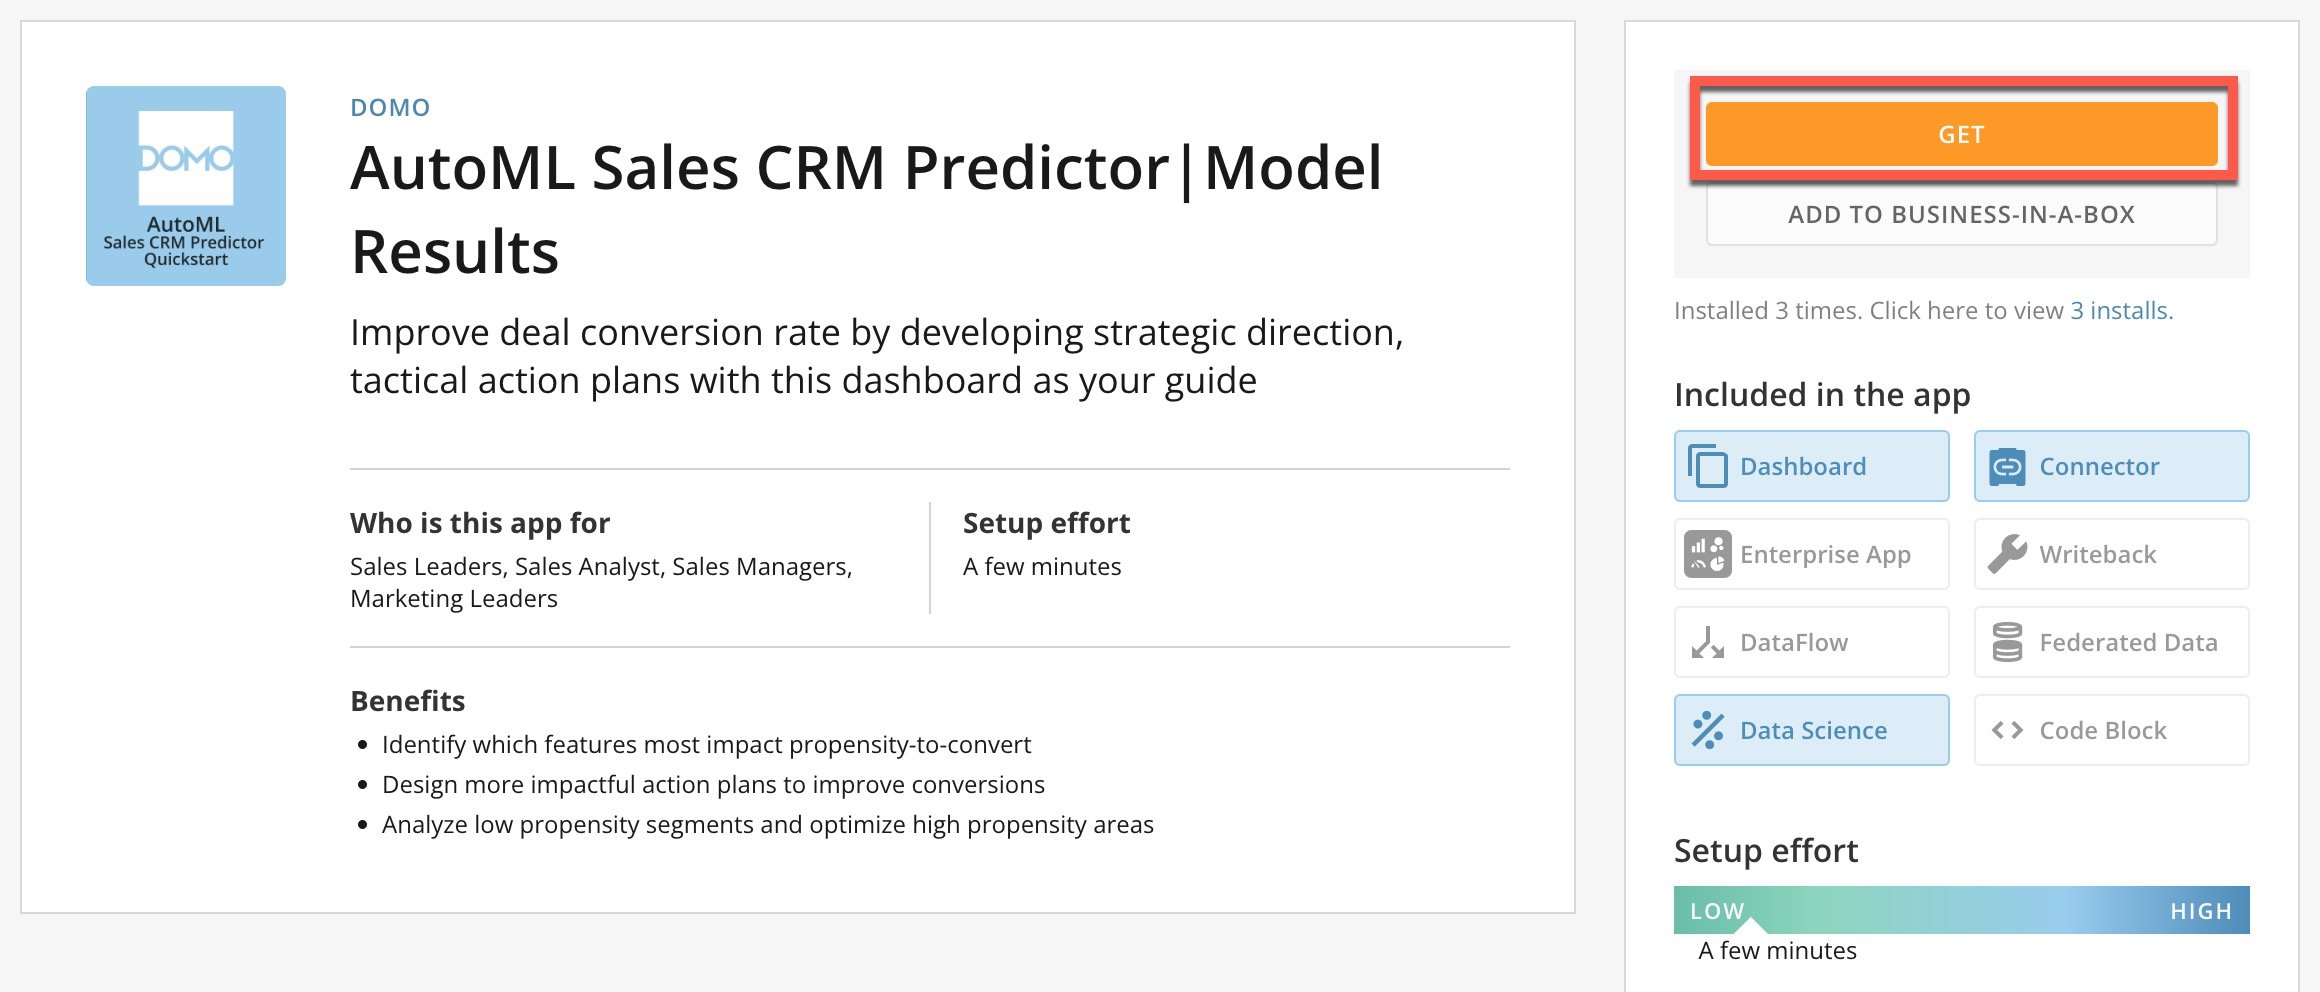
3. Select the app to display its Details view.
4. In the Details view, review the requirements and notes for the app.
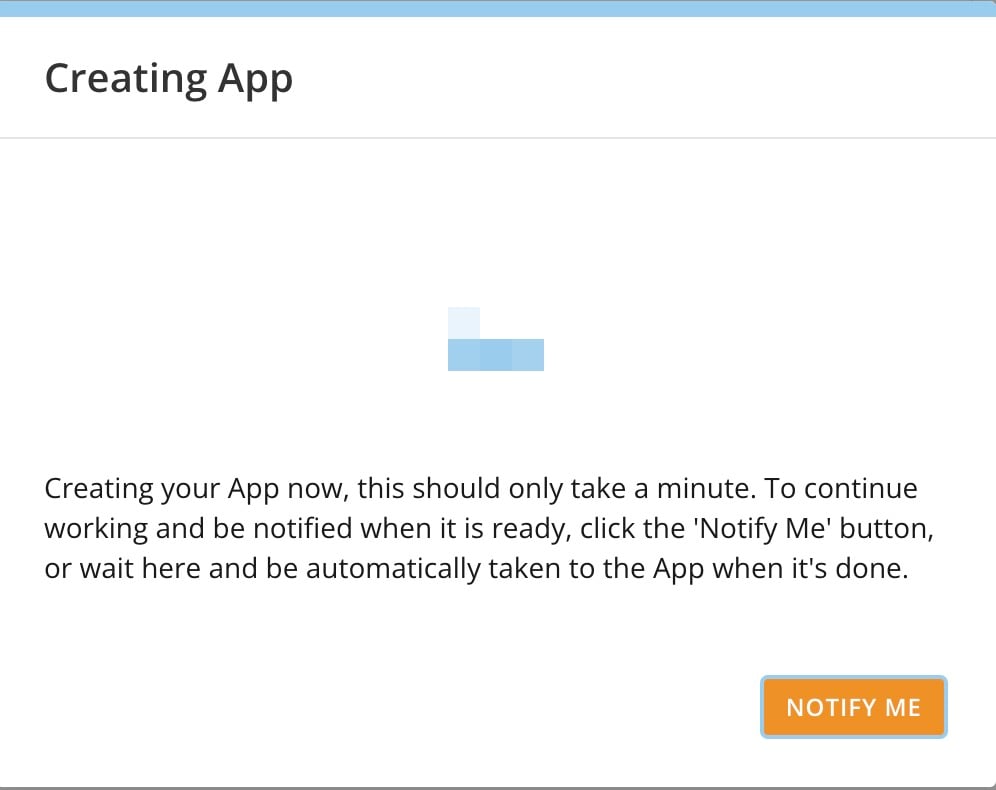
5. Select **Get**. Some apps may have different labels, for this option. A dialog displays, informing you that your app is being created. You can select **Notify Me** to continue working and receive a notification when the app is ready. You can also wait and be taken directly to the app when it is ready.
**Conditional:** If any versions of this app are already installed in your instance, you have the option to request access to an existing version or to add a new version. For information about requesting access to an existing version, see the [Request Access to an App](https://domo-support.domo.com/s/article/360042933274 "Requesting Access to an App") task. Otherwise, select **Add New** and proceed to the next step.
**Note:** Anyone with a Participant default security role or anyone with a custom role that does not include the Use Appstore grant do not see the option to get the app. Instead, they see an option to **Request Demo**. Selecting this option displays a dialog in which you can reach out to your MajorDomo and request that the app be installed. For more information about default security roles, see [Managing Custom Roles](/s/article/360043438973).
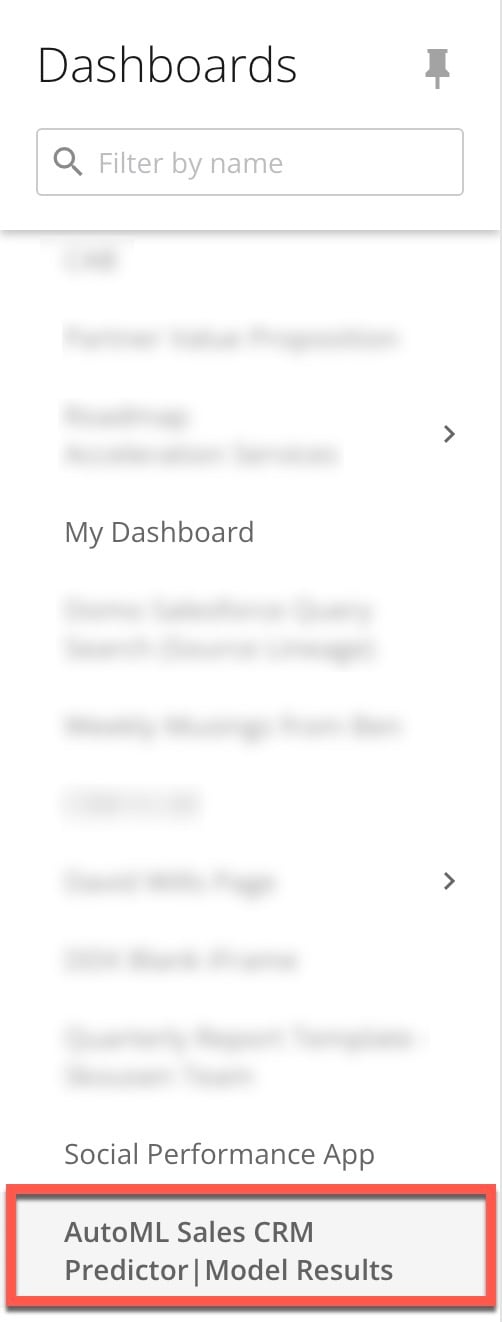
6. In the navigation header, go to **Dashboards**. You can view the new app dashboard at the bottom of your **Dashboards** panel.
When you select the app dashboard, you view all of the cards automatically created with sample date. A blue bar displays at the top of the cards with sample data.
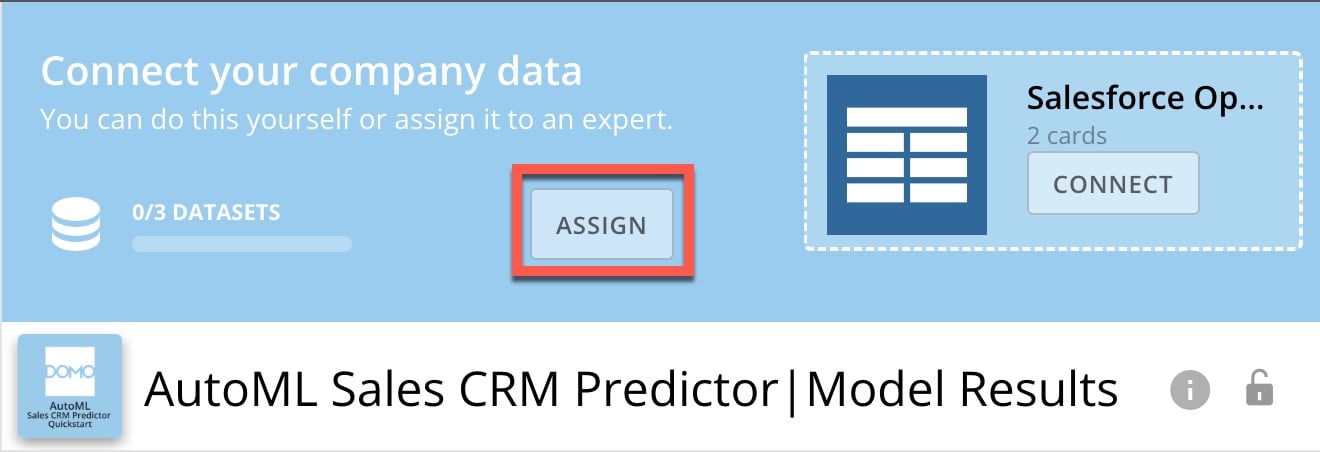
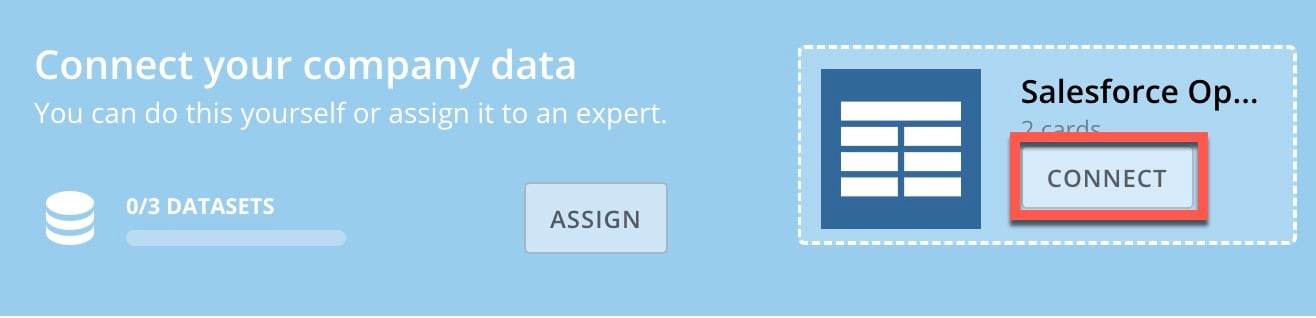
7. At the top of the app dashboard, select **Connect Data** to display the **Connect your company data** banner. The banner displays **Connect** buttons for all DataSets powering the app, along with the total number of DataSets and cards associated with this app. In this example, the app is powered by three DataSets and contains four cards.
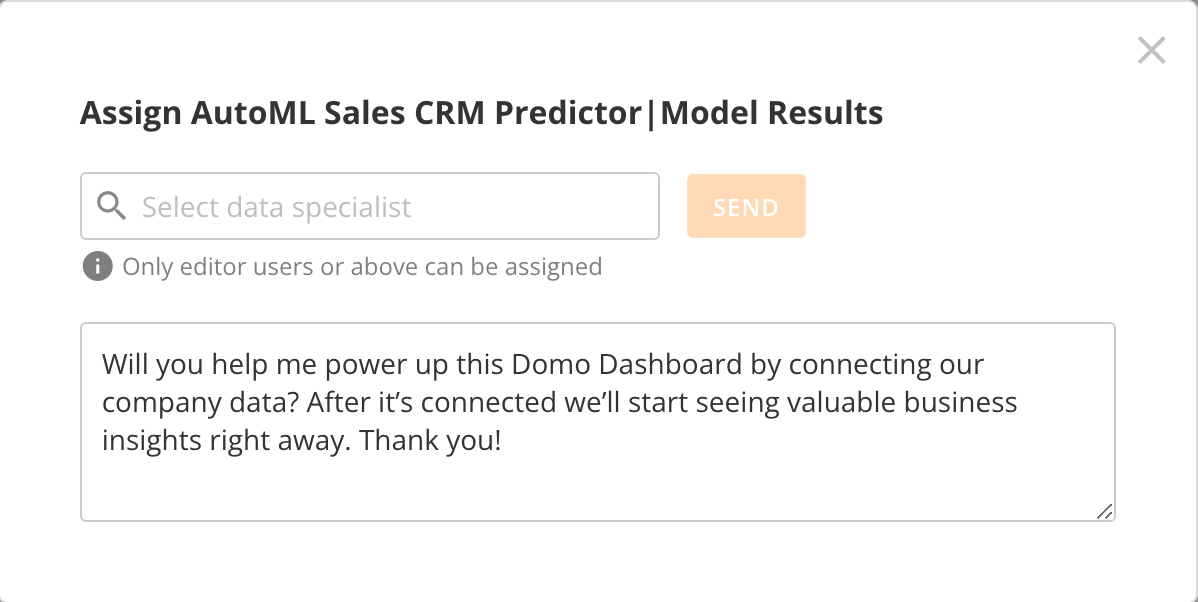
8. (Optional) Select **Assign** to assign the setup for this app to another person. A dialog displays with an assignment message that you can send as-is or customize. Search for and select your organization's data specialist, customize the message if you want to, and then select **Send**. The person you assign setup to receives an email notification about the assignment.
**Important:** You can only assign people with an Editor role or above to set up the app.
9. (Optional) To connect the DataSets yourself, select **Connect** for any one of the DataSets in the banner. The result of this action depends on the type of app you are deploying.
Follow the appropriate steps for the type of app: a [Dashboard app](#configure_dashboard_app) or a [Cardbuilder or custom app](#configure_cardbuilder_app).
### Configure a Dashboard App
Follow the steps in the configuration wizard.
### Configure a Cardbuilder or Custom App
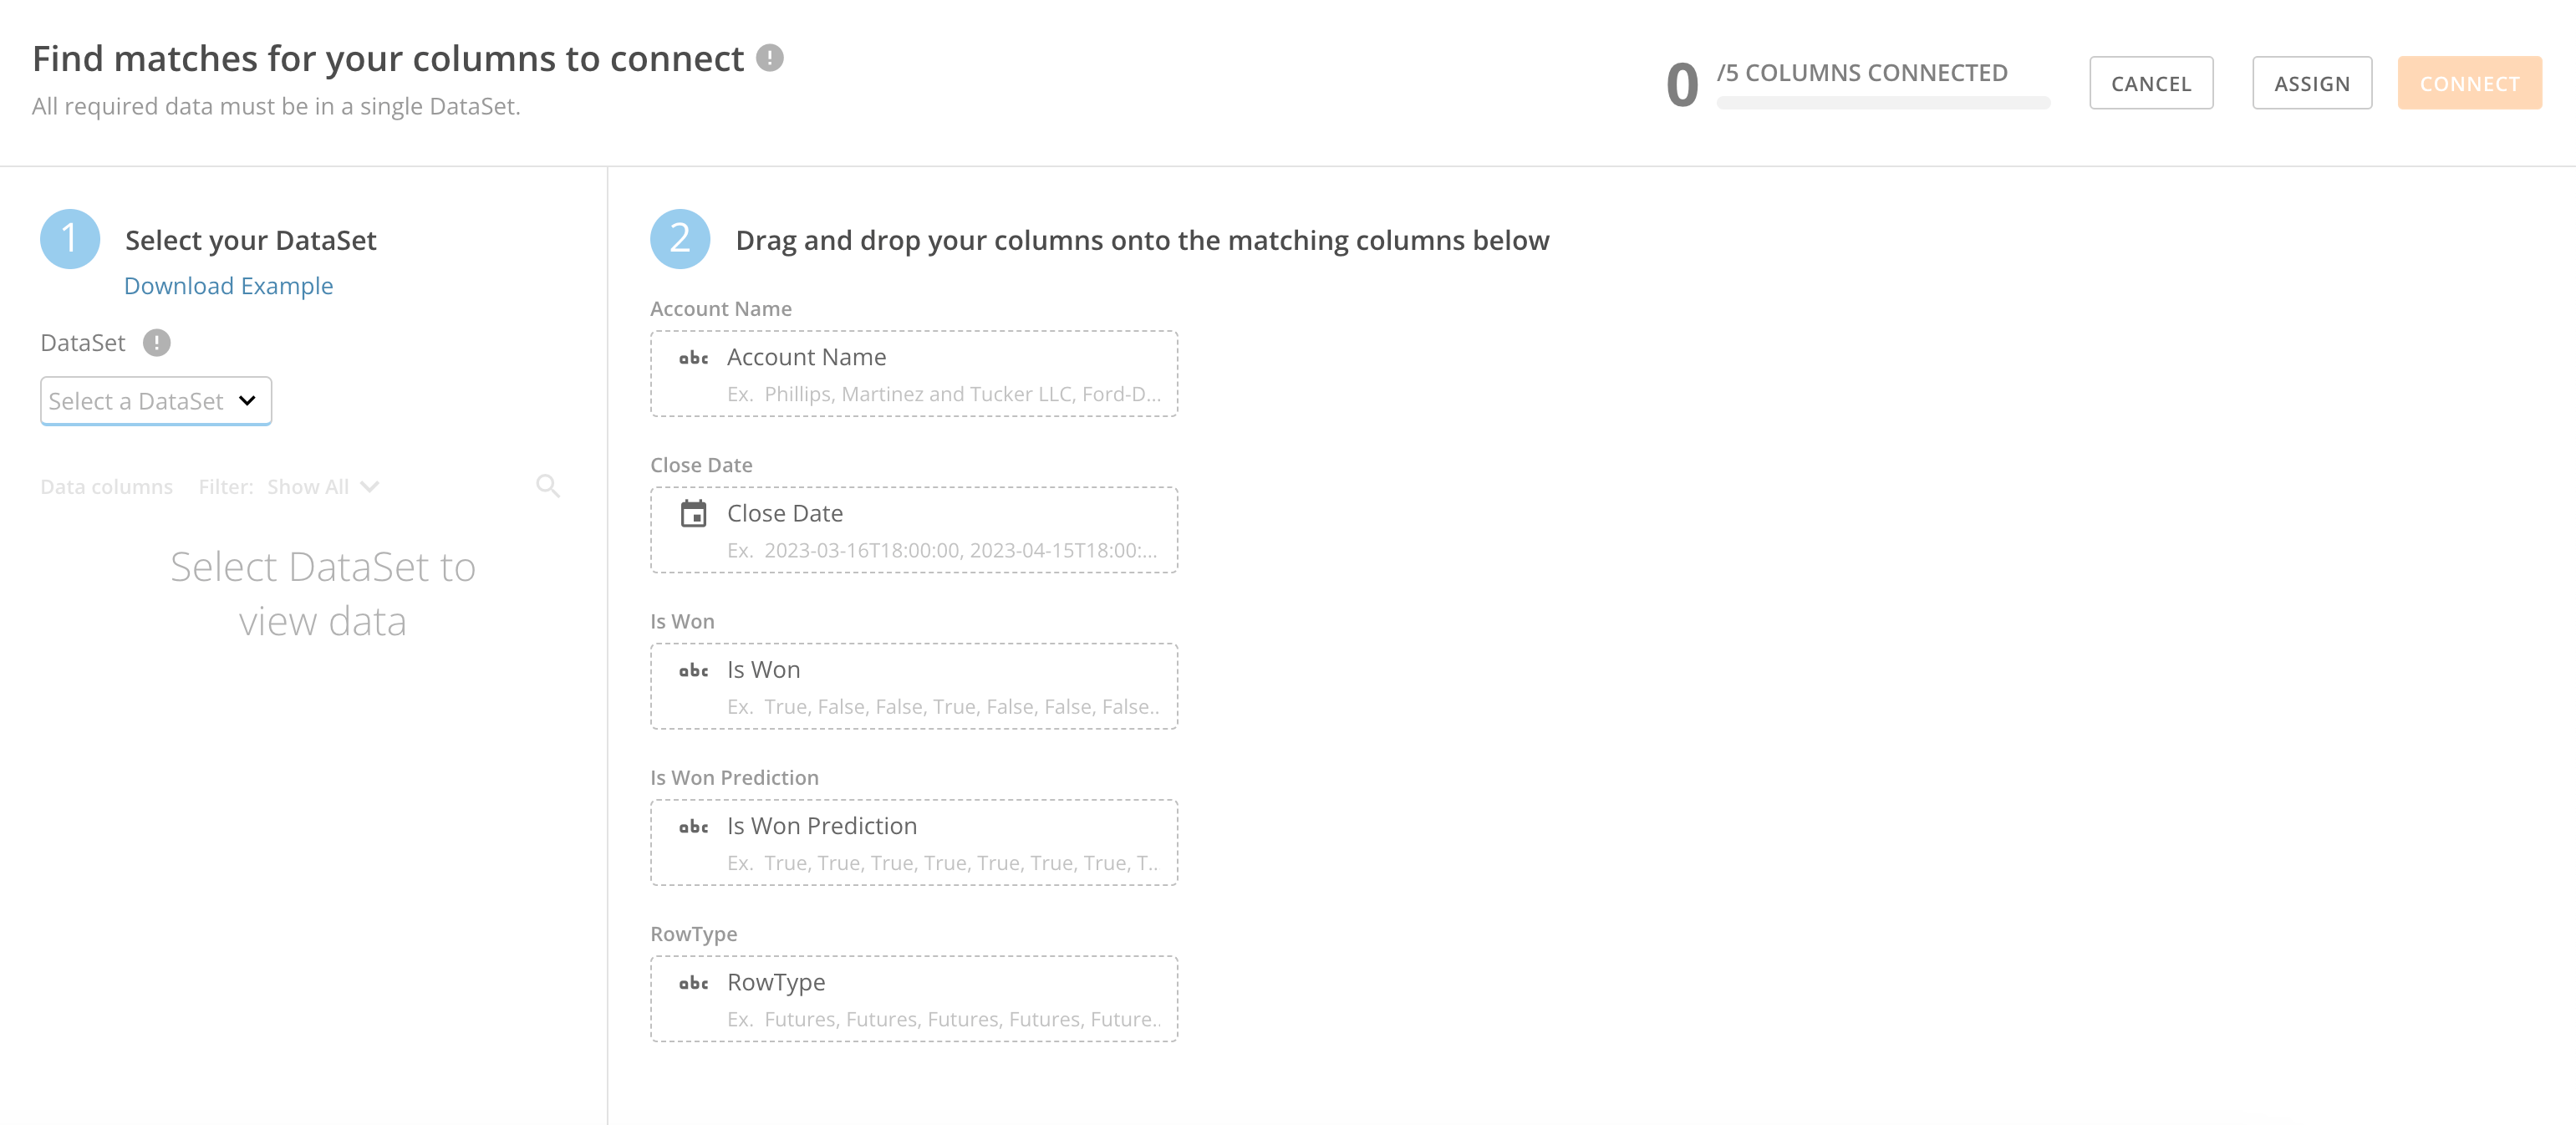
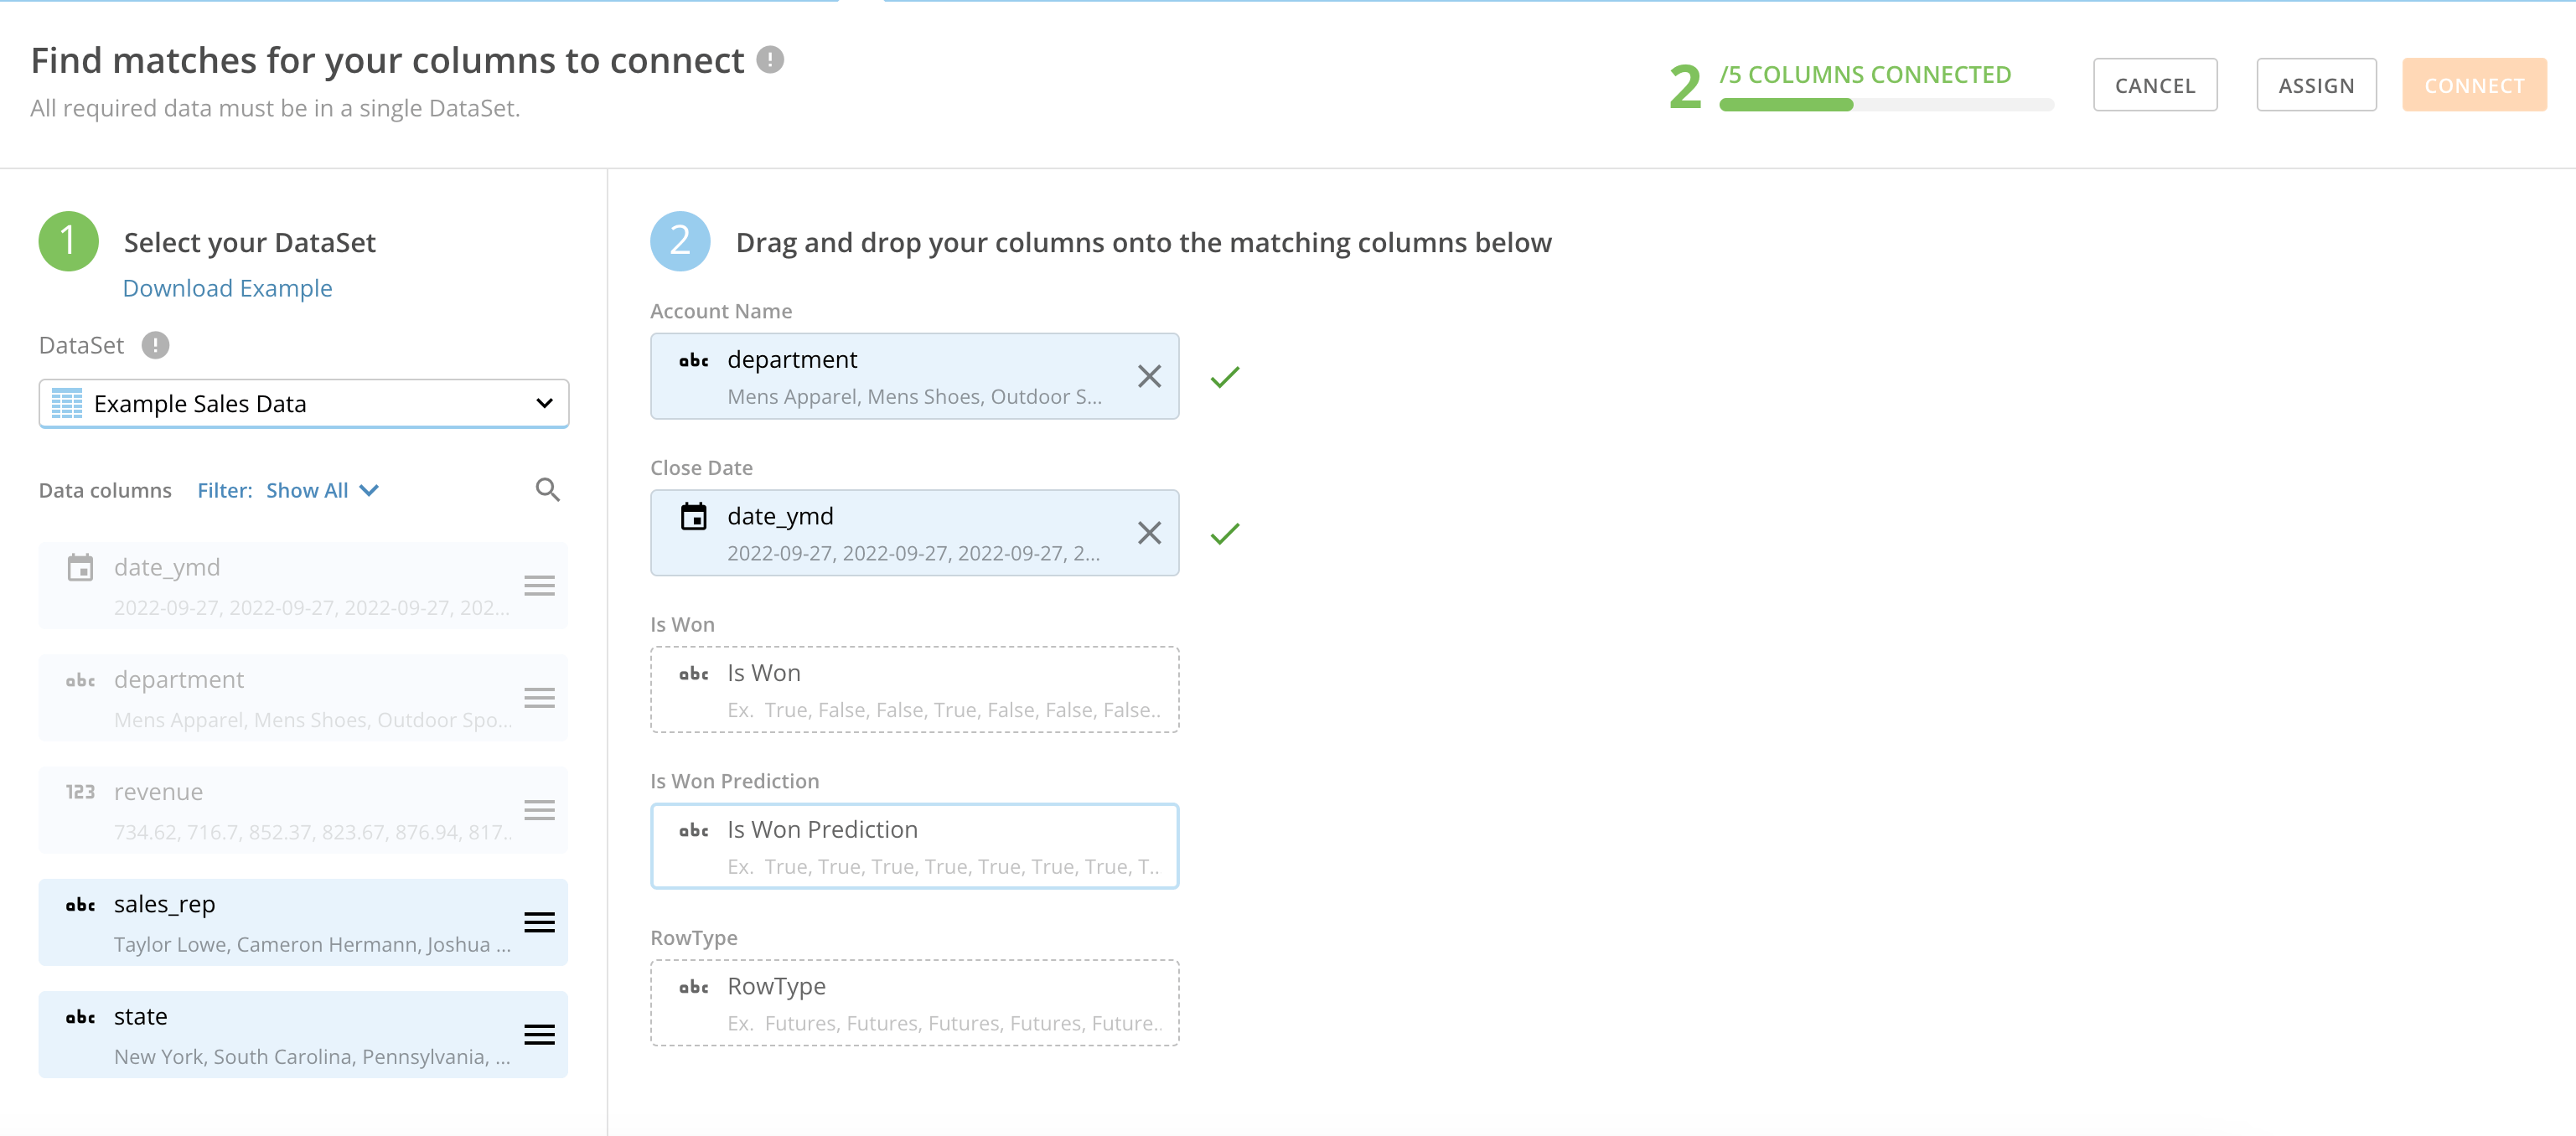
When you select **Connect** in the banner for a Cardbuilder or custom app, the **Find matches for your columns to connect** screen displays.
1. In pane 1, select the DataSet you want to connect in the menu. The different columns in the DataSet display in that pane.
2. Drag the columns from pane 1 into the matching columns in pane
3. When a match is made, a green checkmark displays by the column. If there is no match, you cannot drag the DataSet into pane 2.
4. After you match all of the columns in pane 2, select **Connect**. The cards in the DataSet now populate with live data from your DataSet.
You can update the columns and/or DataSet populating the app at any time by going to the dashboard, viewing the banner, and selecting **Change**.
**Video — Advanced Deploy for all Apps**
**Video — Appstore Column Mapping**
## Request Access to an App
By default, when you install an app, only you, Admin-level users, and users with a custom security role that includes the Manage Appstore grant. If someone else wants access to an app that you installed, you can share access to the dashboard the same way you [share access to any dashboard](/s/article/360042932994). If you want access to an app that someone else installed, you can request access to the app dashboard from the Appstore.
For more information, see Controlling Access to Cards and Dashboards.
Follow these steps to request access to an app dashboard:
1. In the navigation header, select **Appstore **.****
2. Locate the app you want access to. You can view a list of apps in your instance by selecting
**Installed Apps** in the sidebar and going to the **Your Installed Apps** and **Installed By Others** tabs.
3. When you locate the app, select it to see the Details view.
4. Select **Request Access**. A dialog displays with a request message that you can send as-is or customize.
5. (Optional) Customize the request message.
6. Select **Send Request**.
Your request is sent to the app owner via Buzz.
## Remove an Installed App
You can remove an app you have deployed to your Domo instance from the Appstore. This action removes instances of the app *only* from your own view of the instance. If other instances of the app have been installed in your organization's Domo instance by other people, these are not removed. When you remove an installed app, the version of the app in the Appstore is not affected.
**Note:** To remove an app, you must be the person who deployed the app or have an Admin default security role or a custom role with the Manage Appstore grant enabled. For more information about default security roles, see [Managing Custom Roles](/s/article/360043438973).
1. In the navigation header, select **Appstore**.
2. In the sidebar, select
**Installed Apps**.
The **Installed Apps** page displays.
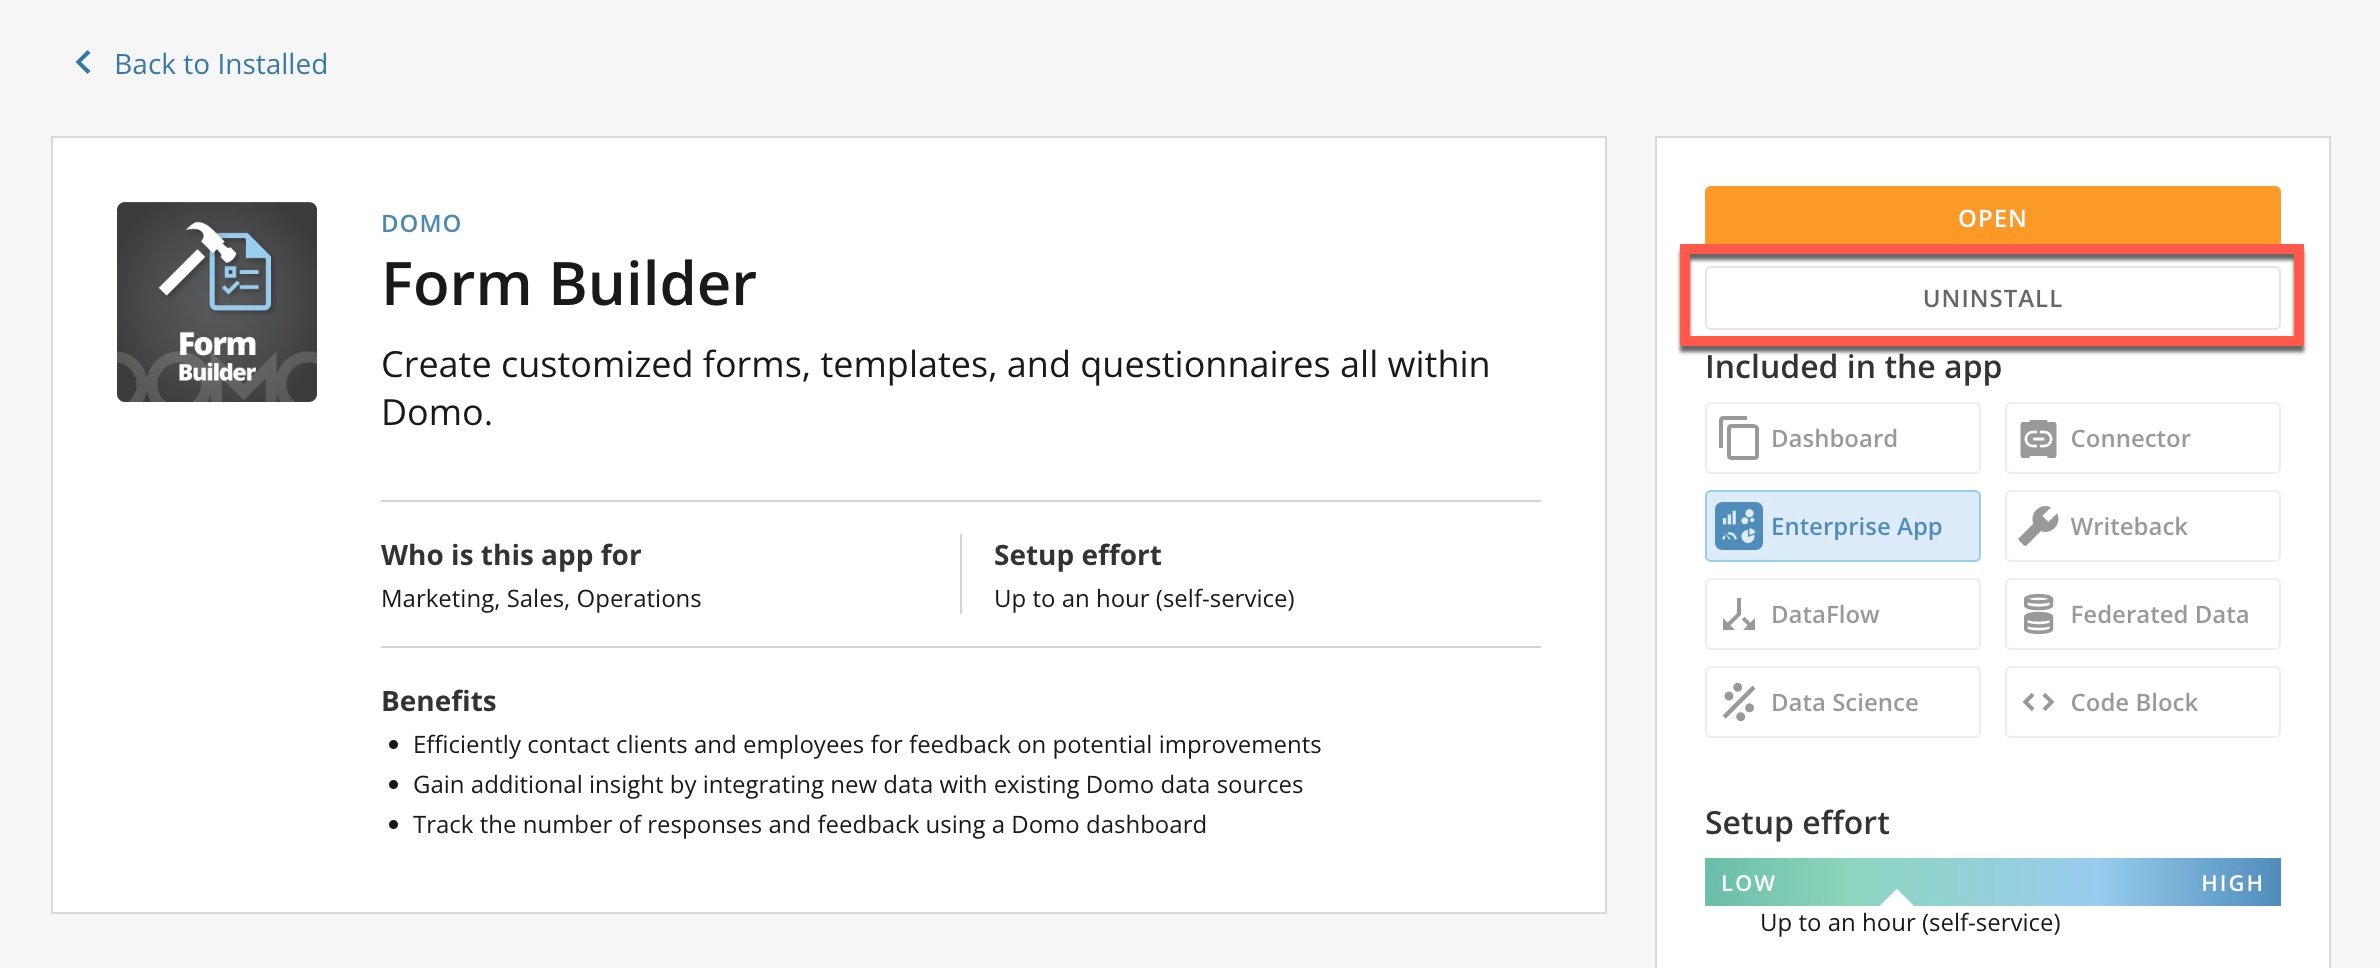
3. In the **Your Installed Apps** section, locate and select the app you want to remove.
The app Details view displays.
4. Select **Uninstall**.
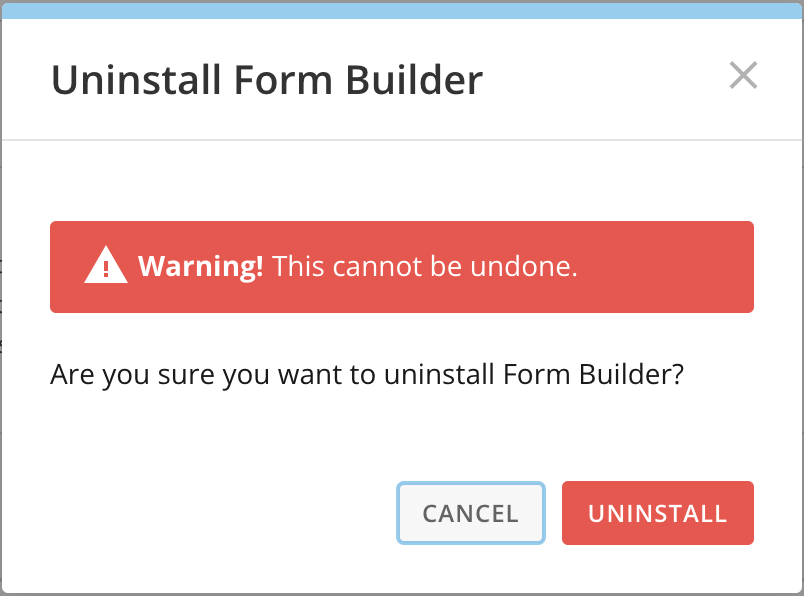
A dialog displays warning that this action cannot be undone.
5. Select **Uninstall** to remove the app or **Cancel** to go back.
 After you deploy an app, look over the app card(s) to make sure this app is what you need. When you are ready, you can power up the cards in the app with live data by connecting to a third-party connector account (Dashboard apps) or DataSet with matching columns (all other apps). You can also assign another user to power up the app.
Follow these steps to deploy an app to Domo:
1. In the navigation header, select **Appstore**.
2. In the Appstore, search for and find the app you want to add. To learn more about searching in the Appstore, see
[Appstore Overview](/s/article/360043438013).
3. Select the app to display its Details view.
4. In the Details view, review the requirements and notes for the app.
5. Select **Get**. Some apps may have different labels, for this option. A dialog displays, informing you that your app is being created. You can select **Notify Me** to continue working and receive a notification when the app is ready. You can also wait and be taken directly to the app when it is ready.
After you deploy an app, look over the app card(s) to make sure this app is what you need. When you are ready, you can power up the cards in the app with live data by connecting to a third-party connector account (Dashboard apps) or DataSet with matching columns (all other apps). You can also assign another user to power up the app.
Follow these steps to deploy an app to Domo:
1. In the navigation header, select **Appstore**.
2. In the Appstore, search for and find the app you want to add. To learn more about searching in the Appstore, see
[Appstore Overview](/s/article/360043438013).
3. Select the app to display its Details view.
4. In the Details view, review the requirements and notes for the app.
5. Select **Get**. Some apps may have different labels, for this option. A dialog displays, informing you that your app is being created. You can select **Notify Me** to continue working and receive a notification when the app is ready. You can also wait and be taken directly to the app when it is ready.
 6. In the navigation header, go to **Dashboards**. You can view the new app dashboard at the bottom of your **Dashboards** panel.
 When you select the app dashboard, you view all of the cards automatically created with sample date. A blue bar displays at the top of the cards with sample data.
7. At the top of the app dashboard, select **Connect Data** to display the **Connect your company data** banner. The banner displays **Connect** buttons for all DataSets powering the app, along with the total number of DataSets and cards associated with this app. In this example, the app is powered by three DataSets and contains four cards.
When you select the app dashboard, you view all of the cards automatically created with sample date. A blue bar displays at the top of the cards with sample data.
7. At the top of the app dashboard, select **Connect Data** to display the **Connect your company data** banner. The banner displays **Connect** buttons for all DataSets powering the app, along with the total number of DataSets and cards associated with this app. In this example, the app is powered by three DataSets and contains four cards.
 8. (Optional) Select **Assign** to assign the setup for this app to another person. A dialog displays with an assignment message that you can send as-is or customize. Search for and select your organization's data specialist, customize the message if you want to, and then select **Send**. The person you assign setup to receives an email notification about the assignment.
 Follow the appropriate steps for the type of app: a [Dashboard app](#configure_dashboard_app) or a [Cardbuilder or custom app](#configure_cardbuilder_app).
### Configure a Dashboard App
Follow the steps in the configuration wizard.
### Configure a Cardbuilder or Custom App
When you select **Connect** in the banner for a Cardbuilder or custom app, the **Find matches for your columns to connect** screen displays.
Follow the appropriate steps for the type of app: a [Dashboard app](#configure_dashboard_app) or a [Cardbuilder or custom app](#configure_cardbuilder_app).
### Configure a Dashboard App
Follow the steps in the configuration wizard.
### Configure a Cardbuilder or Custom App
When you select **Connect** in the banner for a Cardbuilder or custom app, the **Find matches for your columns to connect** screen displays.
 1. In pane 1, select the DataSet you want to connect in the menu. The different columns in the DataSet display in that pane.
2. Drag the columns from pane 1 into the matching columns in pane
3. When a match is made, a green checkmark displays by the column. If there is no match, you cannot drag the DataSet into pane 2.
1. In pane 1, select the DataSet you want to connect in the menu. The different columns in the DataSet display in that pane.
2. Drag the columns from pane 1 into the matching columns in pane
3. When a match is made, a green checkmark displays by the column. If there is no match, you cannot drag the DataSet into pane 2.
 4. After you match all of the columns in pane 2, select **Connect**. The cards in the DataSet now populate with live data from your DataSet.
You can update the columns and/or DataSet populating the app at any time by going to the dashboard, viewing the banner, and selecting **Change**.
**Video — Advanced Deploy for all Apps**
**Video — Appstore Column Mapping**
## Request Access to an App
By default, when you install an app, only you, Admin-level users, and users with a custom security role that includes the Manage Appstore grant. If someone else wants access to an app that you installed, you can share access to the dashboard the same way you [share access to any dashboard](/s/article/360042932994). If you want access to an app that someone else installed, you can request access to the app dashboard from the Appstore.
For more information, see Controlling Access to Cards and Dashboards.
Follow these steps to request access to an app dashboard:
1. In the navigation header, select **Appstore **.****
2. Locate the app you want access to. You can view a list of apps in your instance by selecting
4. After you match all of the columns in pane 2, select **Connect**. The cards in the DataSet now populate with live data from your DataSet.
You can update the columns and/or DataSet populating the app at any time by going to the dashboard, viewing the banner, and selecting **Change**.
**Video — Advanced Deploy for all Apps**
**Video — Appstore Column Mapping**
## Request Access to an App
By default, when you install an app, only you, Admin-level users, and users with a custom security role that includes the Manage Appstore grant. If someone else wants access to an app that you installed, you can share access to the dashboard the same way you [share access to any dashboard](/s/article/360042932994). If you want access to an app that someone else installed, you can request access to the app dashboard from the Appstore.
For more information, see Controlling Access to Cards and Dashboards.
Follow these steps to request access to an app dashboard:
1. In the navigation header, select **Appstore **.****
2. Locate the app you want access to. You can view a list of apps in your instance by selecting
 5. Select **Uninstall** to remove the app or **Cancel** to go back.